A Handmade Season of Giving - Easy Embellished Dishtowels
Michelle Burke
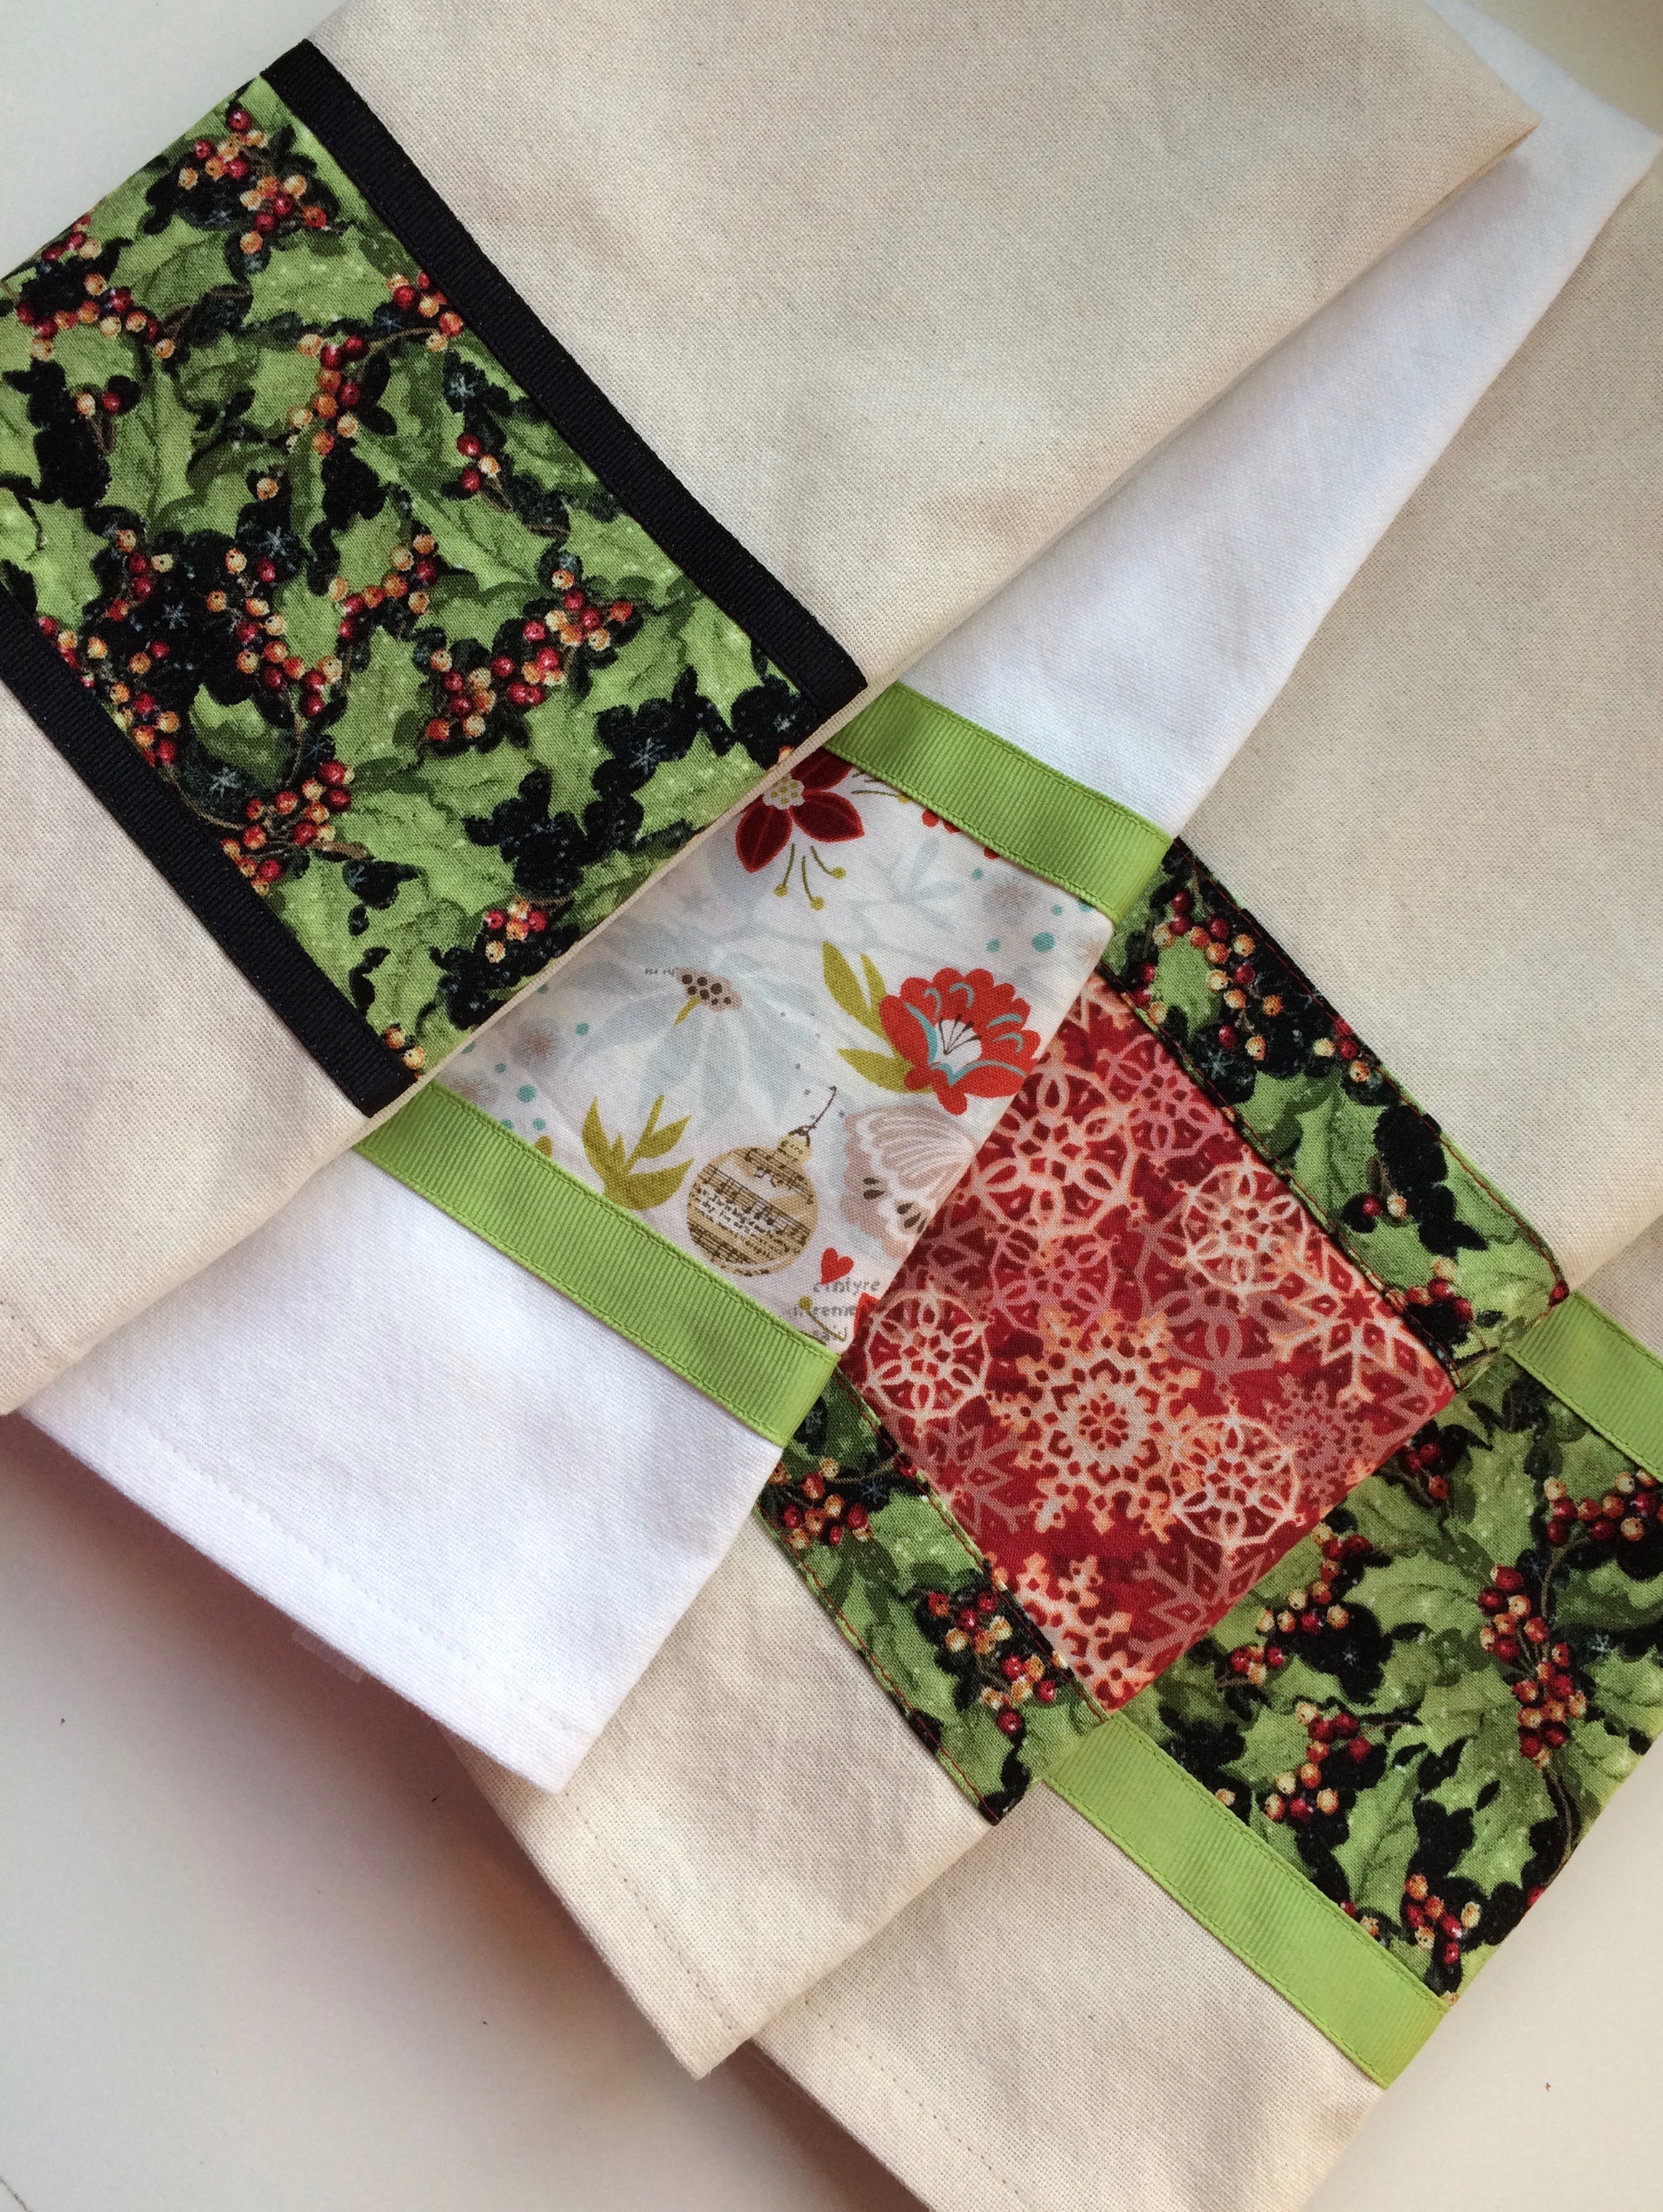
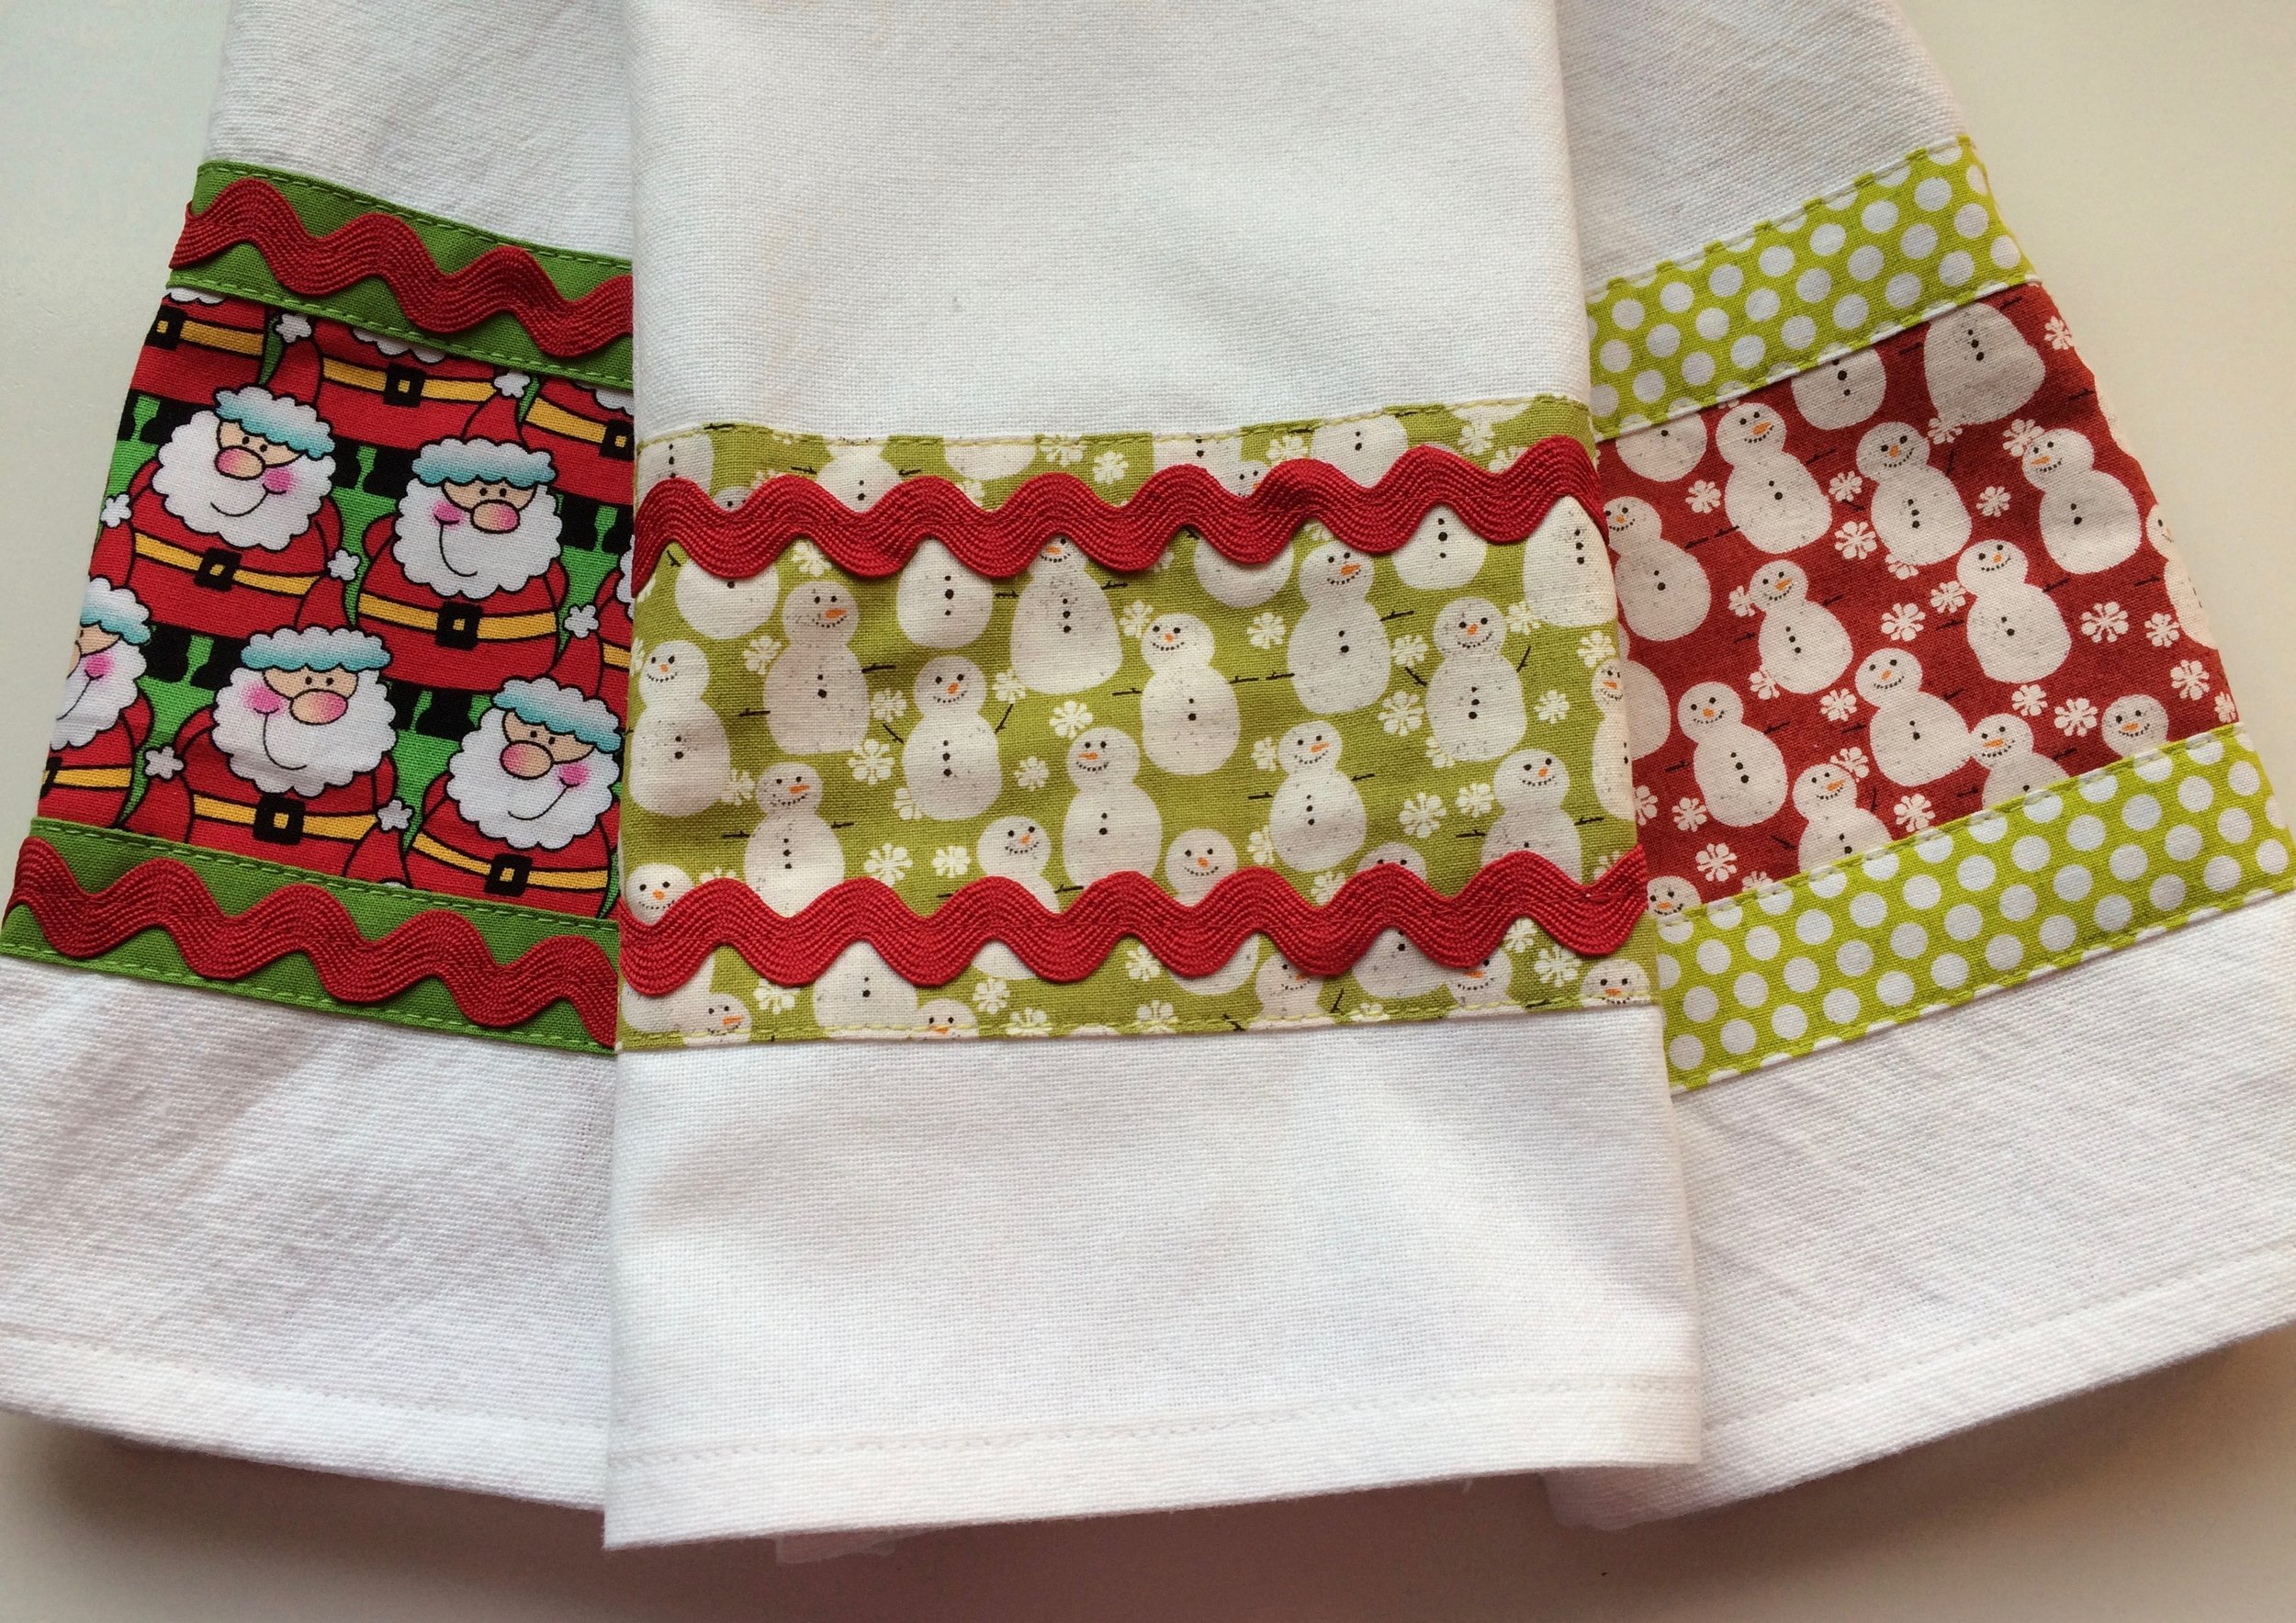
In this season of gift giving, I am making as many gifts as I can this year. I am sharing the gifts that I have made in this blog series, "A Handmade Season of Giving." Today I am sharing how I embellished some dishtowels to give them a holiday flair. One of the dishtowels I embellished for everyday use, not just for use during the Christmas season.
I had a great time embellishing dishtowels to give as gifts this year. It was fun to use Christmas and wintery fabric for this project and adding some fun coordinating ribbon or other trim. Dishtowels make great hostess gifts and can be paired with a coordinating apron (see previous post) and or a recipe and wooden spoon or two. Wrapped with some of the ribbon you used to embellish your dishtowel and you won’t need wrapping paper to make a pretty gift for your favorite cook.
I used dishtowel fabric that I found sold by the yard at THIS ETSY SHOP. MODA’S dishtowel fabric is fabulous and the edges are finished, so you only have to prewash the fabric to preshrink it and then cut it to length (around 27” is good) and finished the cut edges. I pressed the raw edges up to the wrong side of the dishtowel ½” and then up another ½” and then just top-stitched the folded edges in place. You could definitely use a dishtowel that is pre-made and bought from a store. You will still want to prewash it before you add any embellishments.
I embellished most of my dishtowels in on of two ways - a strip of fabric edged either with ribbon or with smaller strips of an accent fabric. These are fun and fast to make - I made each one in less than ½ hour from cutting the fabric to finished product! The part of this project that slowed me down was the time I spent deciding which fabrics and trims to put together – it was just so much fun to think of all the possibilities! The fabrics and trims you use determine whether the finished dishtowel will have a classy or a playful look – or something in between!
EMBELLISHING A DISHTOWEL
Sewing On Your Main Fabric Strip:
1. Cut the main fabric strip so that it is 1 1/2" wider than the measured finished width of the dishtowel that you are using. Cut it 4 1/2" tall.
2. Take your main fabric strip and press one short edge in 1/2”. Leave the other short edge unpressed so that you can adjust it to fit the width of the dish towel exactly. You don't need to worry about doing anything with the long raw edges of your fabric strip, they will be finished later with ribbon or a smaller fabric strip.
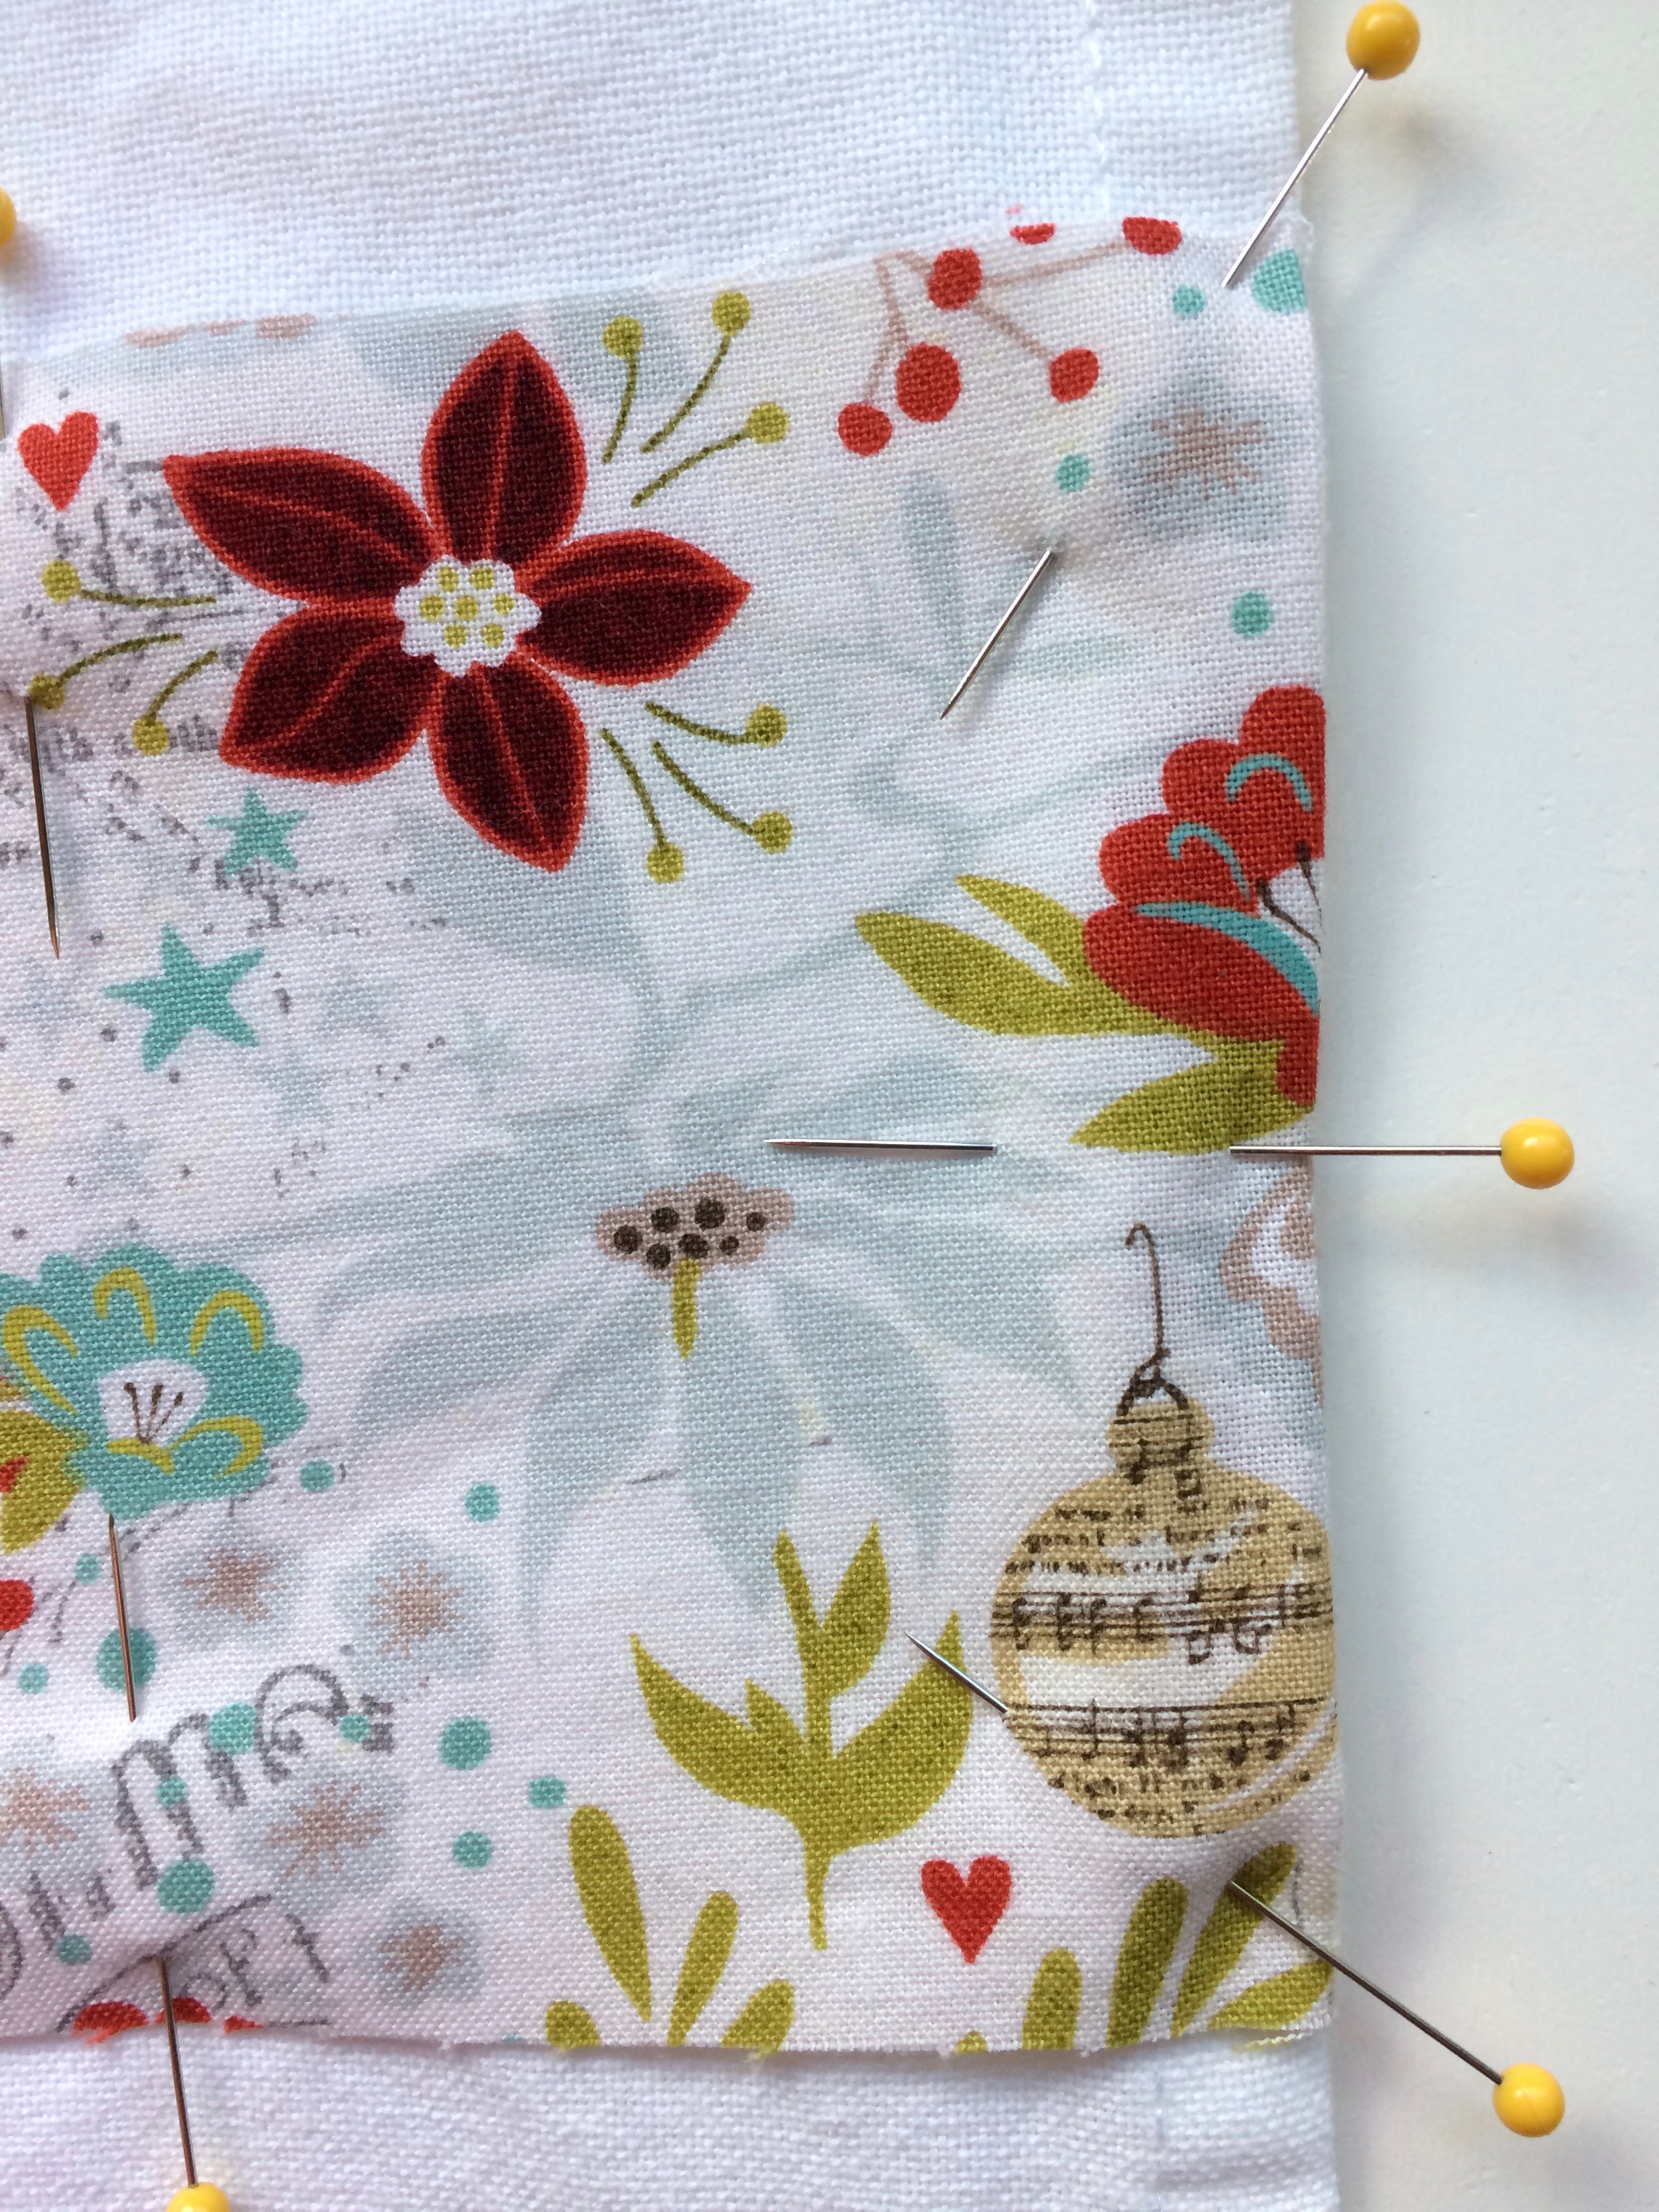
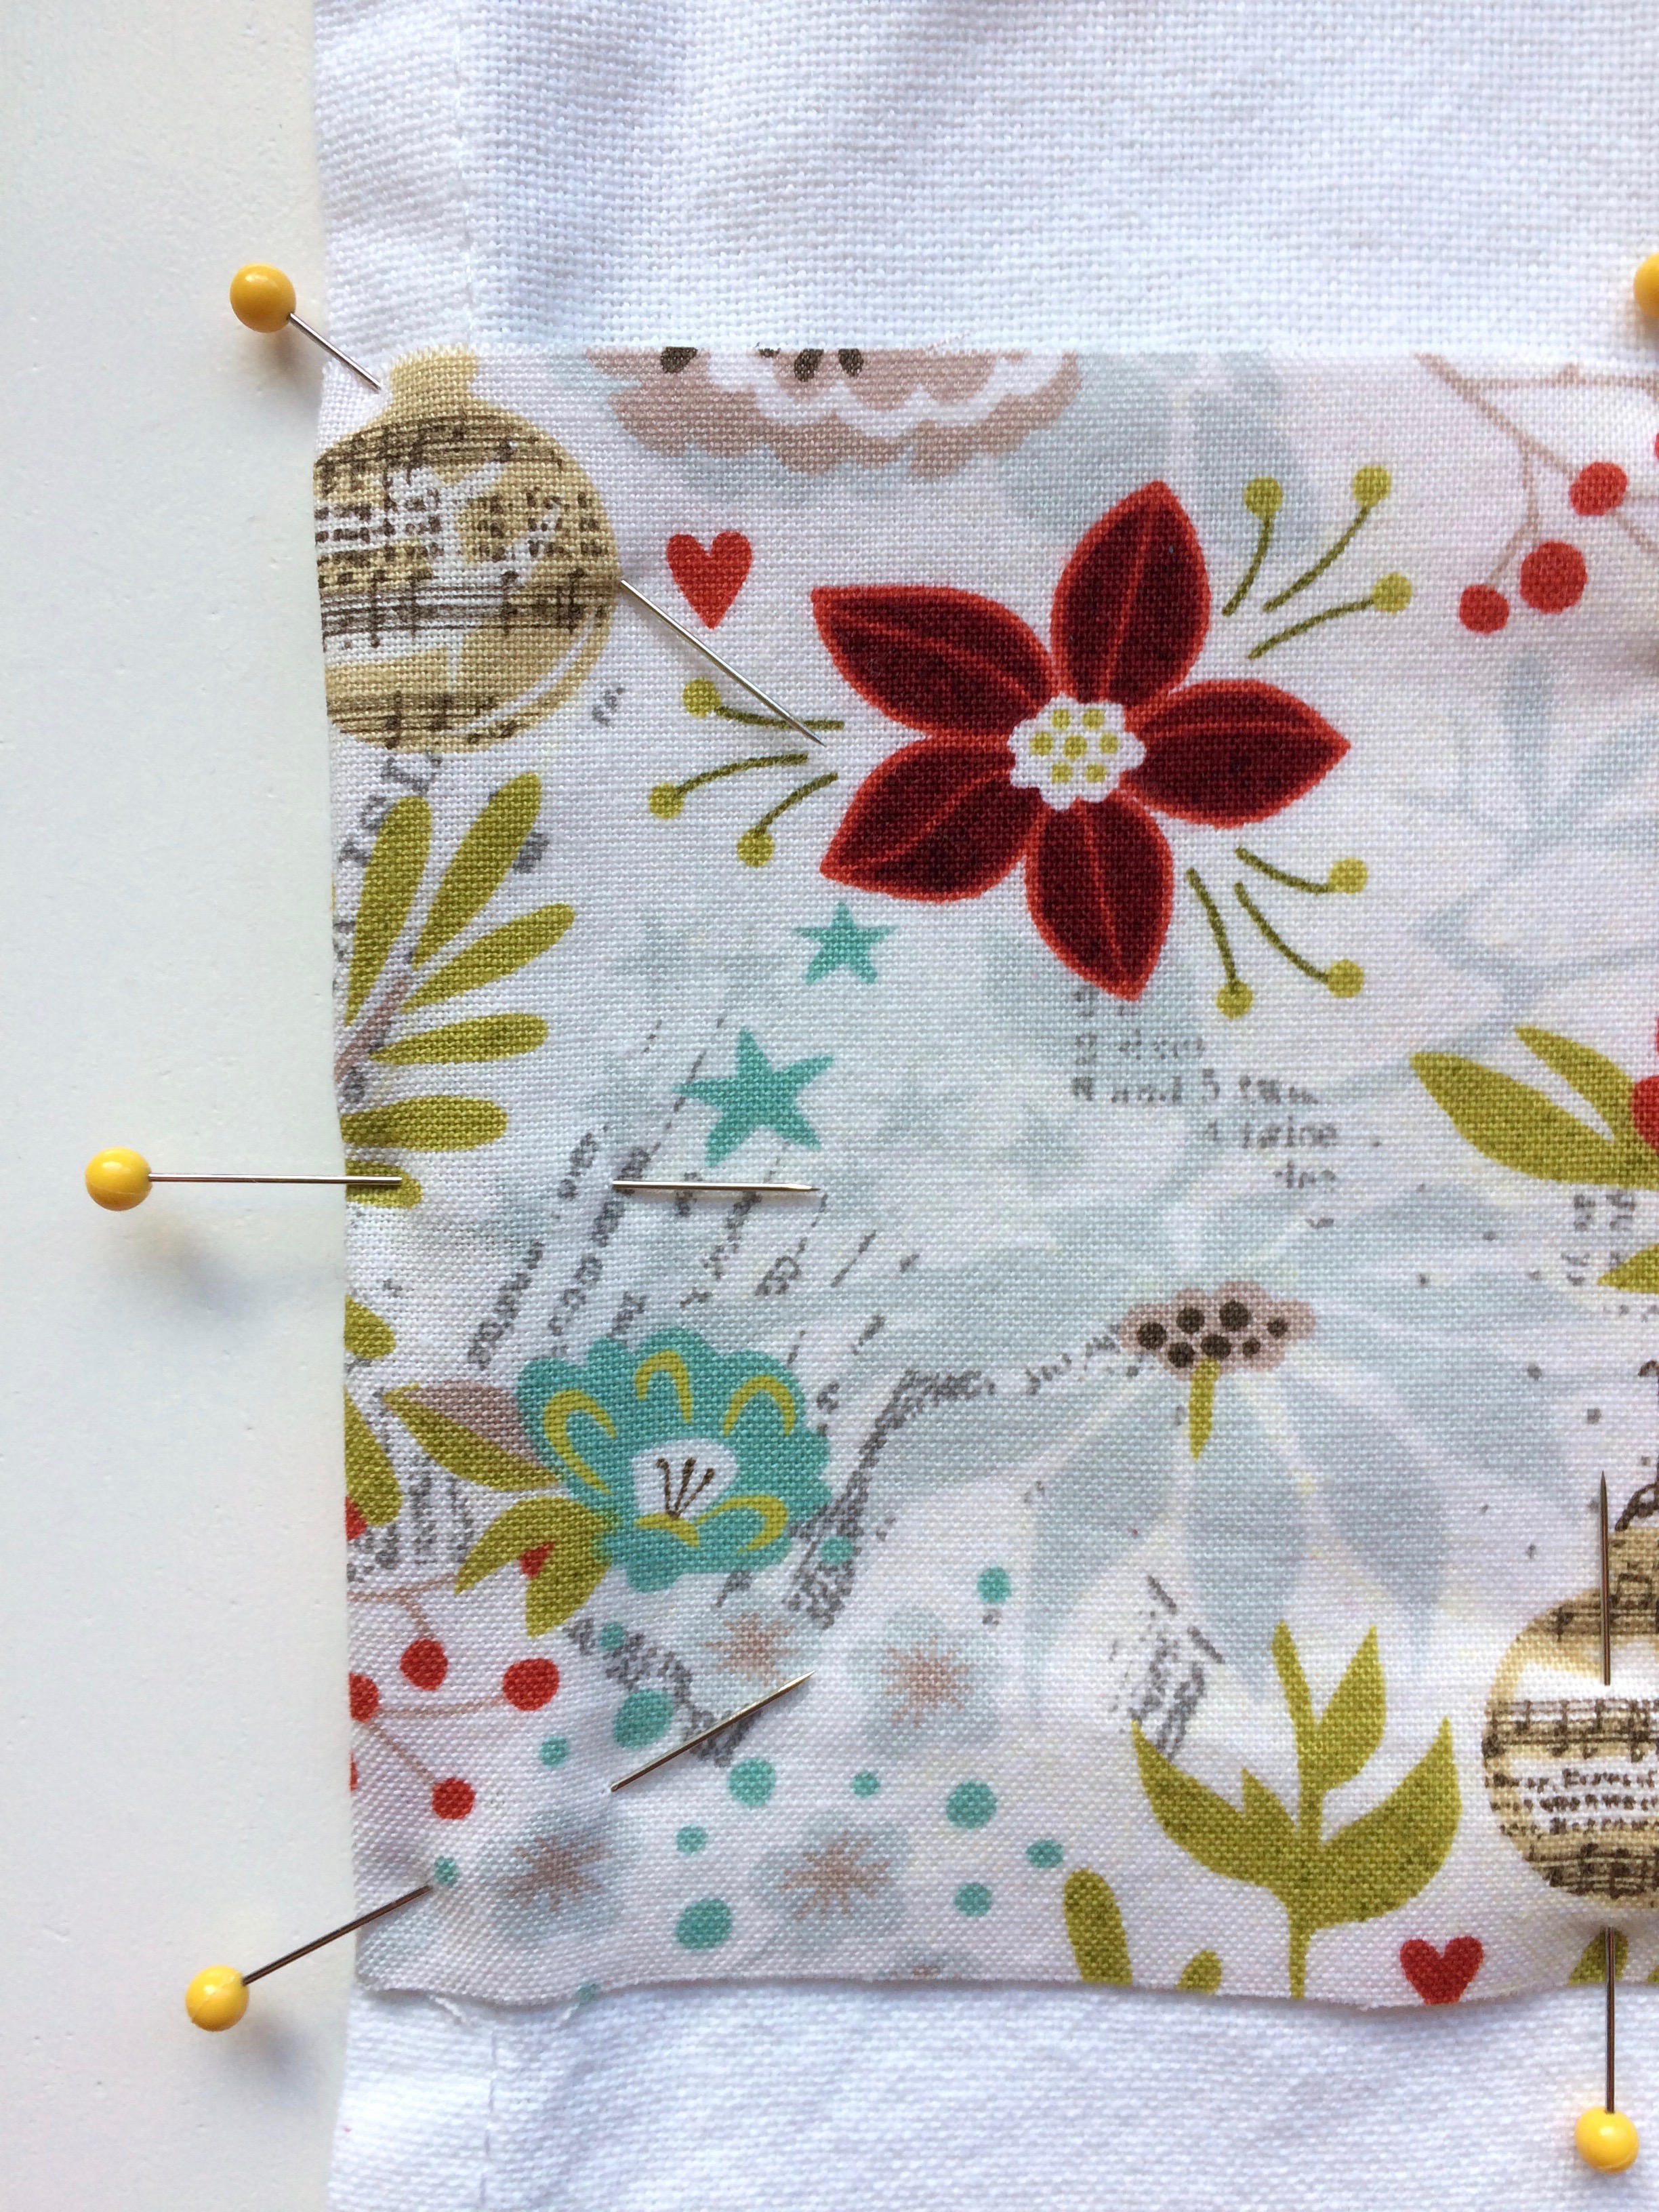
3. Pin main fabric strip onto dish towel so that lower edge is about 2 1/2” up from the bottom edge of the dish towel. Start pinning at pressed short edge (photo below left). When you get to the unpressed edge (photo below center), finger press it to match the width of the dish towel exactly. Pin in place (photo below right).
4. Top-stitch around entire edge of fabric strip very close to the edge (1/16” away from edge if possible). I use a long stitch length for this (3.5). I like to use a thread the machine with a color of thread that coordinates (or one that is a fun contrast) with the main fabric strip. For the bobbin thread, I use a color that matches the dish towel.
Adding Ribbon to Finish the Long Raw Edges of the Main Fabric Strip:
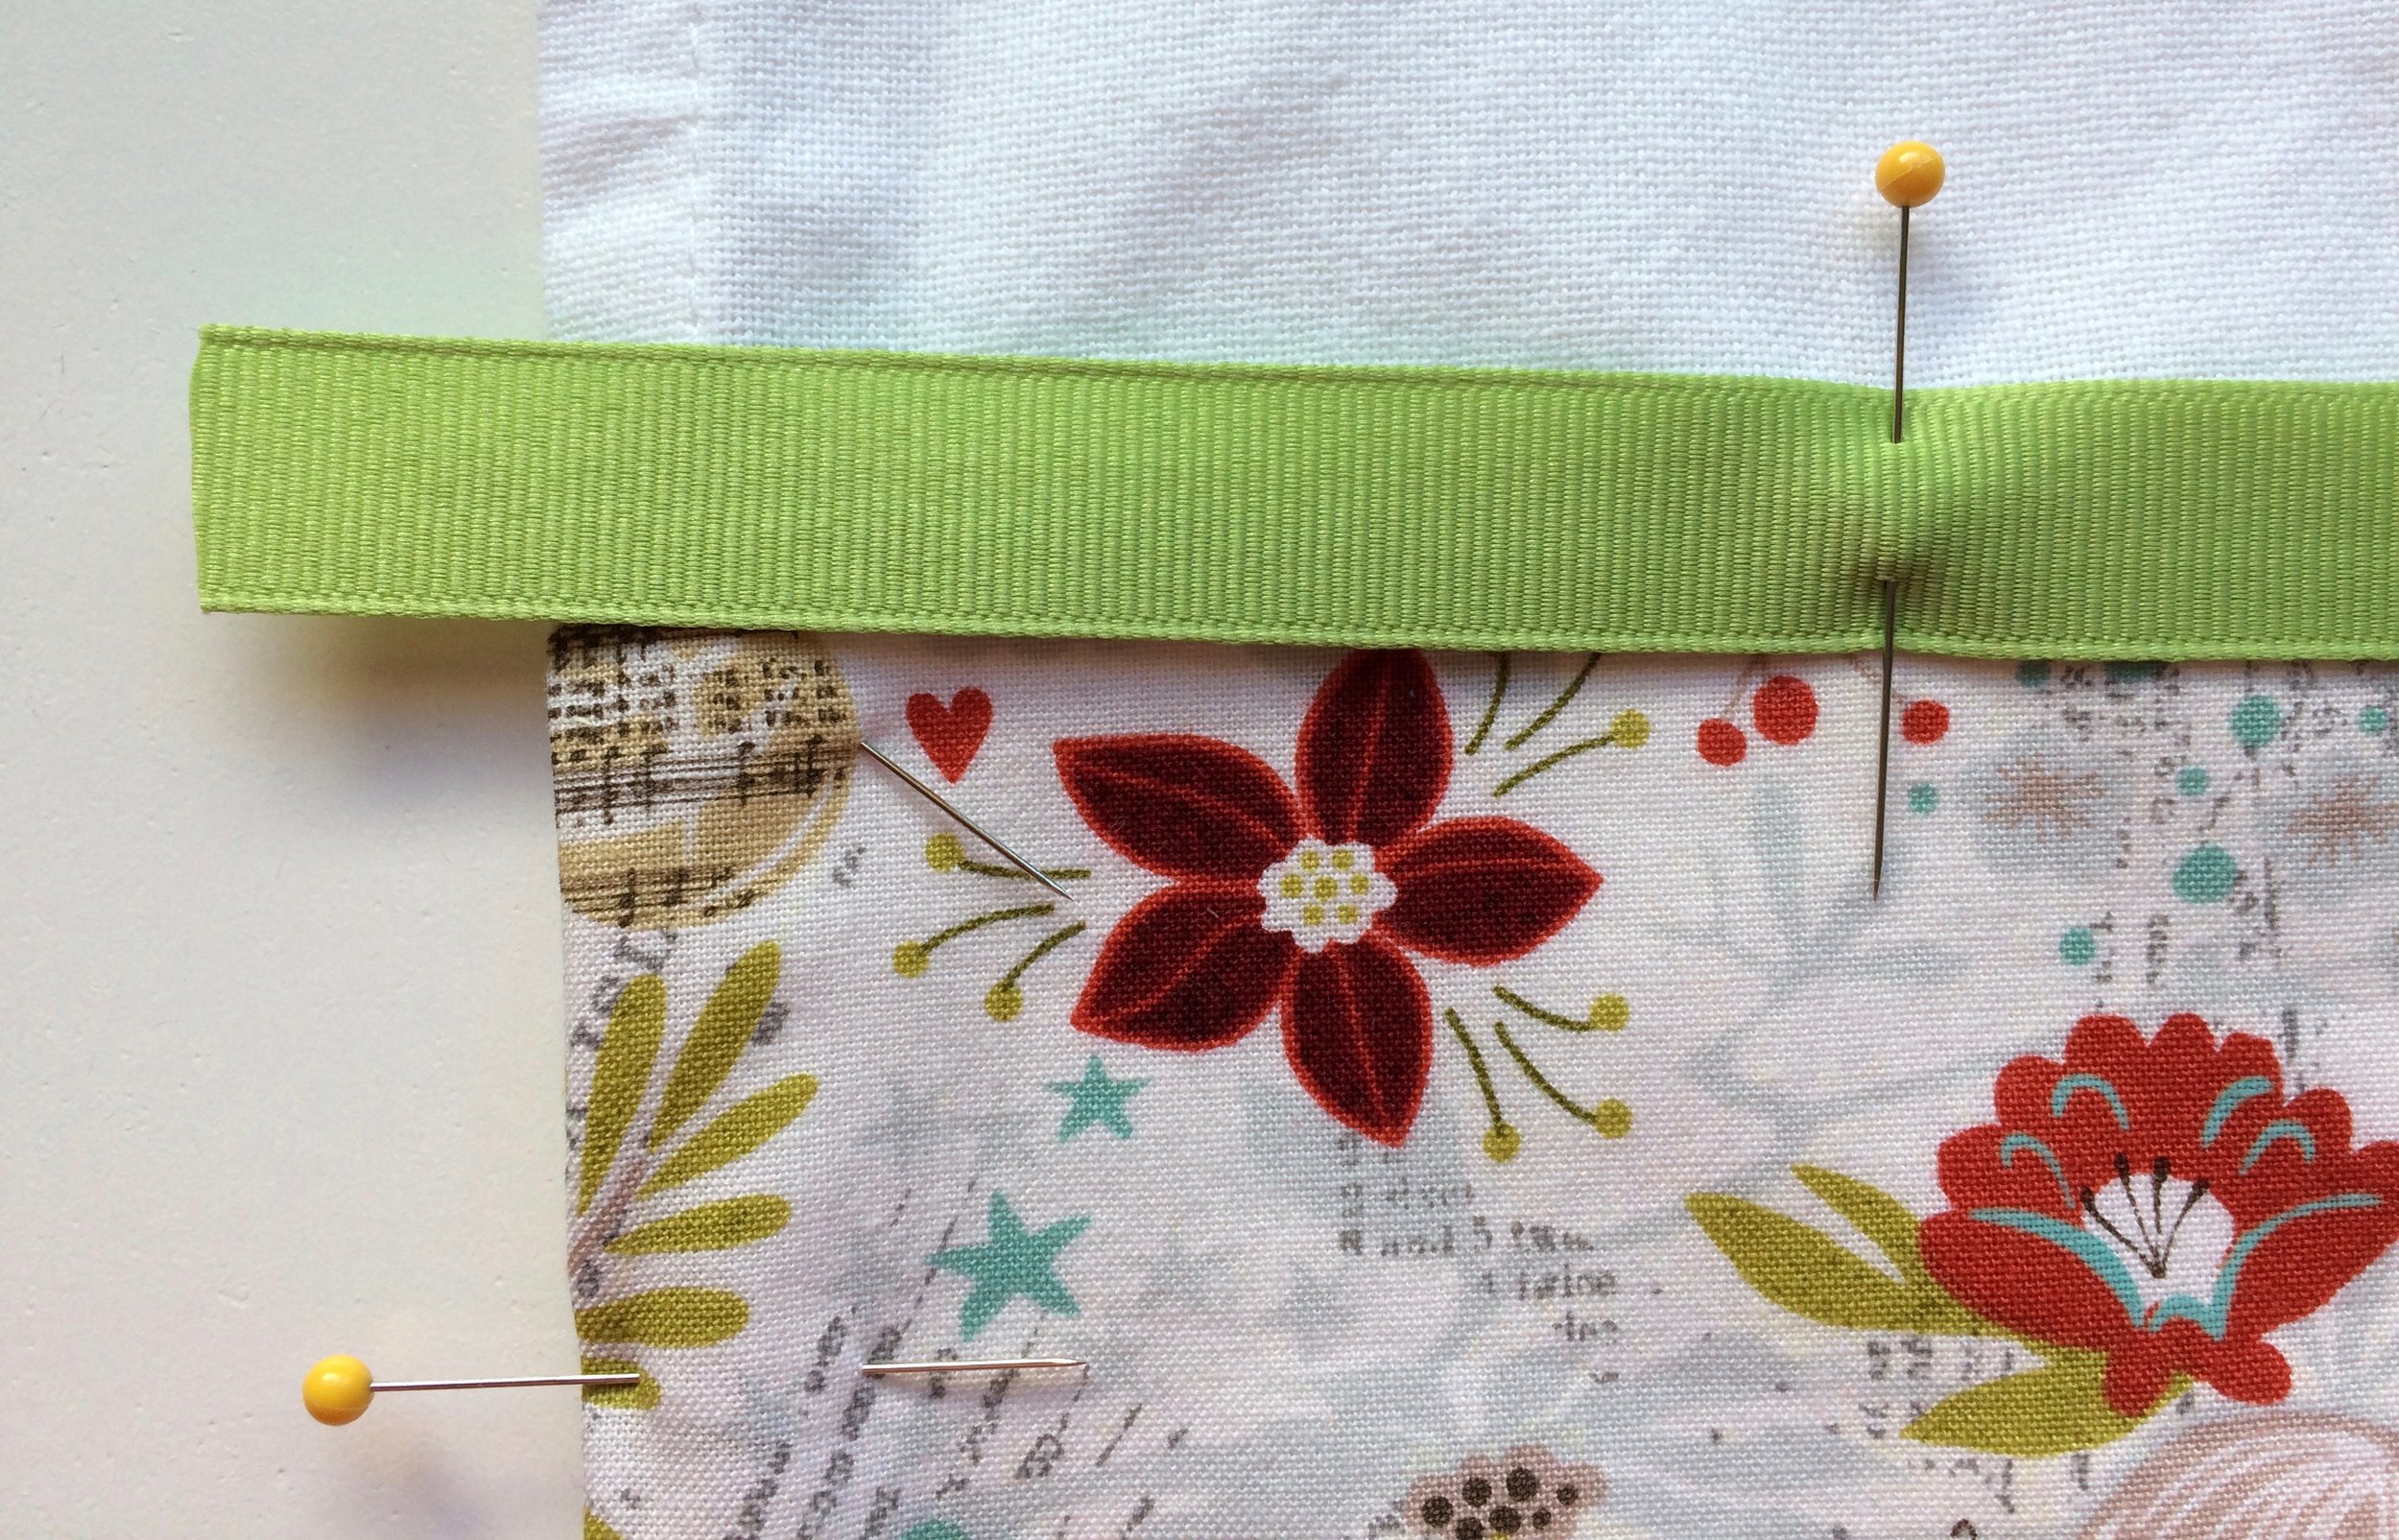
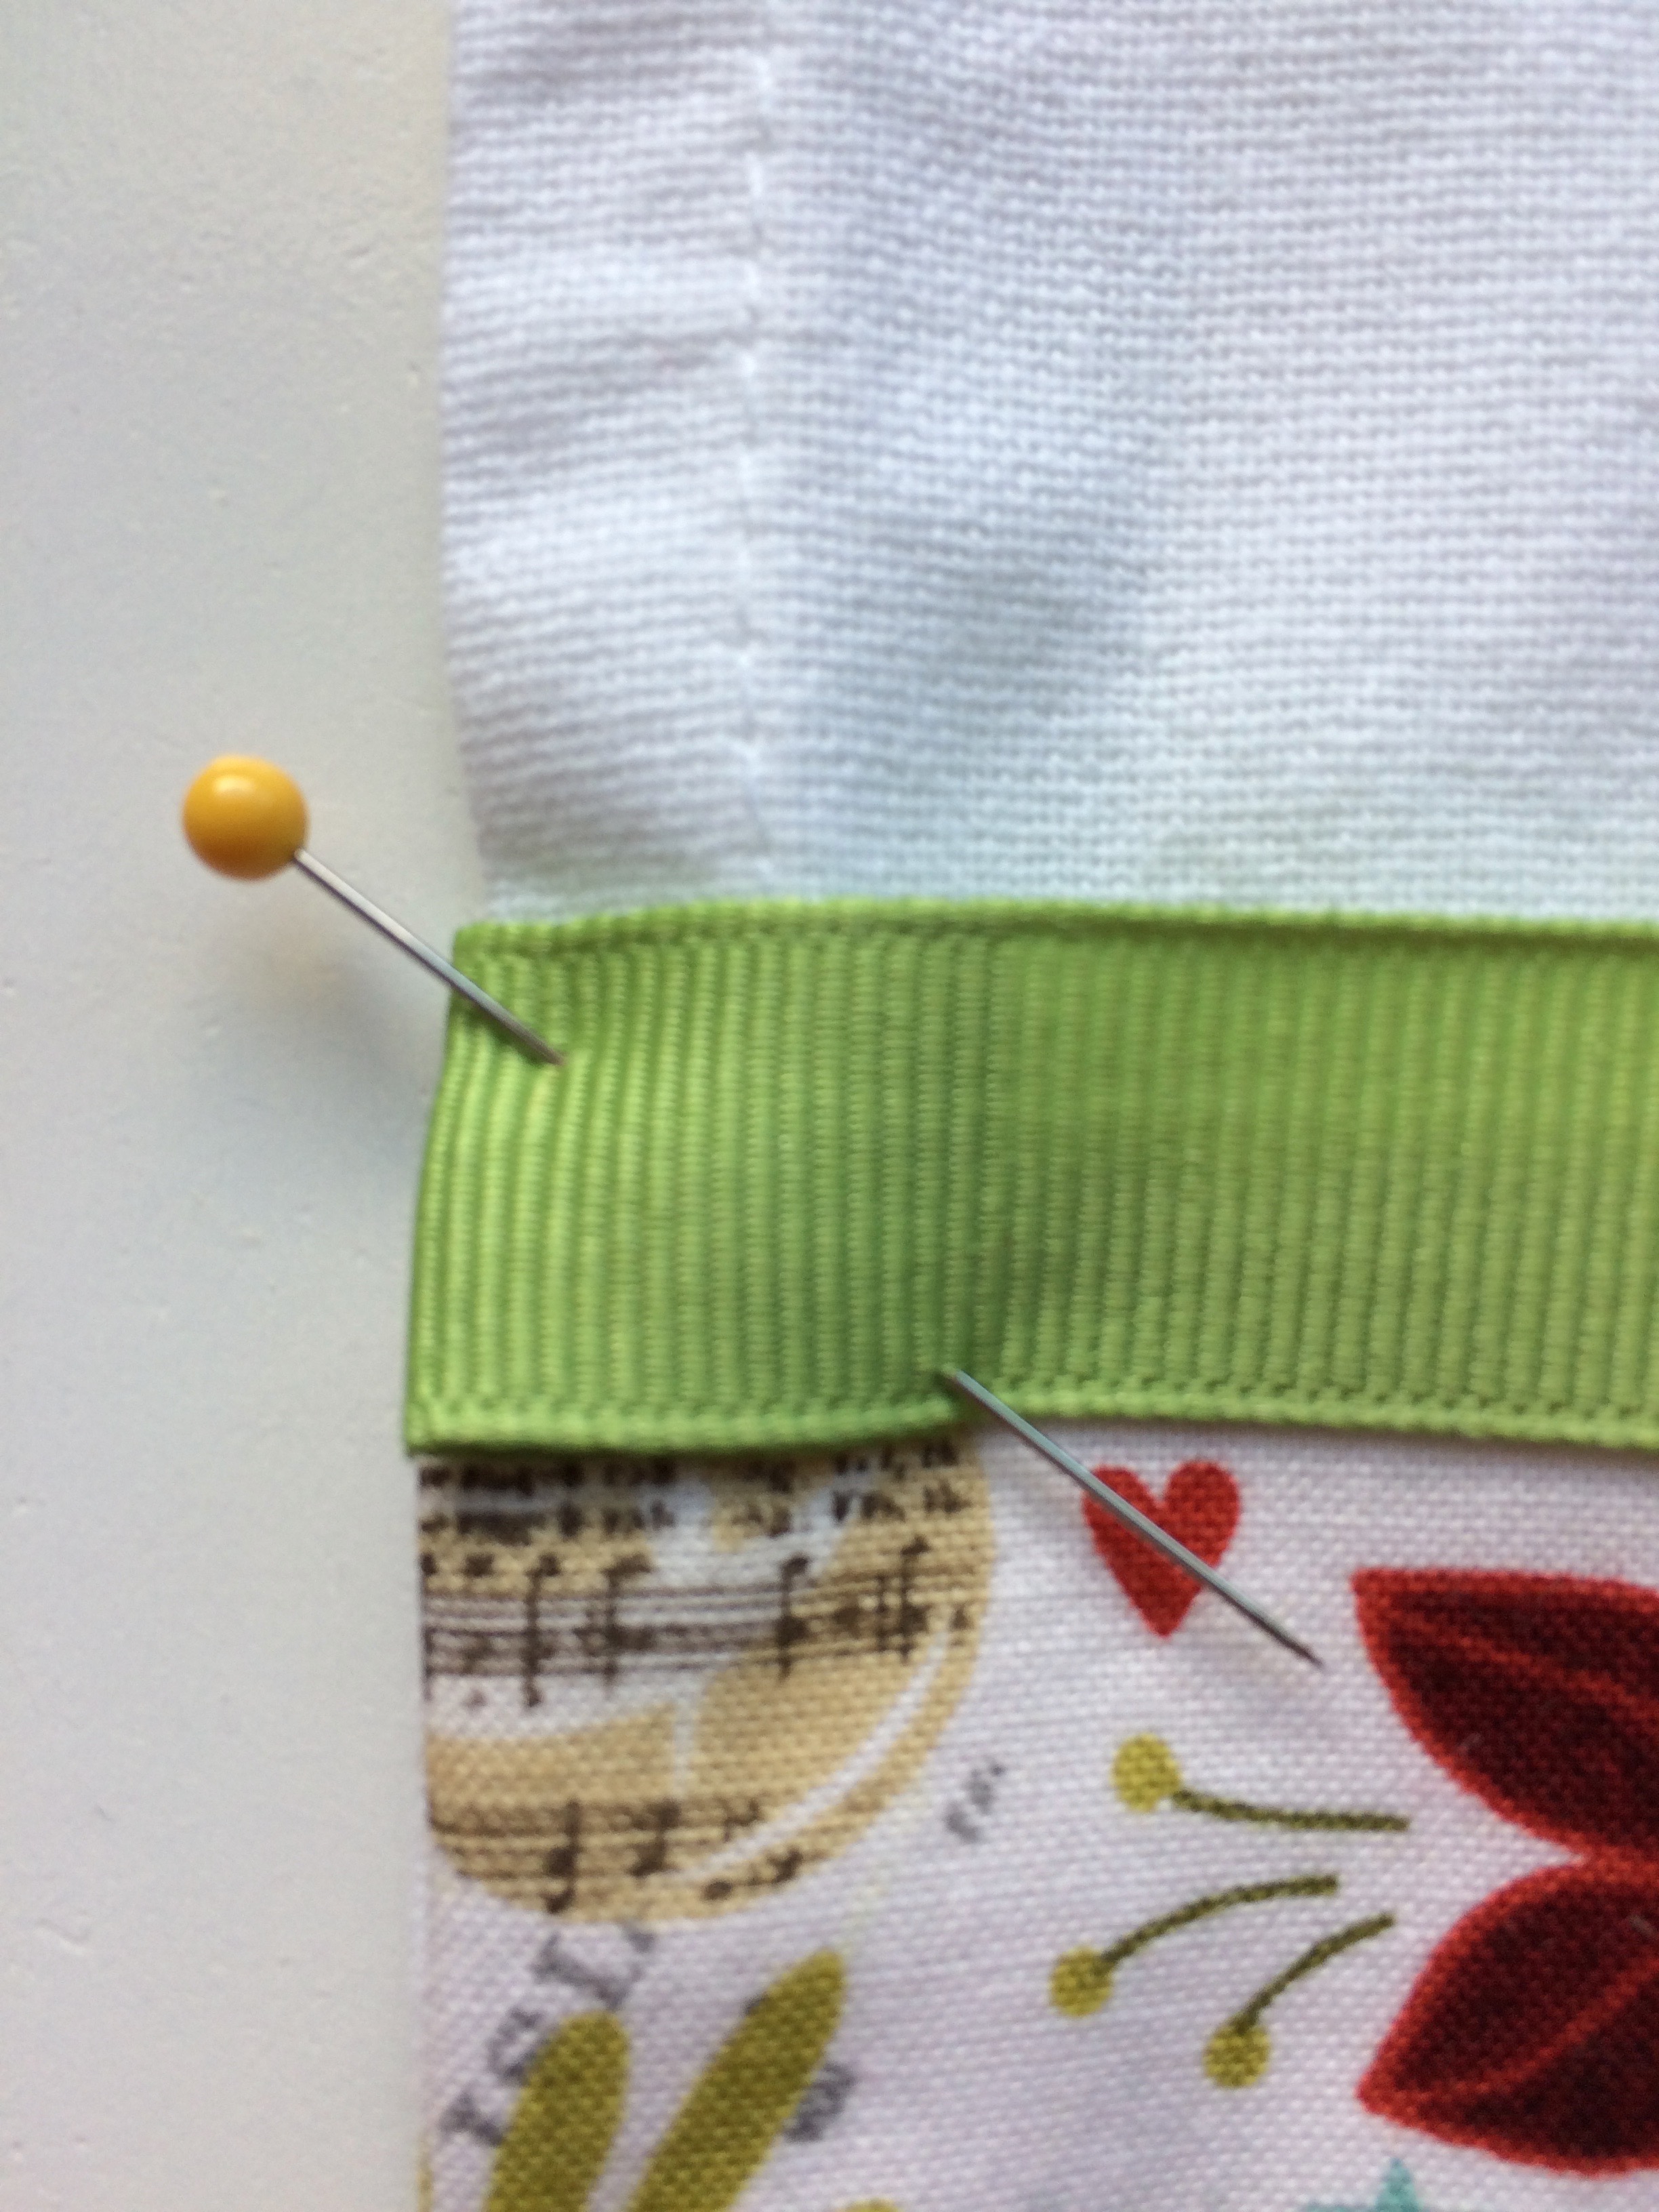
1. Cut two pieces of ribbon so each one is 1 1/2" longer than the measured width of your dishtowel. Pin one ribbon piece in place centered over one long raw edge of your main fabric strip. Use the same method you did for pinning the main fabric strip: folding one edge of your ribbon over 1/2" and matching that to the edge of your dishtowel, pinning across and folding in the other end so it exactly matches the other edge of your dishtowel. (See photos below)
2. Once both ribbons are pinned in place, sew around all four edges of each ribbon very close to the edge (1/16” away from edge if possible). I use a long stitch length again (3.5) and I use a thread the machine with a color of thread that coordinates (or one that is a fun contrast) with the ribbon. For the bobbin thread, I use a color that matches the dish towel.
Adding Accent Fabric Strips to Finish the Long Raw Edges of the Main Fabric Strip:
1. Cut two pieces of accent fabric so each one is 1 1/2" longer than the measured width of your dishtowel and 2" high.
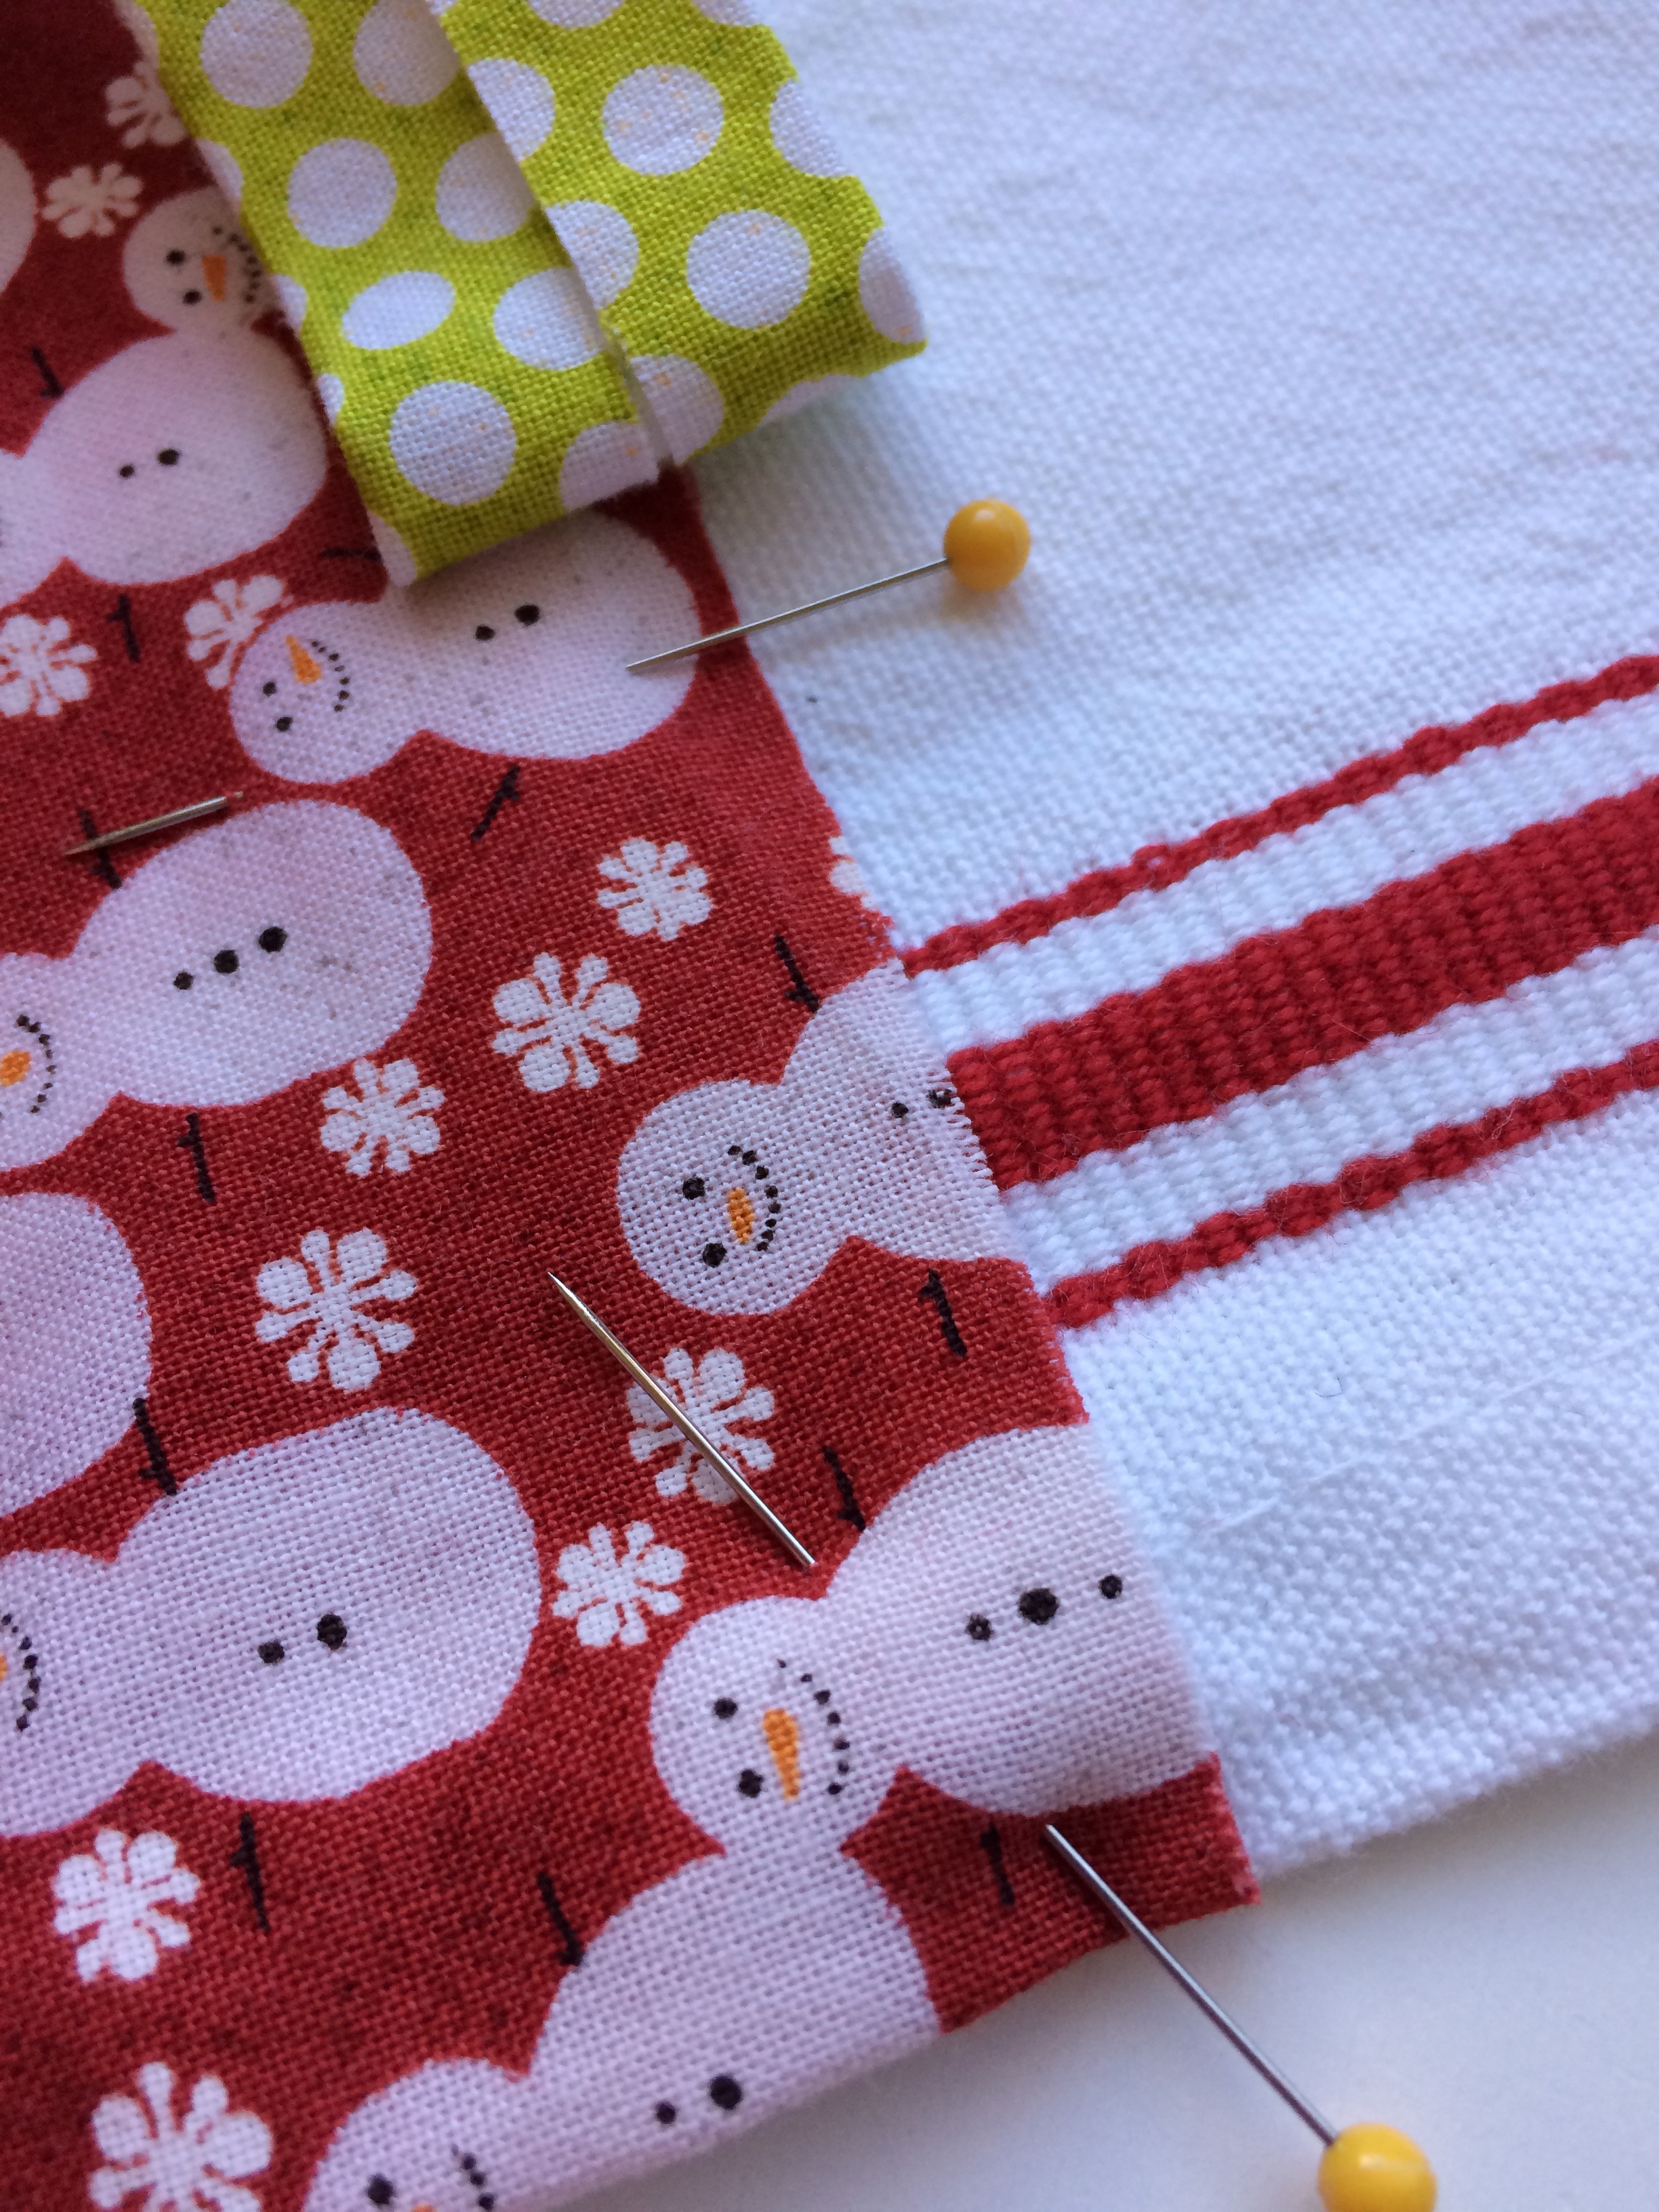
2. Use a chalk pencil or a erasable marker on the wrong side of each of your accent fabric strips to mark the center of the length of each strip (the long way). Fold both of the long raw edges of each accent fabric strip to the wrong side so that they meet at the center line and press. (See photo below)
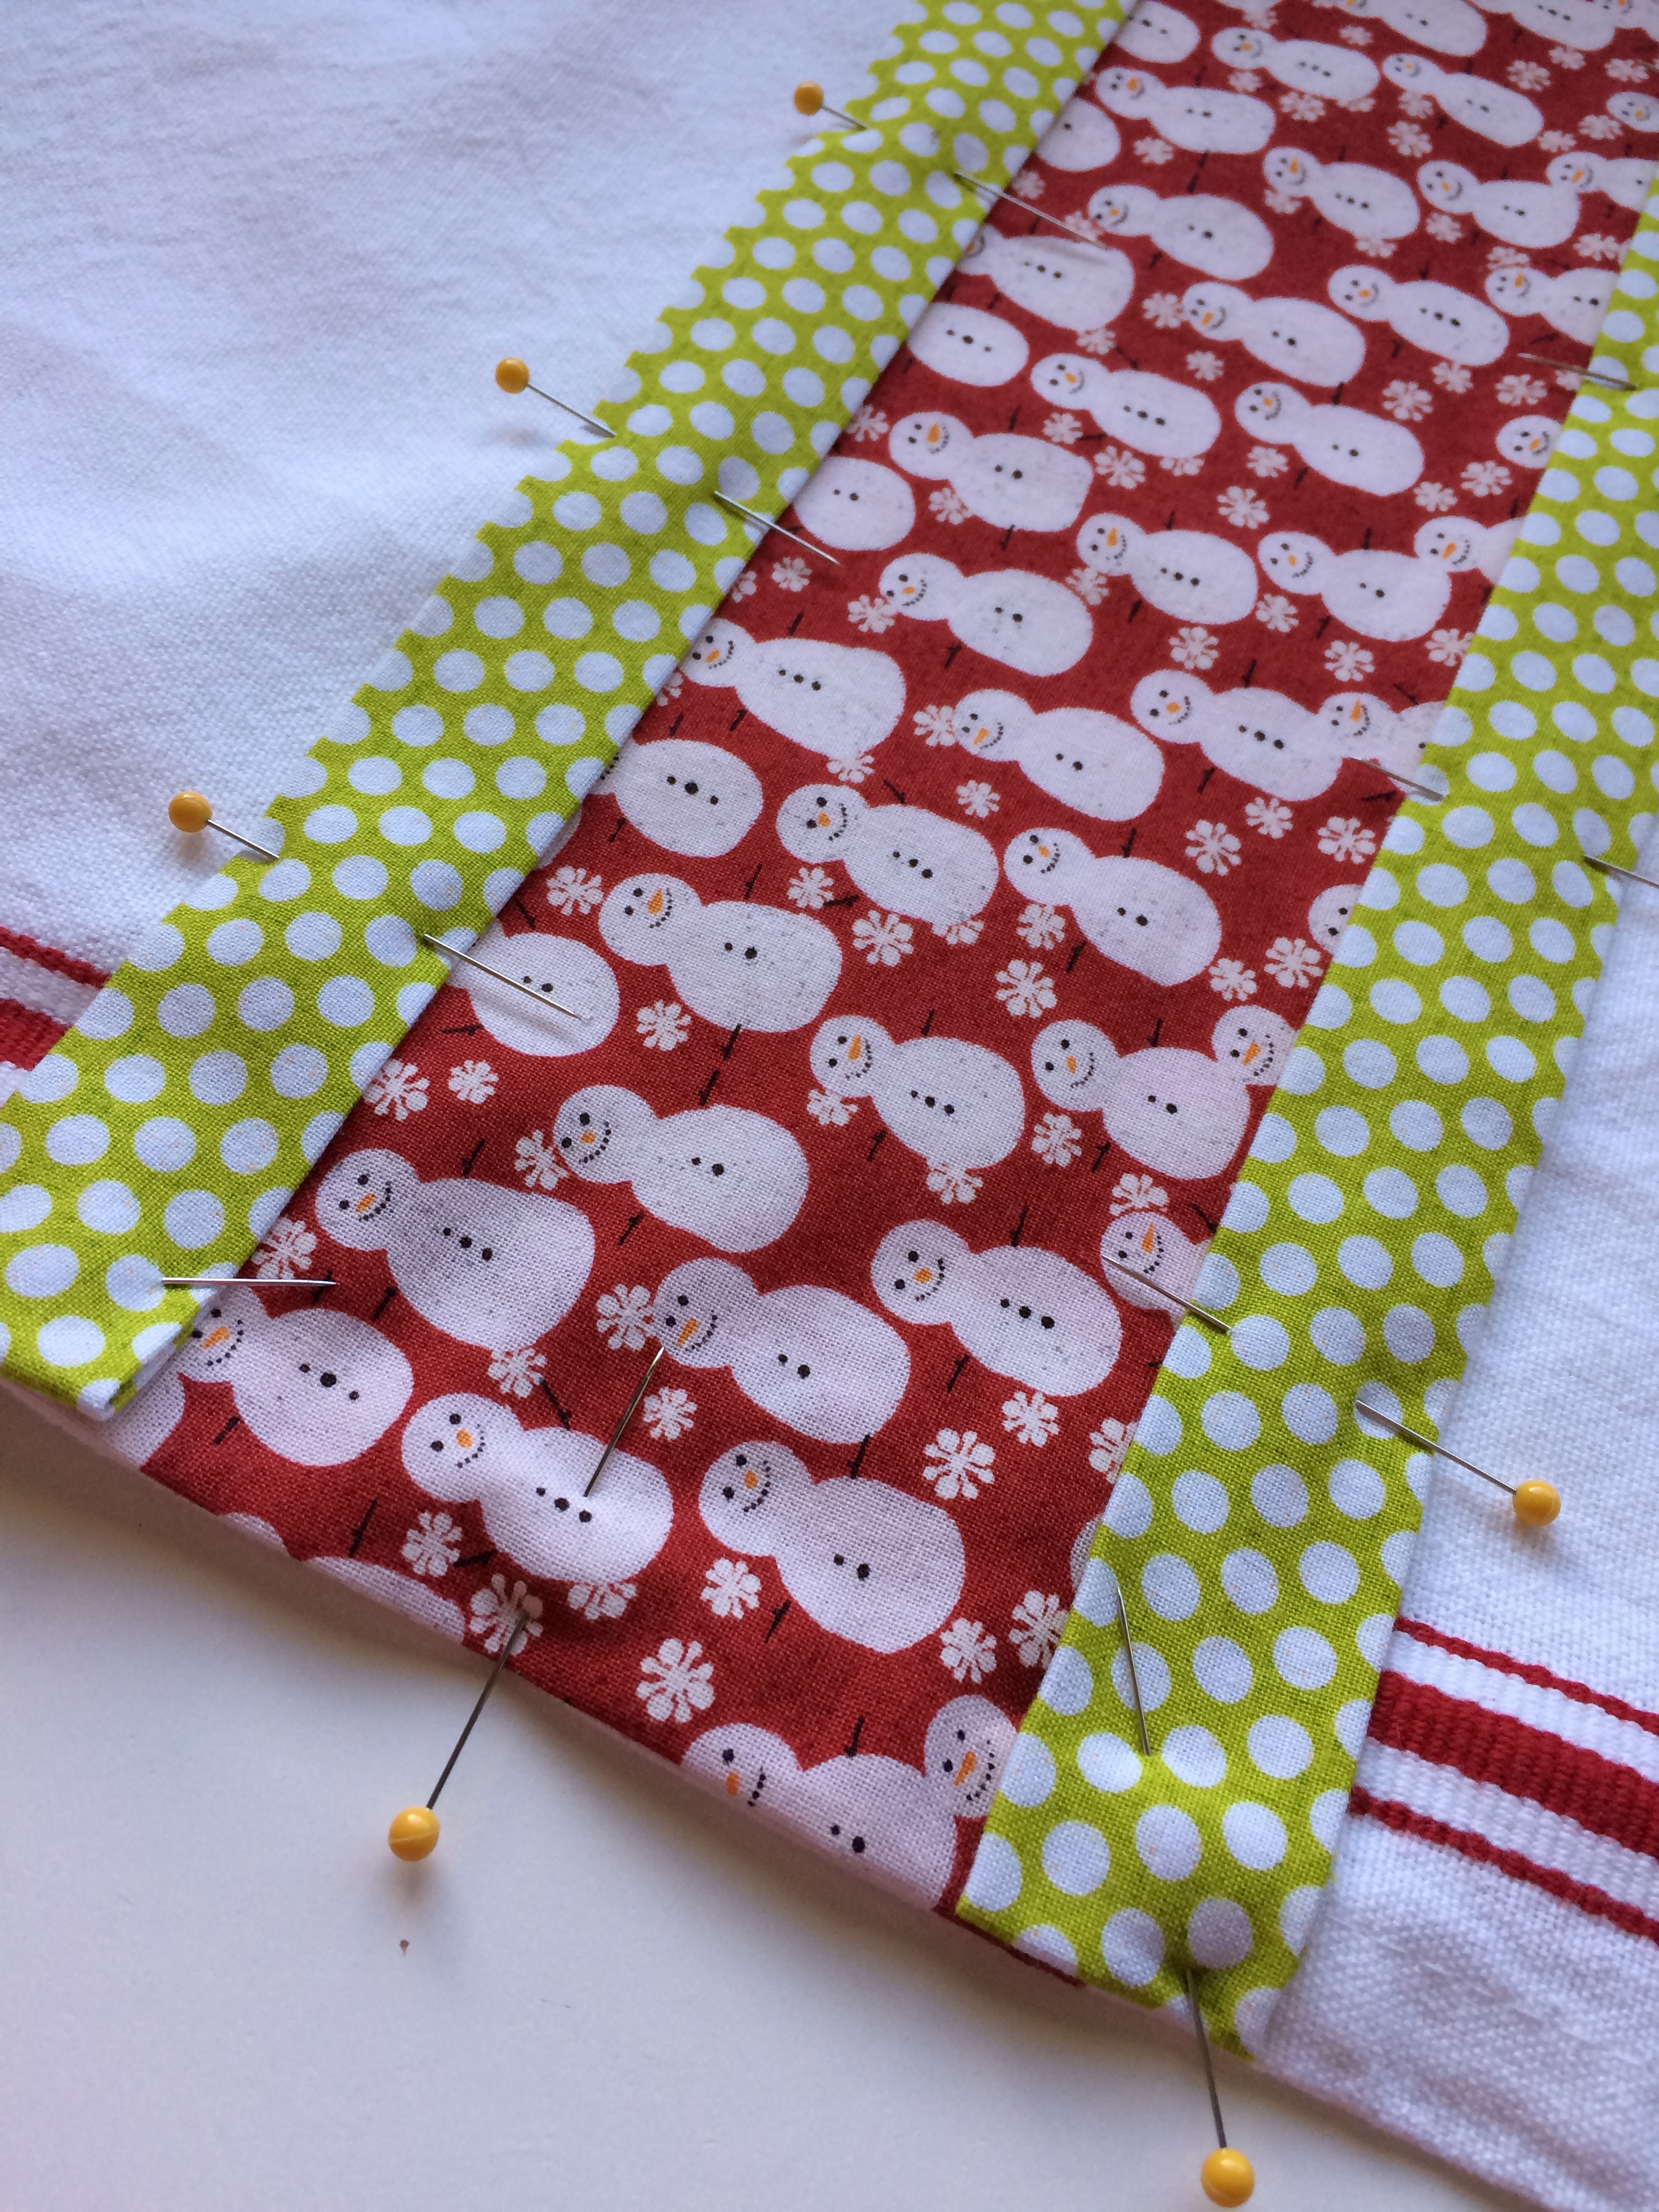
3. Pin one accent fabric strip in place centered over one long raw edge of your main fabric strip. Use the same method you did for pinning the main fabric strip: folding one edge of your accent fabric strip over 1/2" and matching that to the edge of your dishtowel, pinning across and folding in the other end so it exactly matches the other edge of your dishtowel. (See photos below)
4. Once both accent fabric strips are pinned in place, sew around all four edges of each accent fabric strip very close to the edge (1/16” away from edge if possible). I use a long stitch length again (3.5) and I use a thread the machine with a color of thread that coordinates (or one that is a fun contrast) with the accent fabric strip. For the bobbin thread, I use a color that matches the dish towel.
I love giving fun and practical gifts - these dishtowels definitely are fun and practical! They are fun and easy to make too! Watch for another quick and easy handmade gift idea coming in a couple days!


