Kristine ID Wallet Gift Box Tutorial
Michelle Burke
Recently, I gave a Kristine ID Wallet as a gift to a young lady for a high school graduation gift. I wanted to wrap it in some pretty wrapping paper, but I didn't have a box that was a good size for holding the wallet along with the matching wrist strap and lanyard. I remembered making a gift box once for a Necessary Clutch Wallet and decided to work out a custom gift box to fit a Kristine ID Wallet with enough space to also fit a wristlet strap or a lanyard or both. By the way, if you don't have the Kristine ID Wallet pattern, I have links where you can purchase the Kristine ID Wallet pattern at the end of this post.
The Kristine ID Wallet makes a great high school graduation gift, but it is also a perfect gift for any teenage girl or girl in her early twenties. Nurses and medical staff also like the Kristine ID Wallet with the lanyard option for holding their badge and other necessities. Teachers and other's who wear an access or security badge daily, love this wallet. It is also great for a quick trip to the grocery store, holding just what you need while leaving you hands-free to shop. I have given several Kristine ID Wallets as gifts and they are always well received. Now to add an even more personal touch - let's make a gift box to hold your fabulous Kristine ID Wallet creation!
I am excited to share this little tutorial for making a gift box for the Kristine ID Wallet! This gift box is easy to make, you only need:
10" square of pretty card stock,
ruler (an acrylic sewing/quilting ruler works well for this)
pencil and eraser
scissors
glue dots, glue or double-sided tape
about 10-15 minutes
I like the card stock that has a coordinating pattern on the opposite side so that the box looks pretty inside and out, but of course this is not necessary. Using card stock with printing on both sides can make it more difficult to see your fold lines that you will be marking - a bit of a drawback and therefore something to consider.
You will need to cut a 12" square piece of card stock down to a 10" square first. Once you have done this, place your card stock piece wrong side up and make a light pencil line from one corner to the opposite corner. Repeat this, making another line from one of the other corners to the opposite corner from it. These are your center lines that you will use to measure all your other cut and fold lines from. (See photo below) You will turn the paper so it is on point. Decide which of these lines will be your vertical line. This will determine how the design of the card stock looks on your box. The design will be on the diagonal, but if the design on your paper is directional, you will want to consider this as you make the rest of the marks for your box.
From your vertical, center line, draw two lines 3" away on either side. Draw two more lines that are 3/4" away from each of the lines you just made. These two lines should be further away from the vertical, center line. (See photo below - all vertical lines are blue) From your horizontal, center line, draw two lines 2 1/4" away on either side. Draw two more lines that are 3/4" away from each of the lines you just made. These two lines should be further away from the horizontal, center line. (See photo below - all horizontal lines are green)
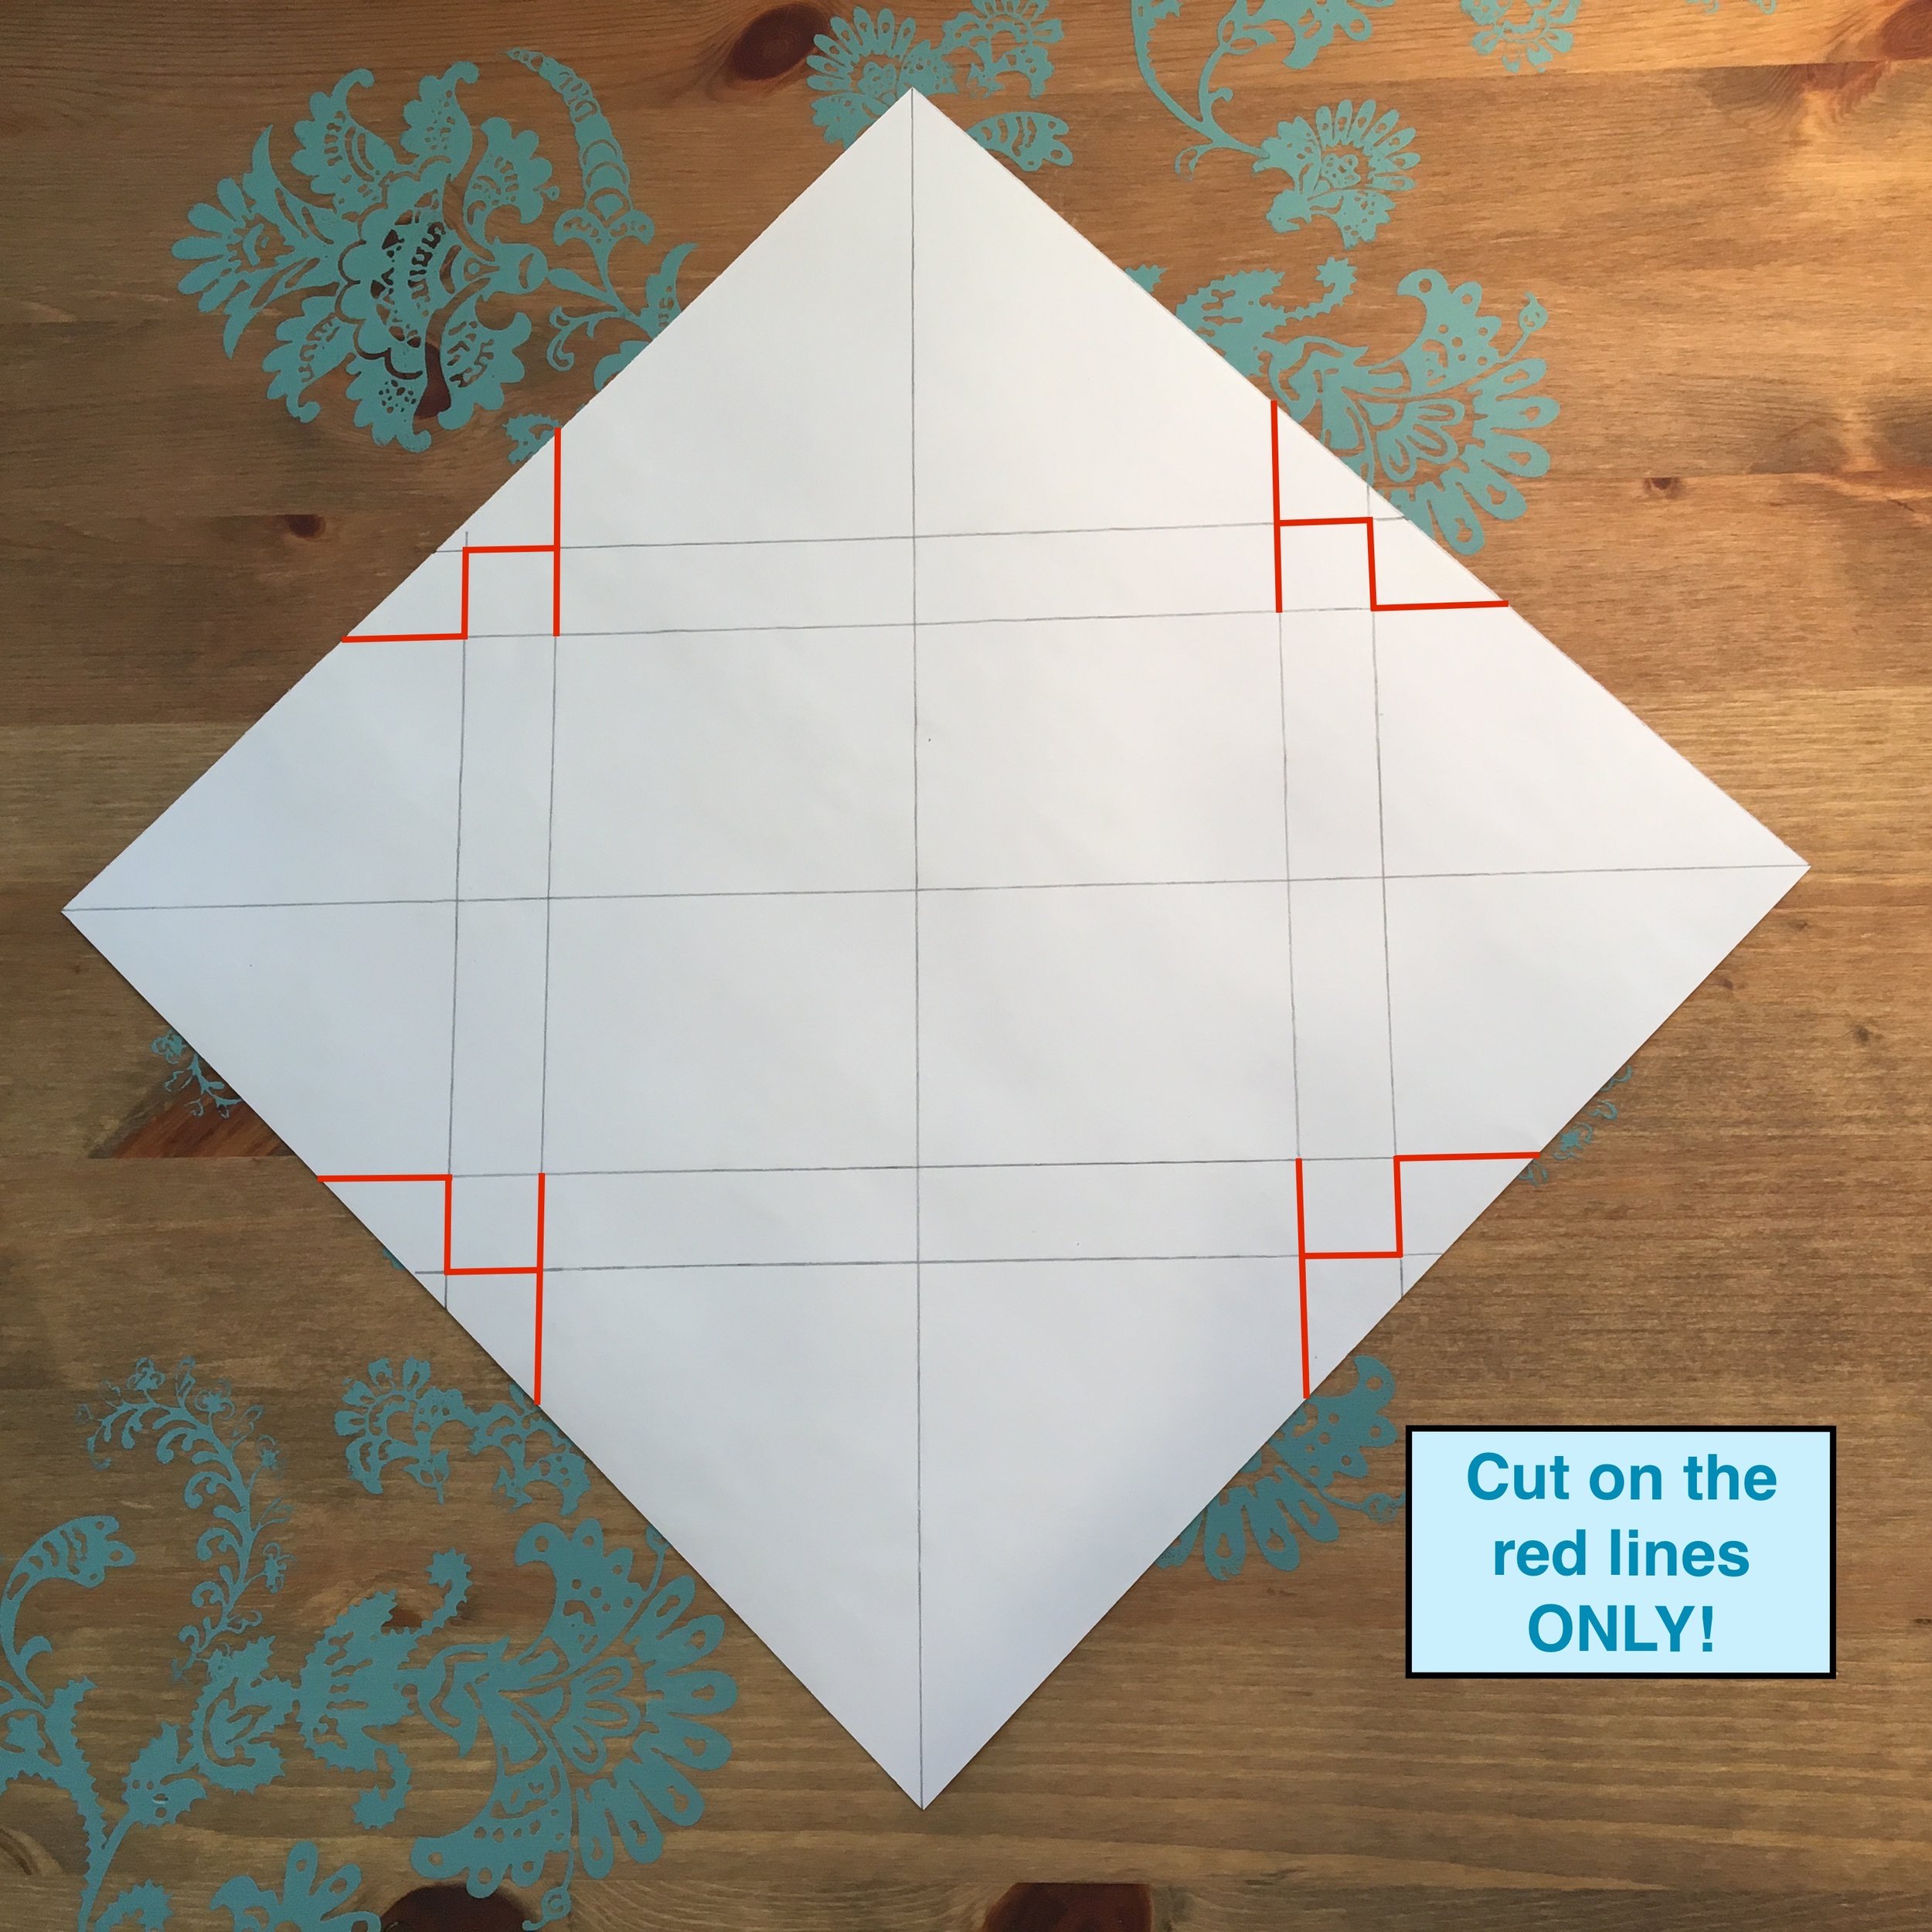
Now we need to cut along some of the lines. I have the lines that need to be cut highlighted in red in the photo below. You will want to pay attention to this closely as there are some cuts that you will make on the vertical lines, but you will not cut on the corresponding horizontal line. Done correctly, the cuts will make the tabs for gluing your gift box togethe.
The photo on the left, below, shows how it looks once most of the cuts are made. The photo on the right below shows how the cuts make a tab for gluing.
The remaining lines indicate where you will need to make folds. I find it is easier to score these lines first using a ruler and scoring tool. There are actually tools that are made for scoring paper and card stock, but I have found my favorite scoring tool is something that lives in my kitchen . . . a butter knife. Use the smooth, non-serrated edge of the knife to score your card stock. It is best to use a ruler or straight edge to make sure you get a good, straight fold line. Just line up your ruler along each of your fold lines and pressing down firmly, draw the smooth side of your butter knife along the pencil line. (See photos below) Make sure you do not score the center lines - I like to erase the center lines at this point so that I don't forget and score them too!
Once all the lines have been scored, fold along all the lines so that you are folding everything toward the inside of the box. The scoring really helps, huh!?! Take a minute to erase your pencil lines not so they aren't so obvious. (See photo below)
With your folds ready to go, we just need to tape or glue the flaps in place on the inside front and back sides of the box. I have tried double-sided scrapbooking tape, Alleen's Tacky Glue, and Zots glue dots for this. Each of these works, but I think the one that works best is the Zots glue dots. If you use glue, you will only need a drop, but you will also need to hold each corner in place once you have added the glue for several seconds to make sure it is holding securely. It is good to give the glue 10-15 minutes to dry well before putting a Kristine ID Wallet in the gift box. The glue works, but is more time consuming. The double-sided tape isn't quite as sticky as I would like for this application - it works, just not super well. The Zots are fast and hold the tabs in place very well. I placed the Zots on the inside of the side piece where the tab needs to go, but you can also place the glue dots on the outside of the tab and then put the tab in place. I found four glue dots work well. (See photo below)
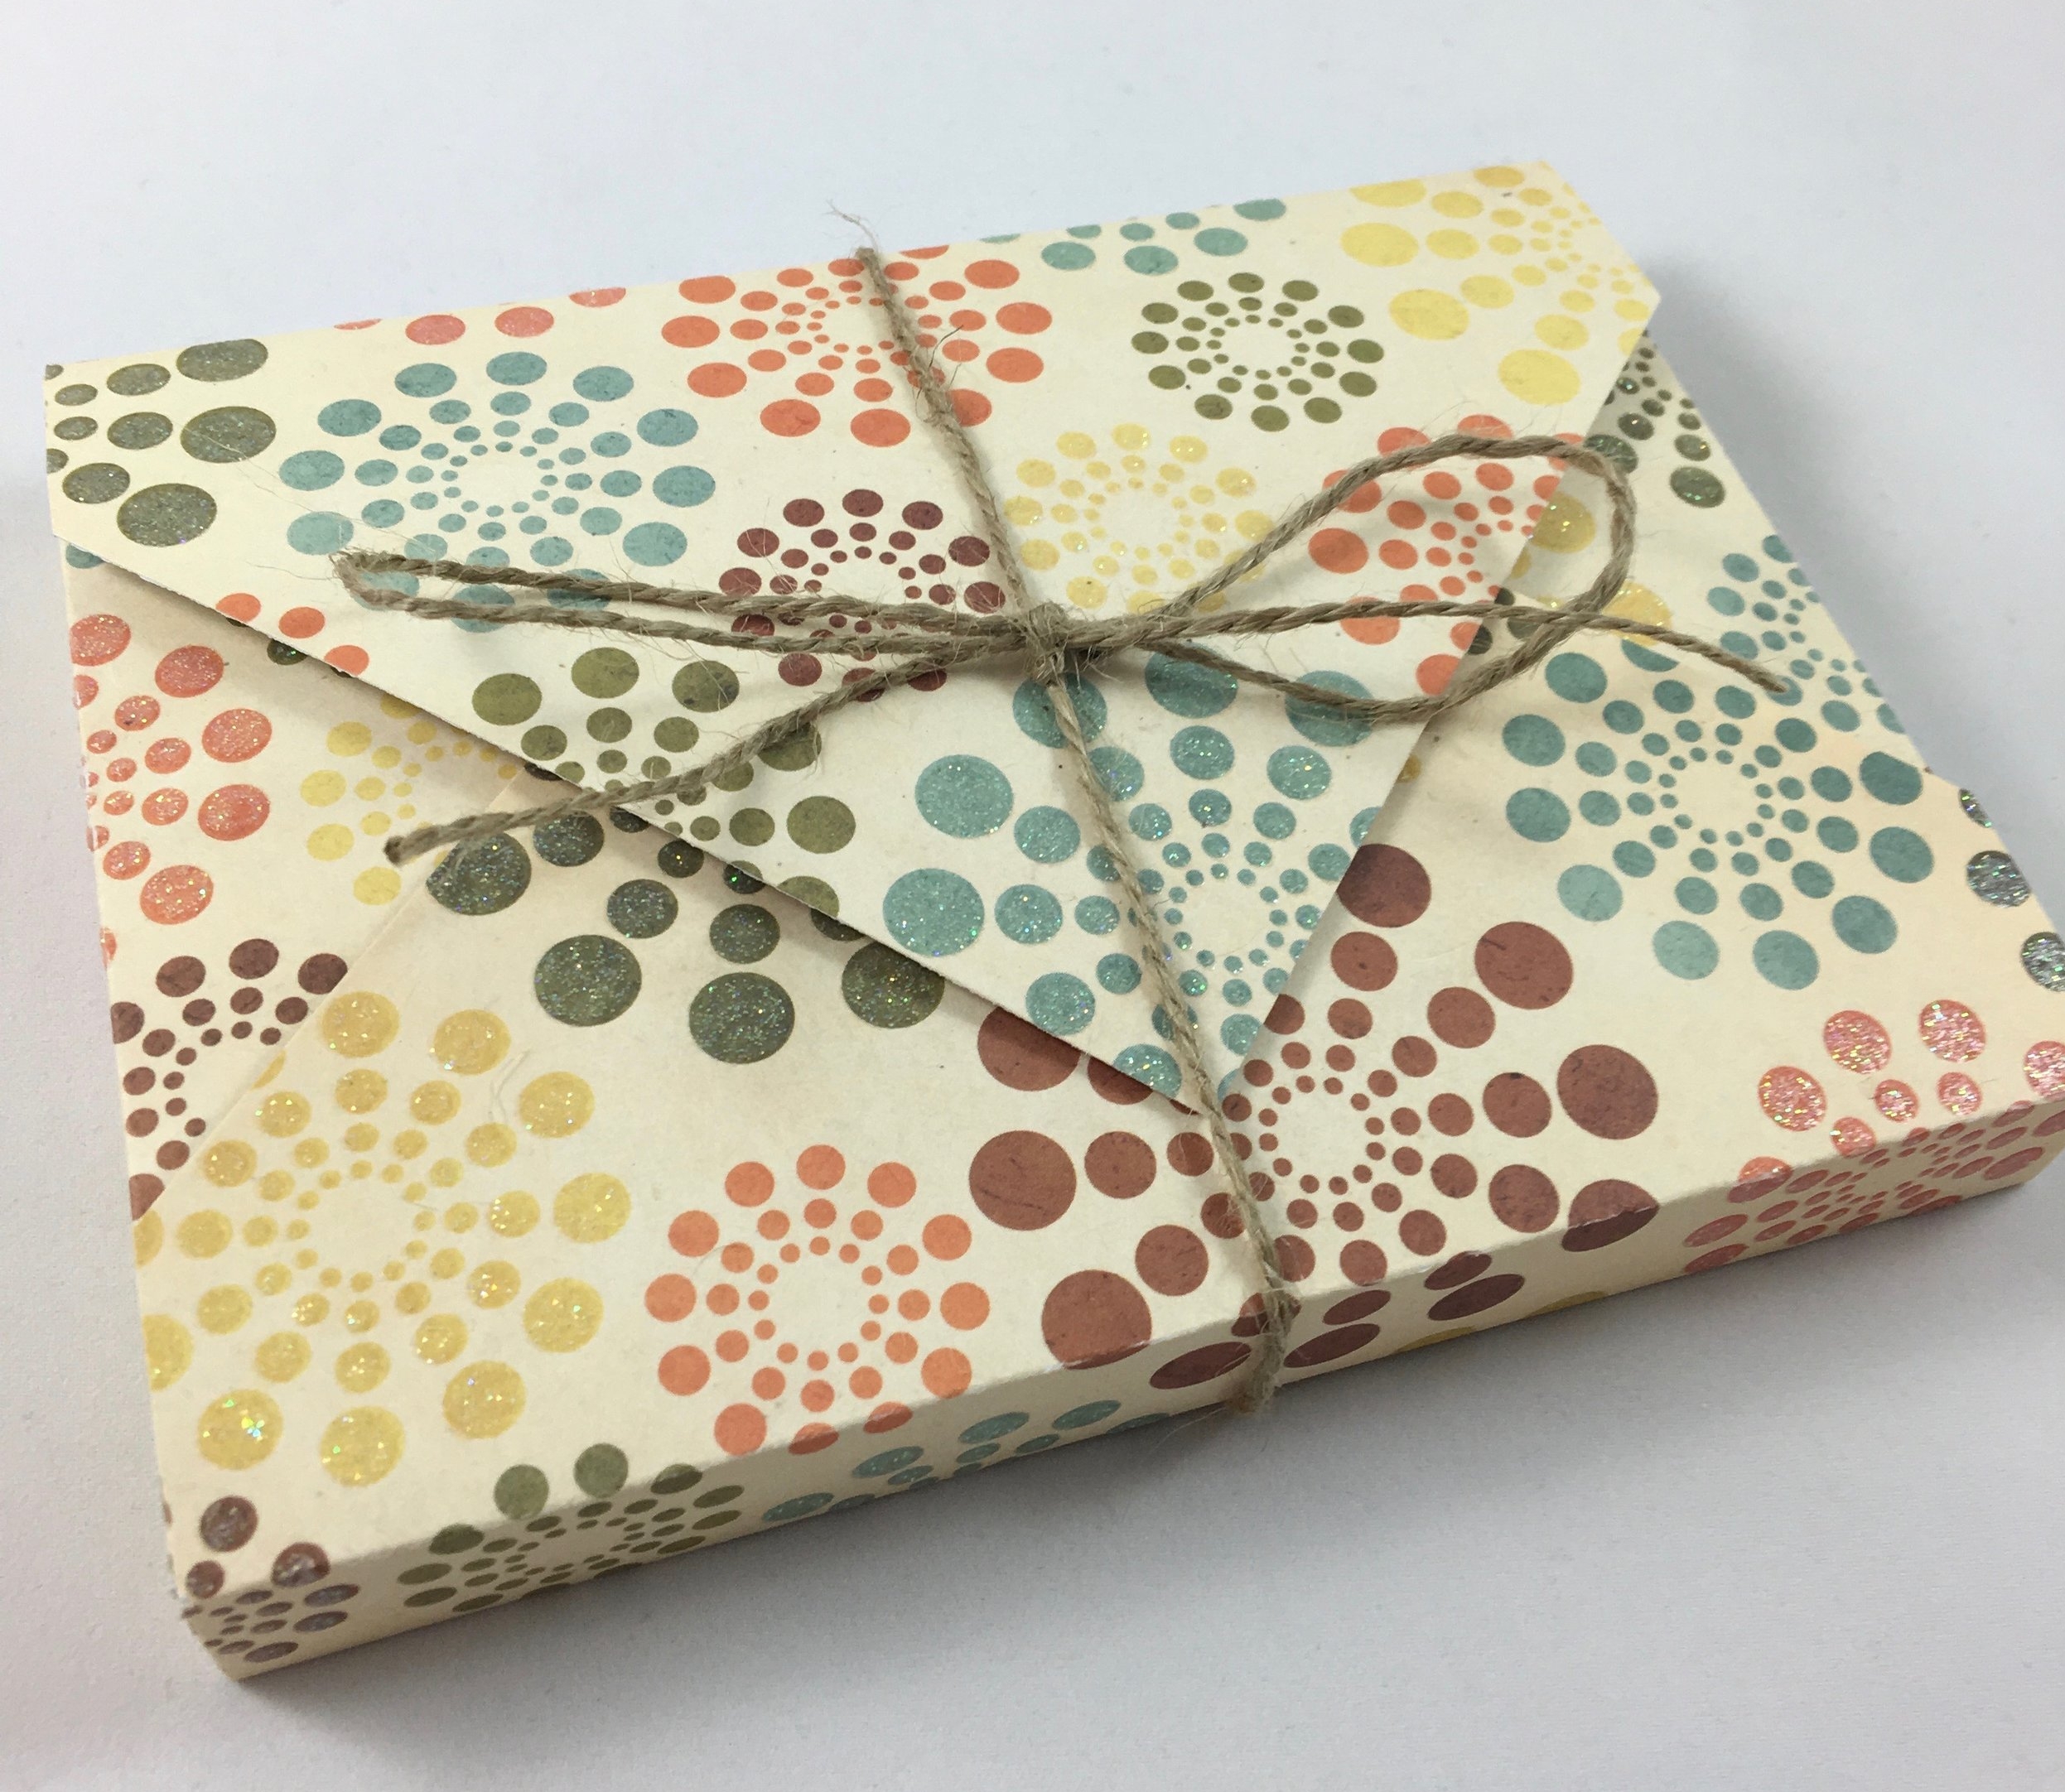
A coordinating sticker, a piece of Washi tape, or a glue dot work well to hold the final flap of the gift box closed. A ribbon or some twine wrapped around the gift box and tied with a bow will also work well to keep the gift box closed while making it look even more festive.
For the gift I gave, I used both a Uniquely Michelle sticker and a couple pieces of twine to hold the gift box closed and to decorate it a bit - sometimes adding more is just more fun!
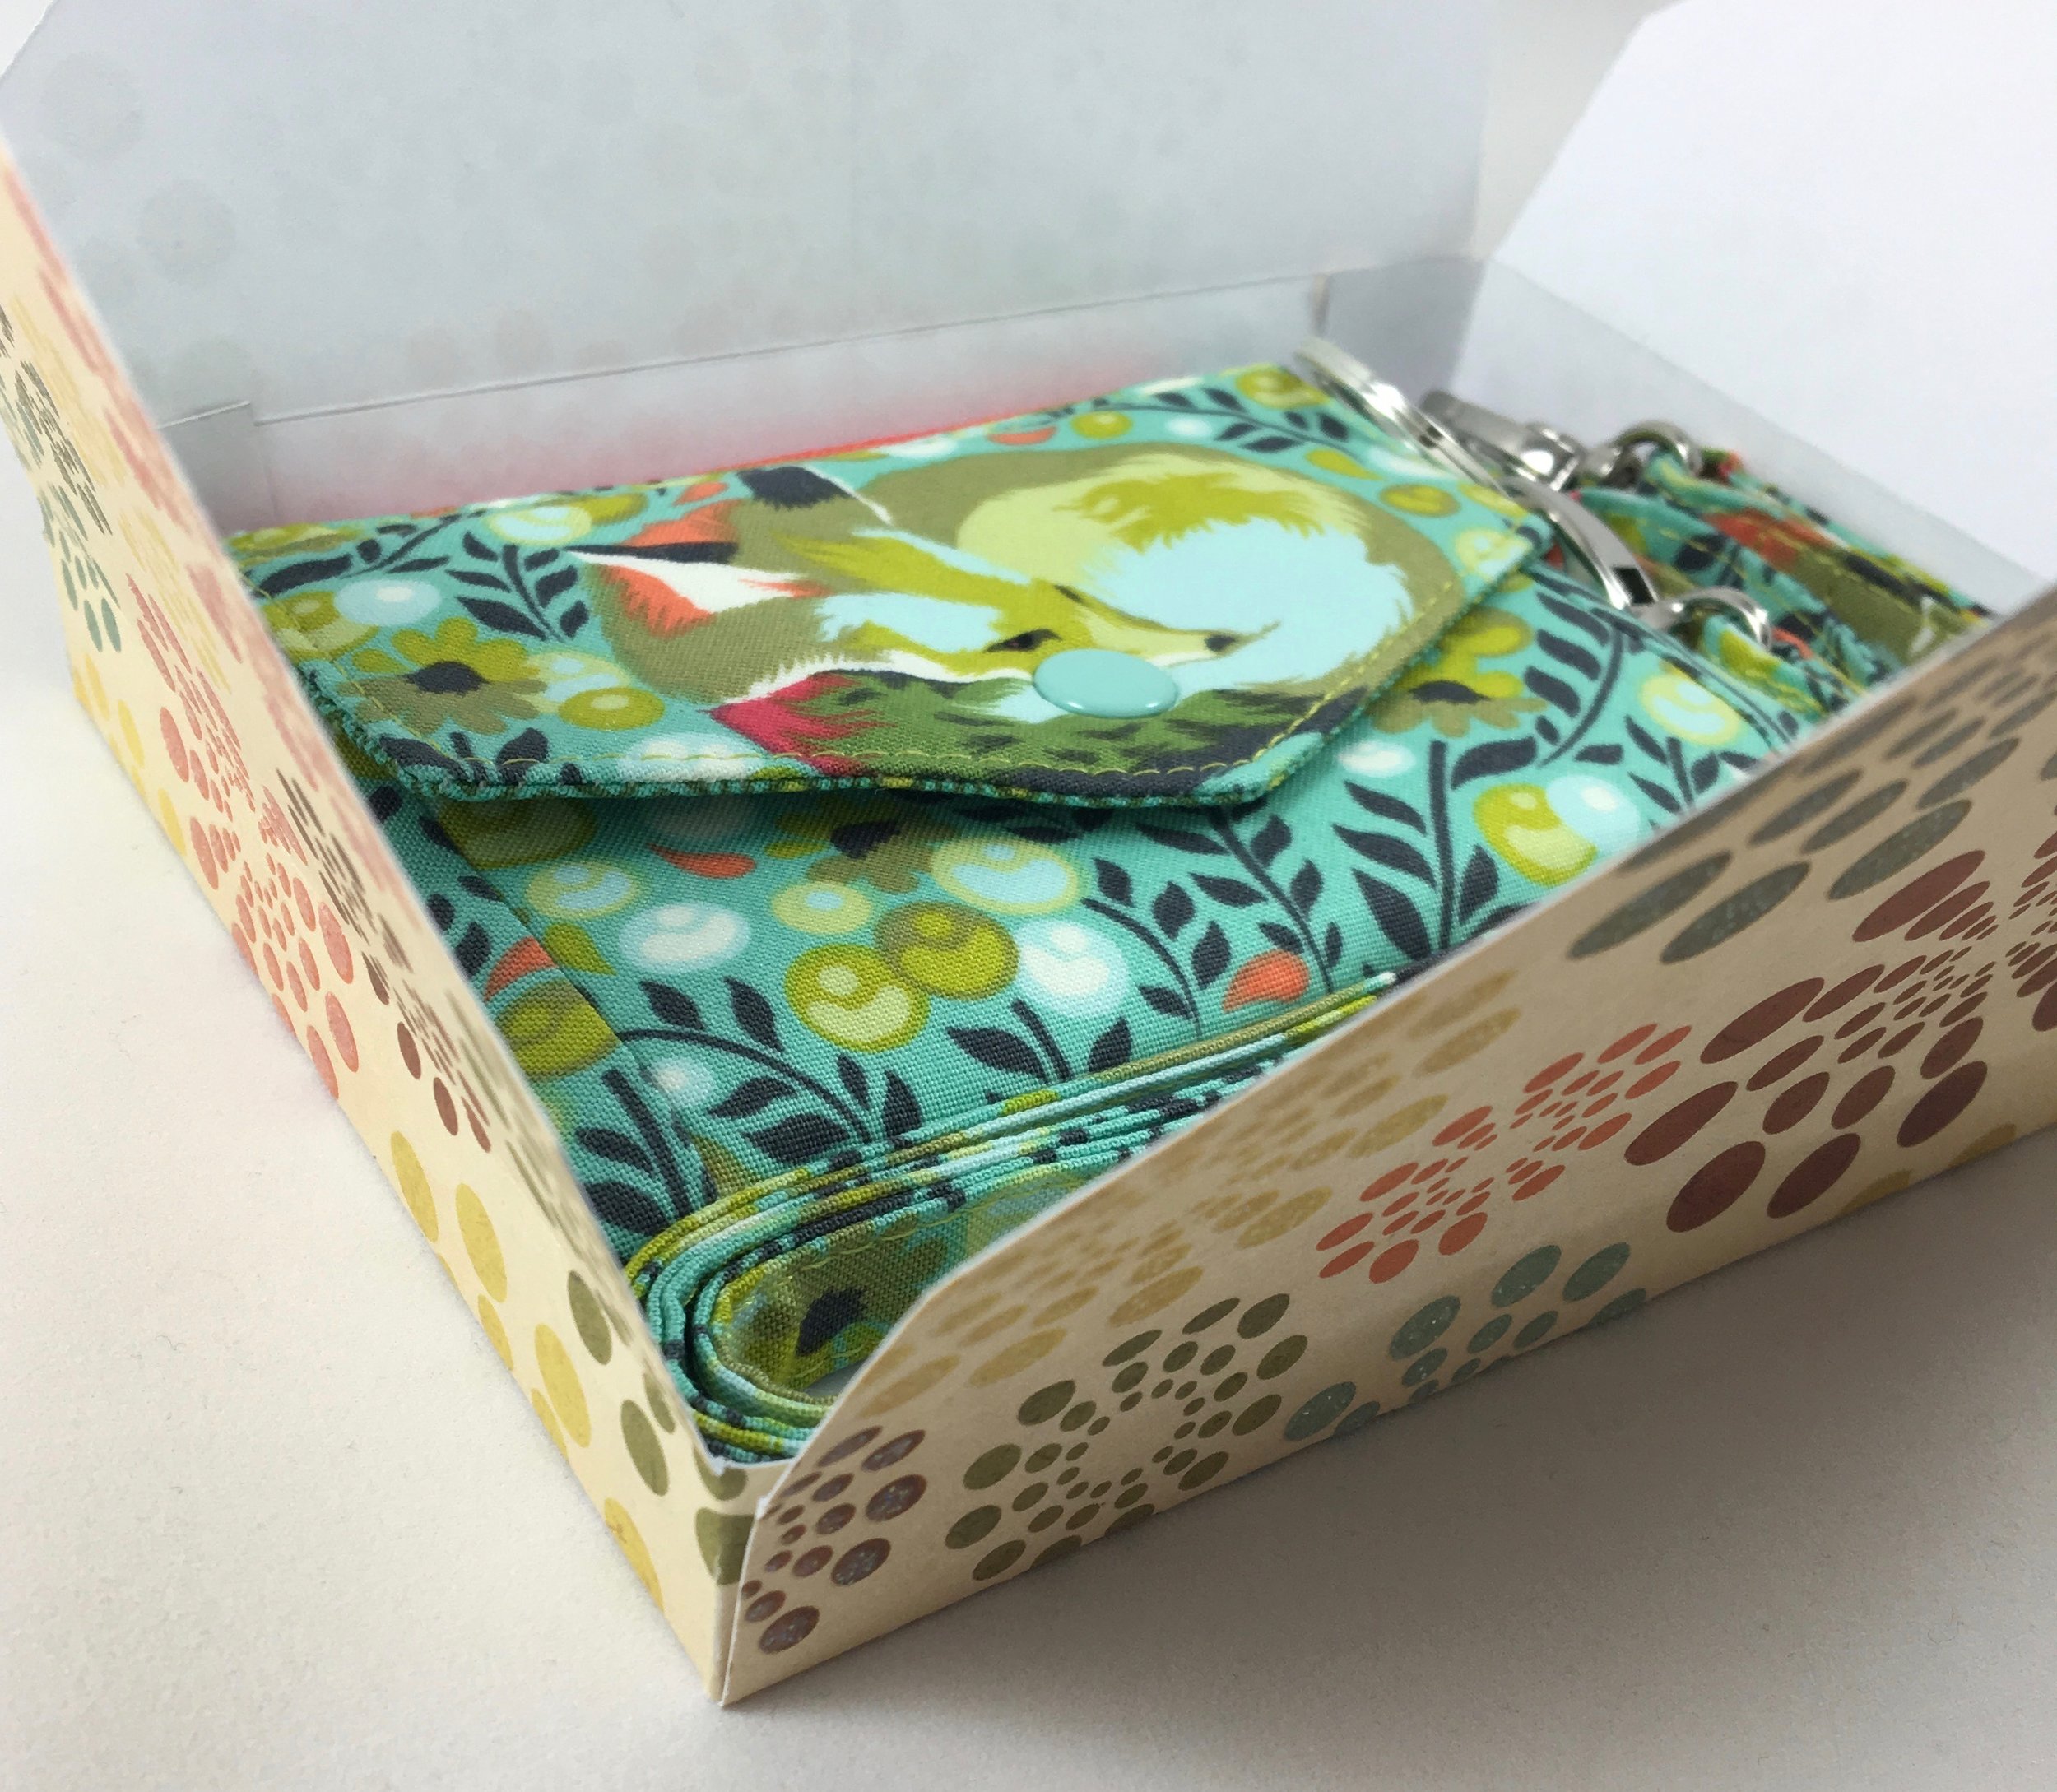
In the photos below, you can see how I position everything in the box so that it fits well. Then as the recipient opens their pretty gift box, she sees the entire handcrafted-by-you-especially-for-her Kristine ID Wallet!
Having a few gift boxes available for sale at a craft fair, may help sales - someone may be buying a Kristine ID Wallet for themselves and then when they see the gift boxes, they may decide that they would love to gift a couple more wallets!


Have fun making these gift boxes for your Kristine ID Wallets and have even more fun giving them as gifts! If you don't have the Kristine ID Wallet pattern, you can purchase it and all other Uniquely Michelle sewing patterns in the Uniquely Michelle website shop, the Uniquely Michelle Bluprint pattern shop or the Uniquely Michelle Etsy shop.


