Adding a Cross-Body Strap to the Lindsay Wristlet - Part 2
Michelle Burke
Today is day six of Lindsay Wristlet Week! I am excited to finish sharing with you a tutorial on making a cross-body strap for the Lindsay Wristlet! Yesterday we cut out the fabric and interfacing and gathered everything we needed. We also made and added the second anchor piece for the cross-body strap to attach to. Today we will make the strap itself!
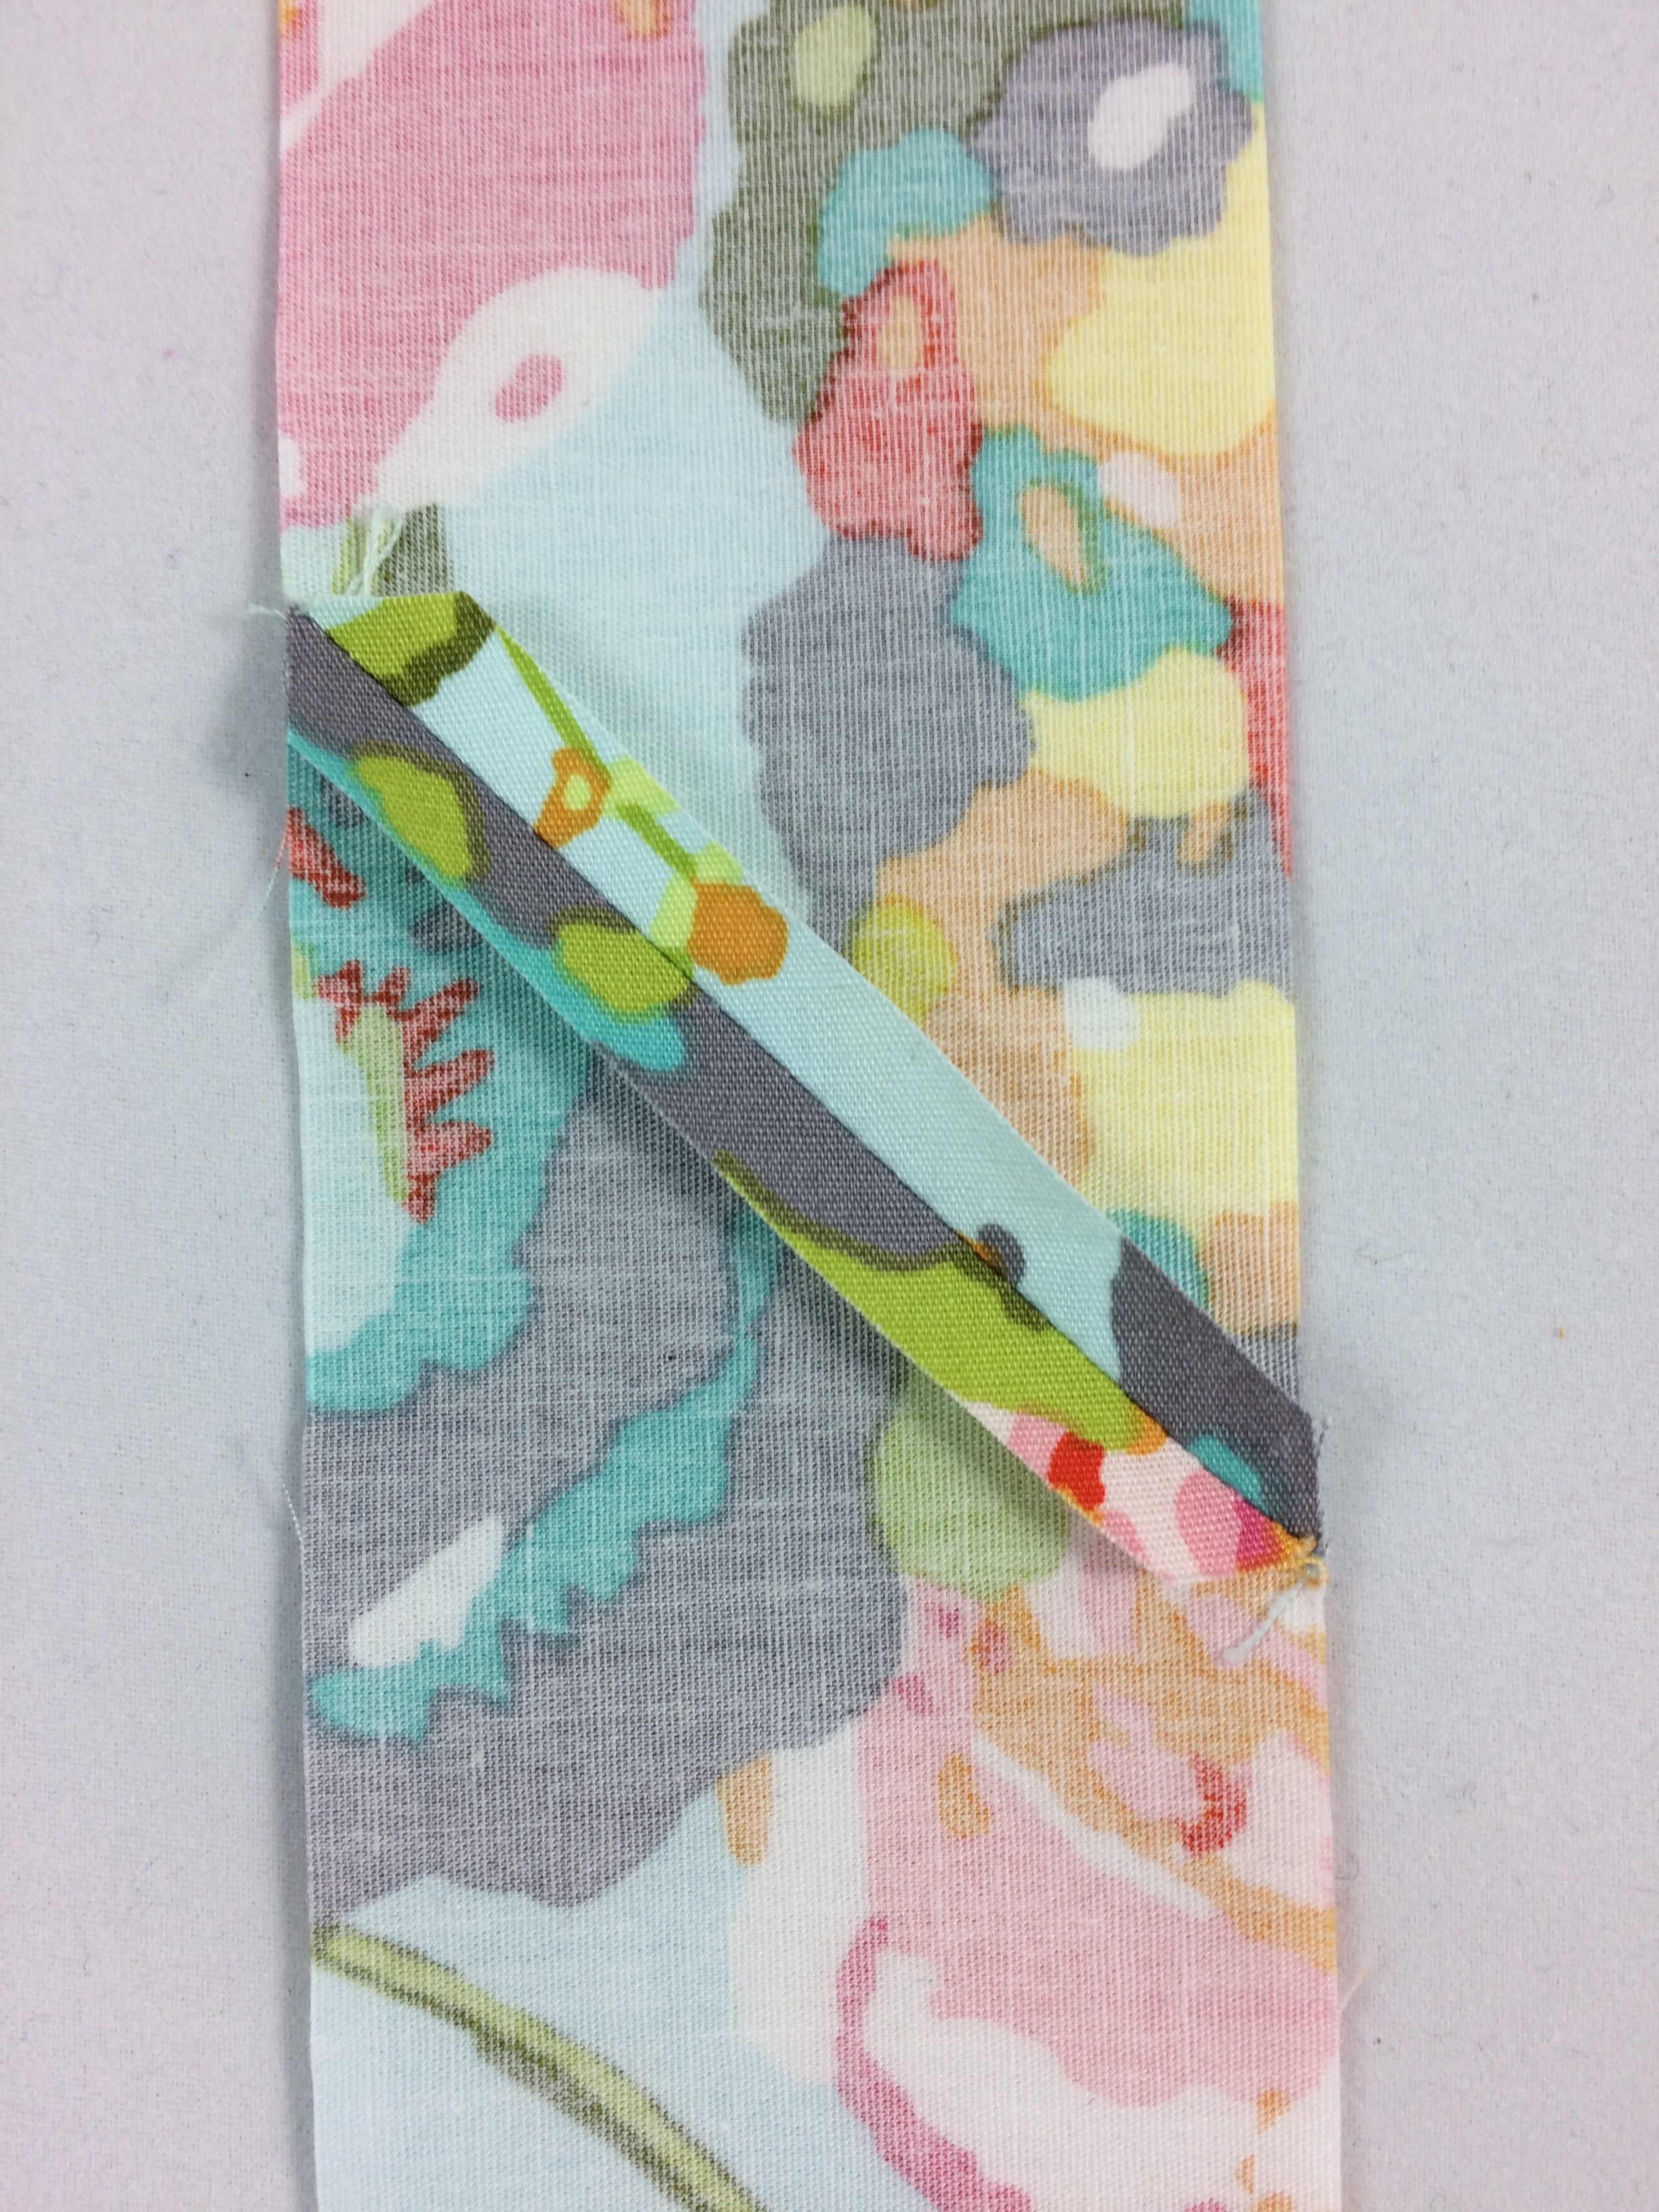
To make the cross-body strap, we need to start by sewing the two strips of fabric together. I like to do this on the bias because it makes it so that the adjustable slider can more easily go over the seam in the strap. Place one end of each strip right sides together so that they are at a right angle to each other. Draw a diagonal line across the square made by the intersection of the two strips of fabric from one corner to the opposite corner (see the photo on the left below). Make sure the two short ends of the strips are on one side of the line and the two long ends of the strips are on the other side of the line. Pin the strips together and sew on the line. Trim the seam allowance to ¼” and press the seam open. Now you have one long strip of fabric!
Next, it's time for interfacing. Following the manufacturer’s instructions, fuse the interfacing to the wrong side of the fabric, centering the interfacing down the middle of the strip of fabric and leaving 2” at each short end of the fabric strip with no interfacing. You may need to cut your interfacing strip shorter so that you have 2” of fabric without interfacing at each short end. If you don’t have one long strip of interfacing, just butt the ends together as you fuse them to the fabric. I fuse the interfacing right over the seam in the strap.
More pressing ahead! Fold both short ends of the Cross-Body Strap to the wrong side ¼” and press. Now fold the strip long raw edges wrong sides together and press. Next fold the raw edges of the long sides into the center fold that you just made and press. Give the Cross-Body Strap one more good press with all the folds in place and we are ready to sew! Top-stitch 1/8" away from each long edge of the strap through all the layers.
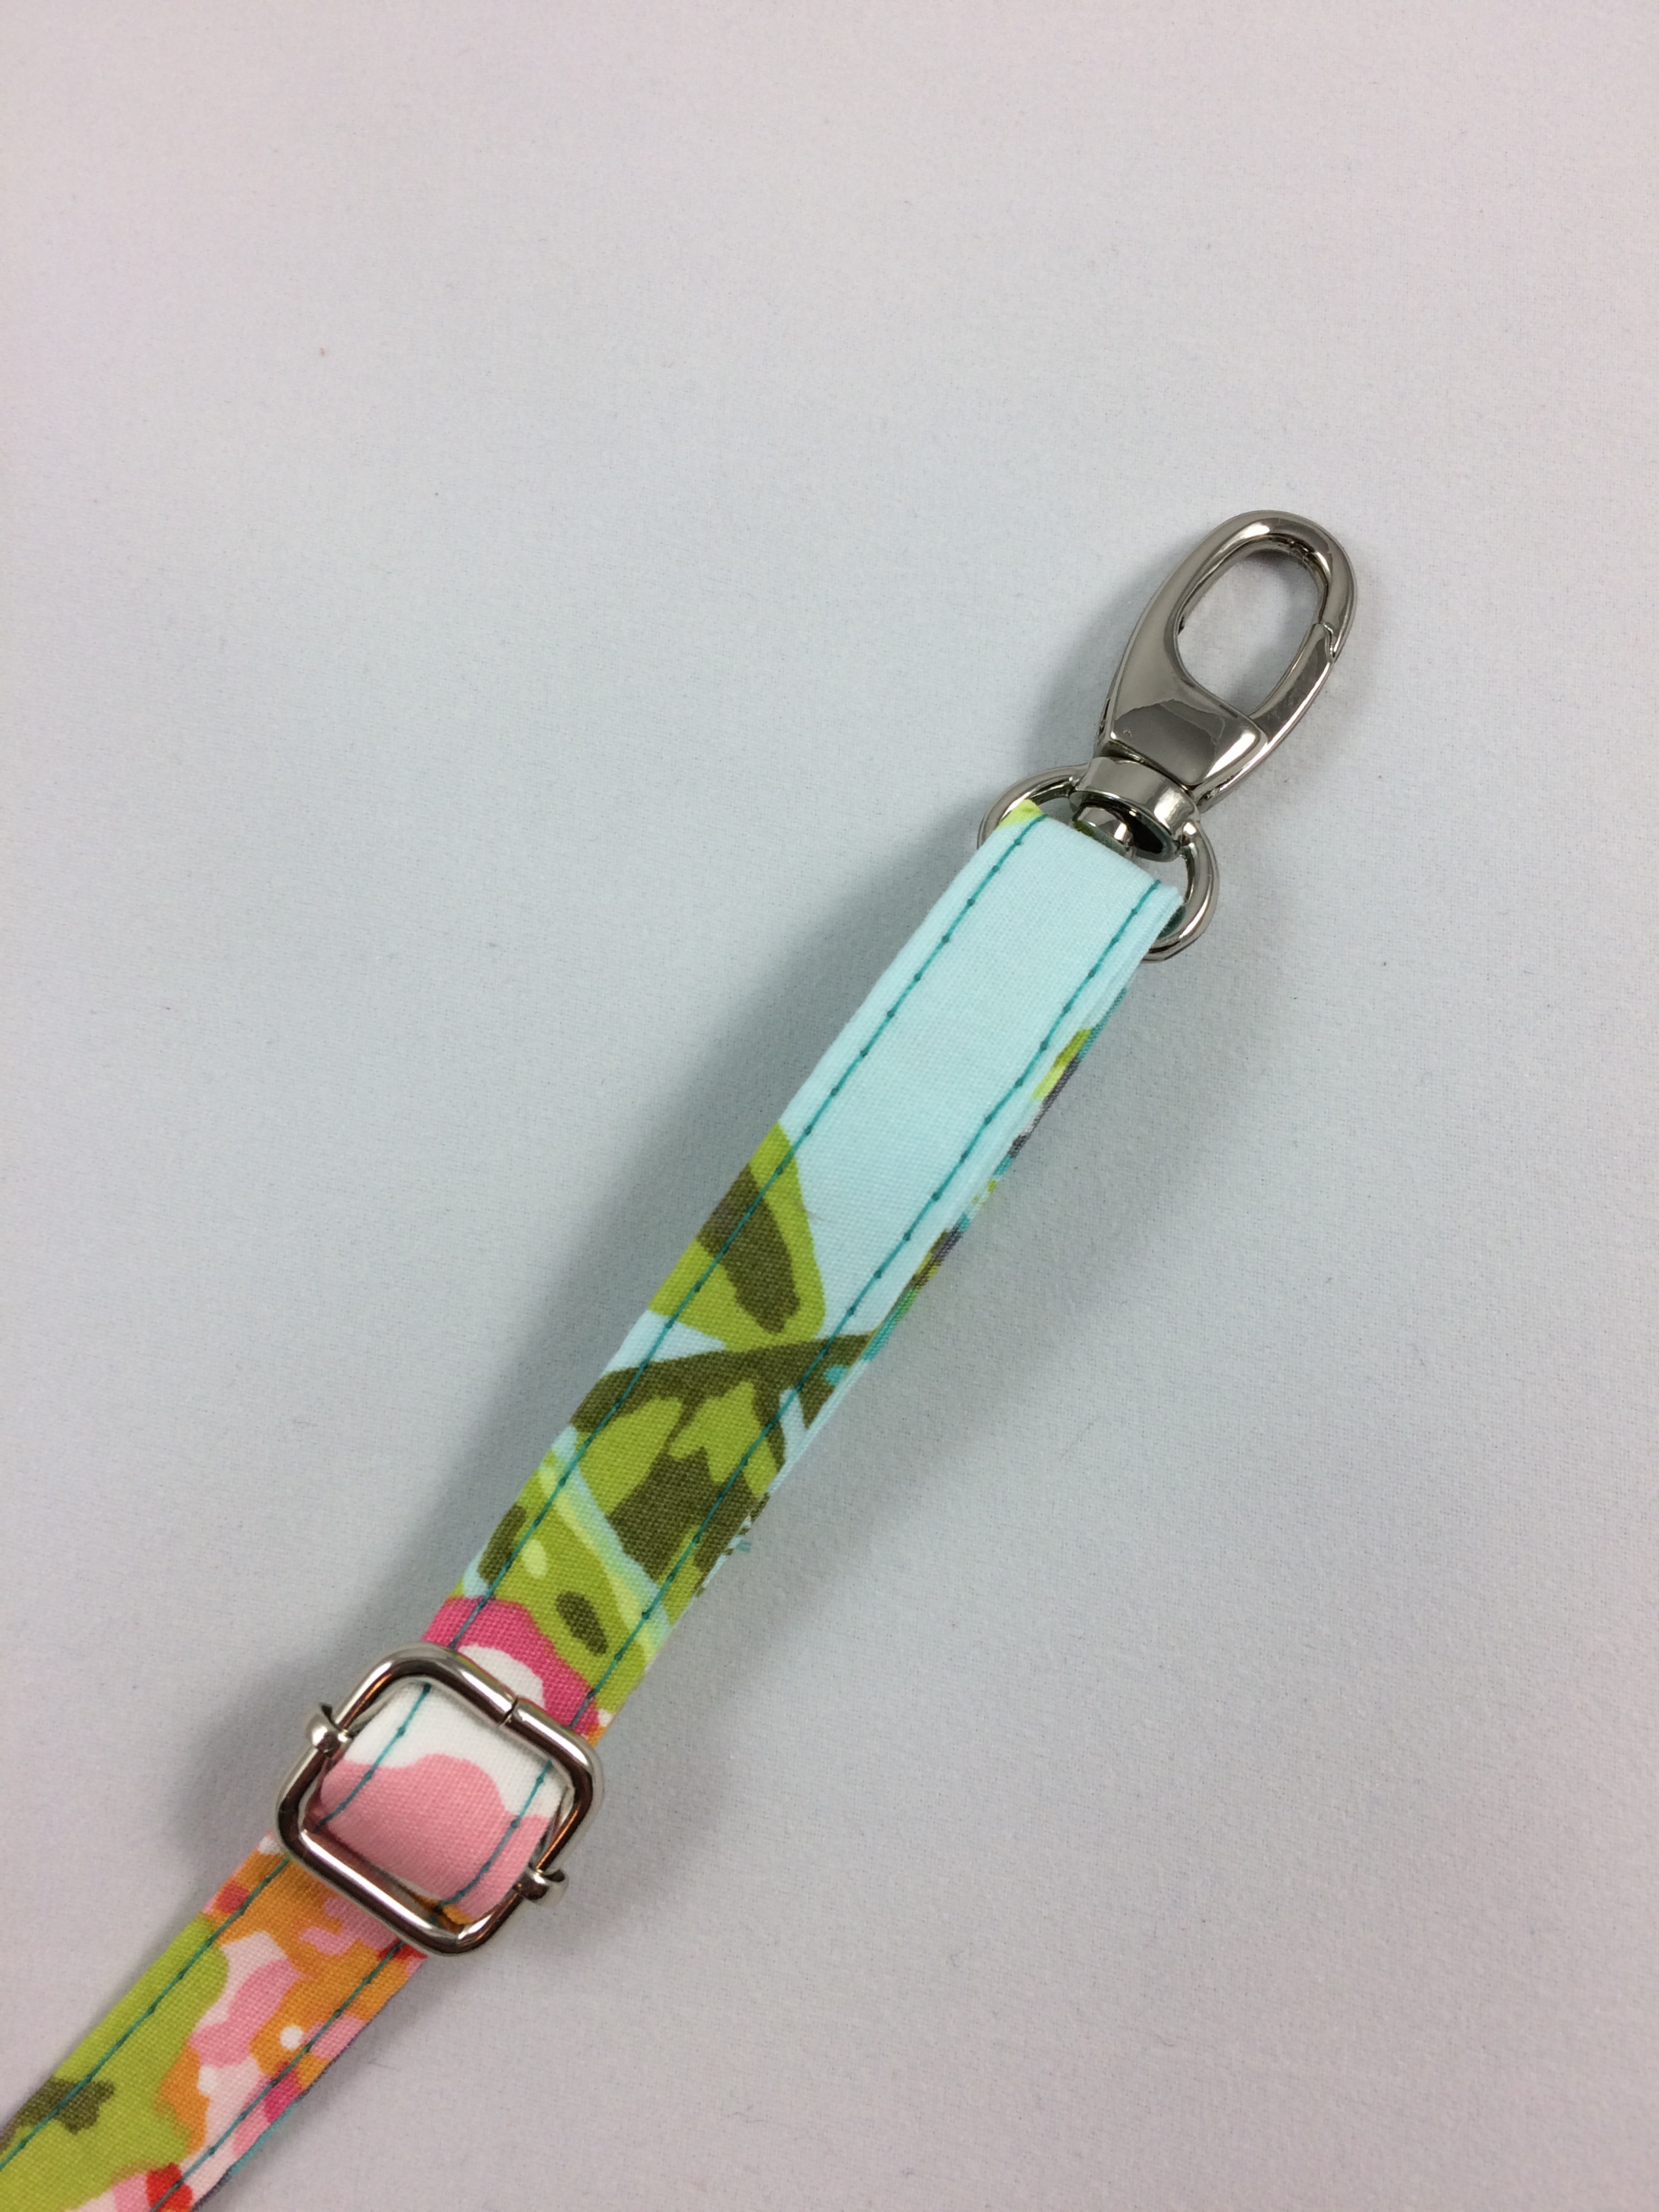
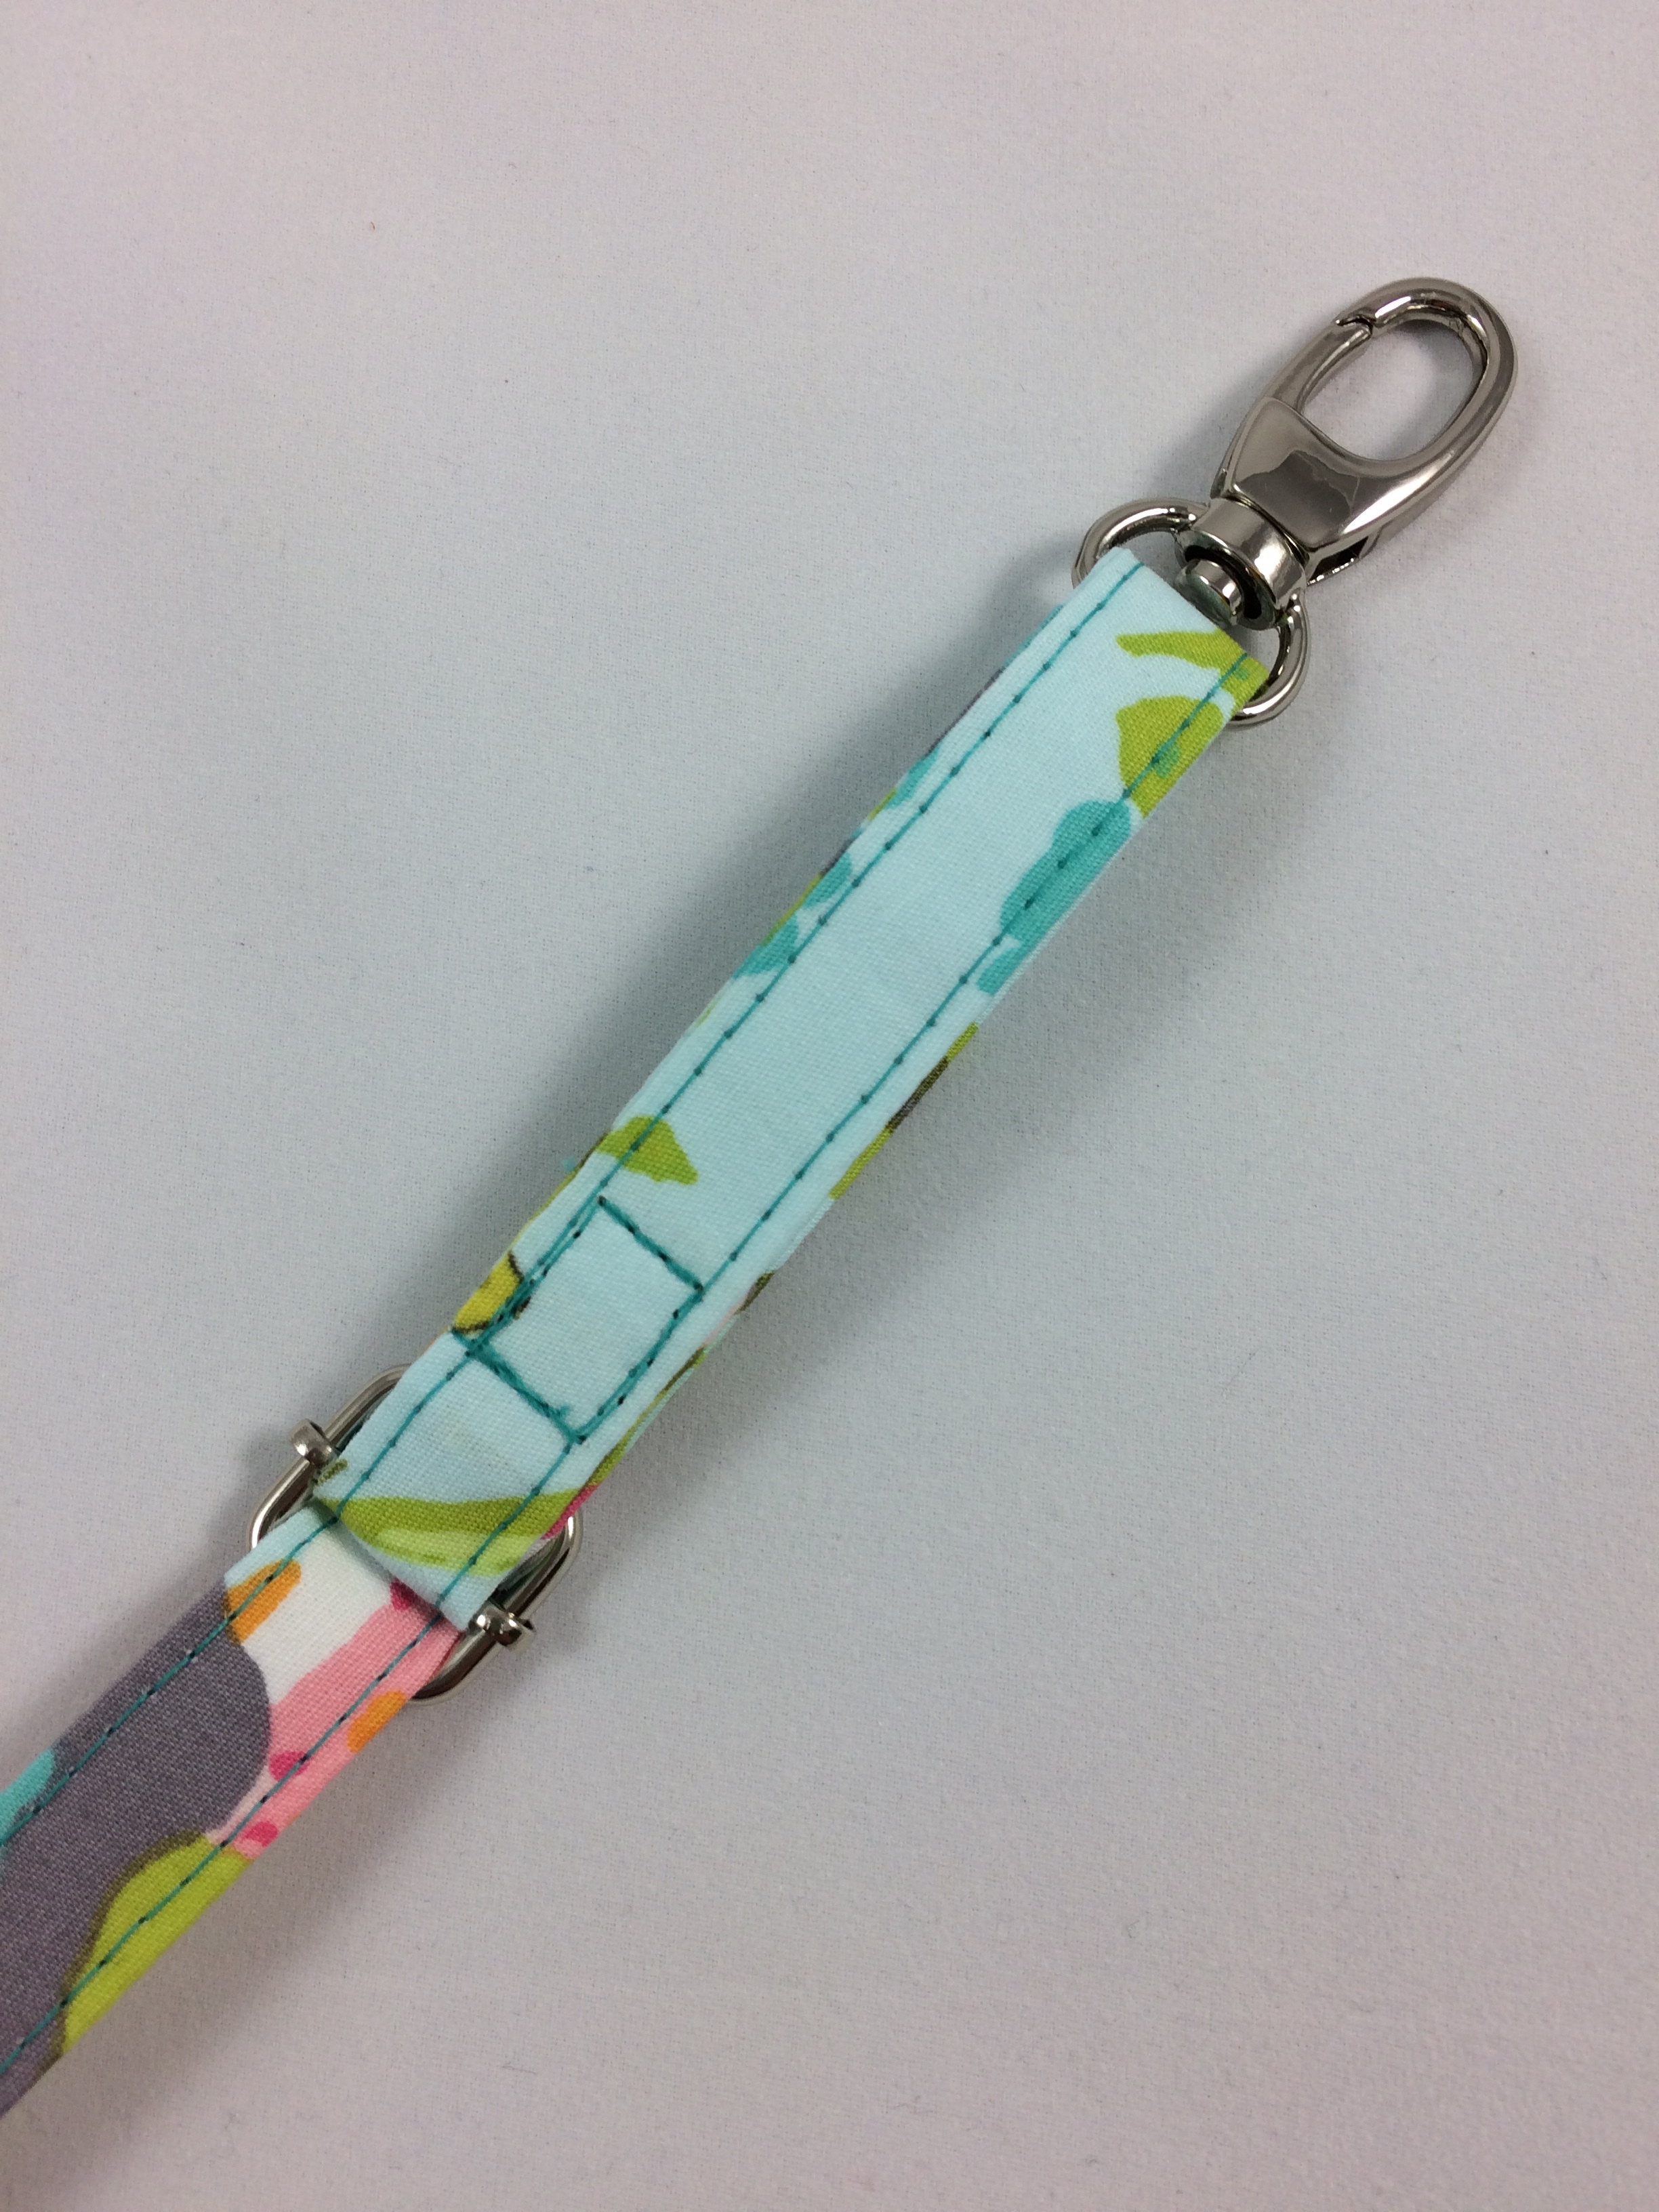
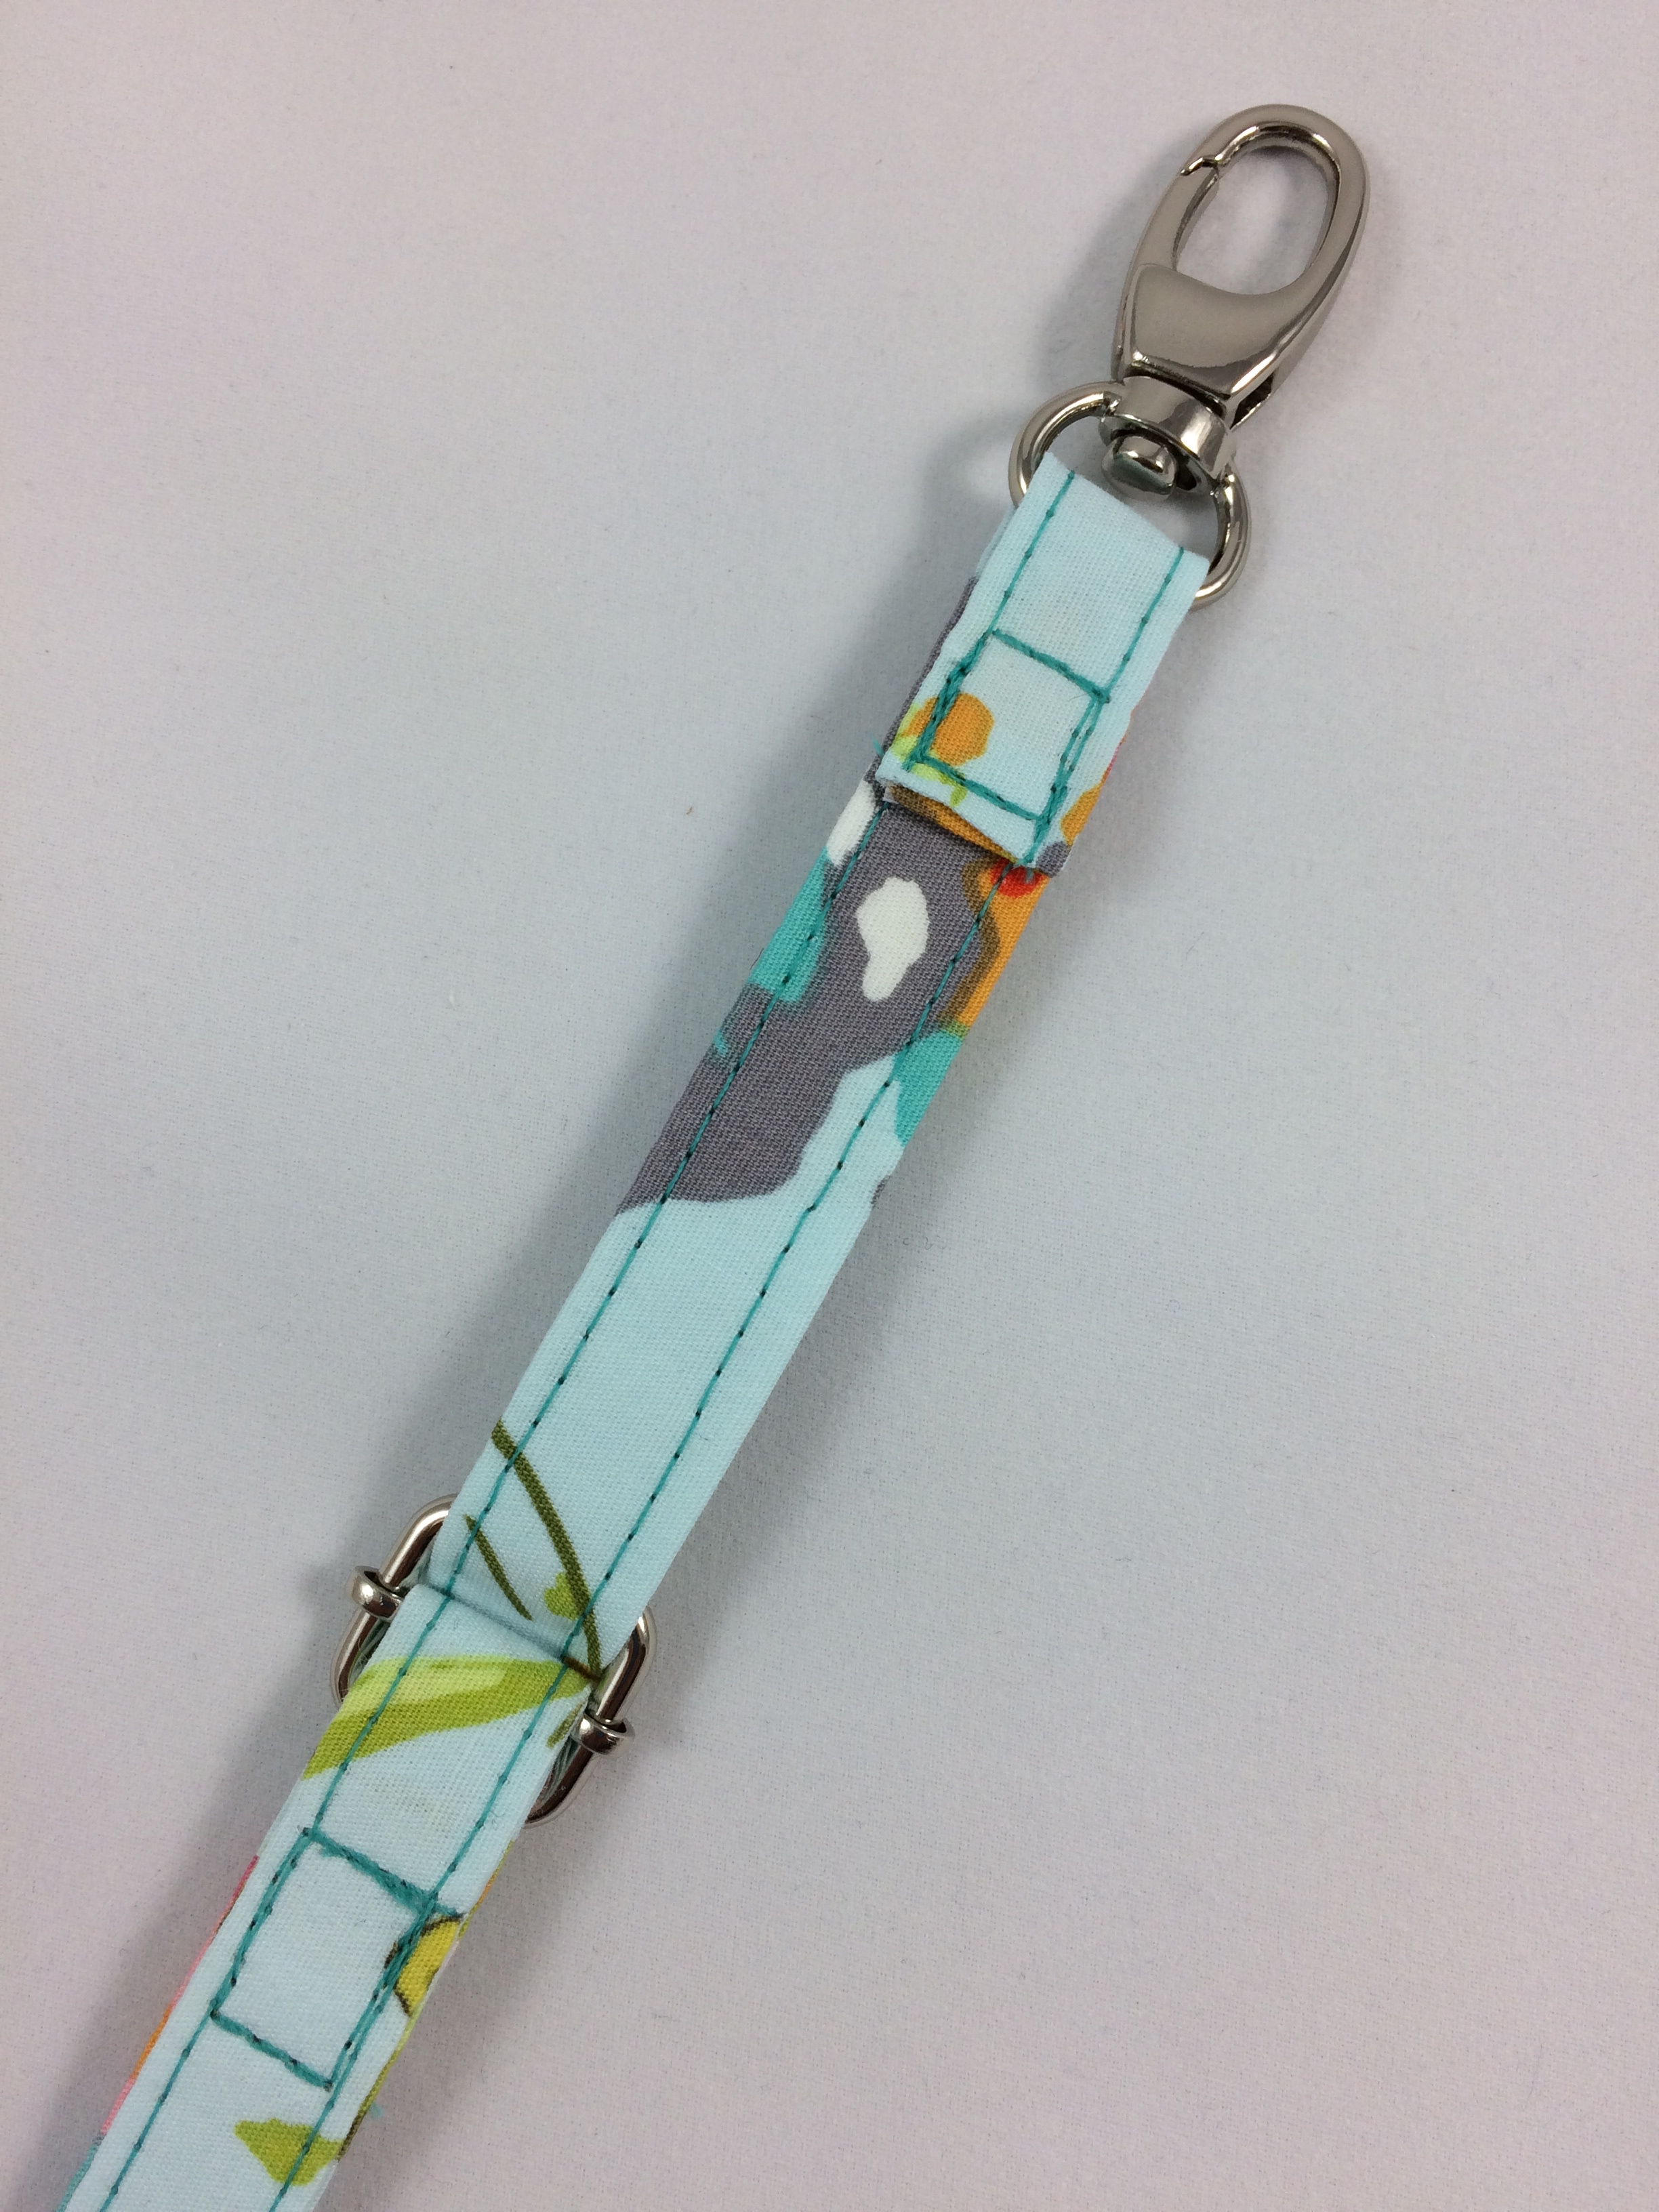
Adding the hardware to a cross-body strap can seem a little daunting the first few times you do it. Start by putting one end of your strap over the center bar of the adjustable slider so that 1” of the end of the strap overlaps on the other side. Sew this strap end in place with a little square near the end of the strap going through both layers of the strap.
Loop the other end of the strap through one of the swivel snap hooks and then bring that end back to the adjustable slider. Keeping any twists out of the strap, put the end of the strap through the adjustable slider - up one side, over the center and down the other side of the adjustable slider.
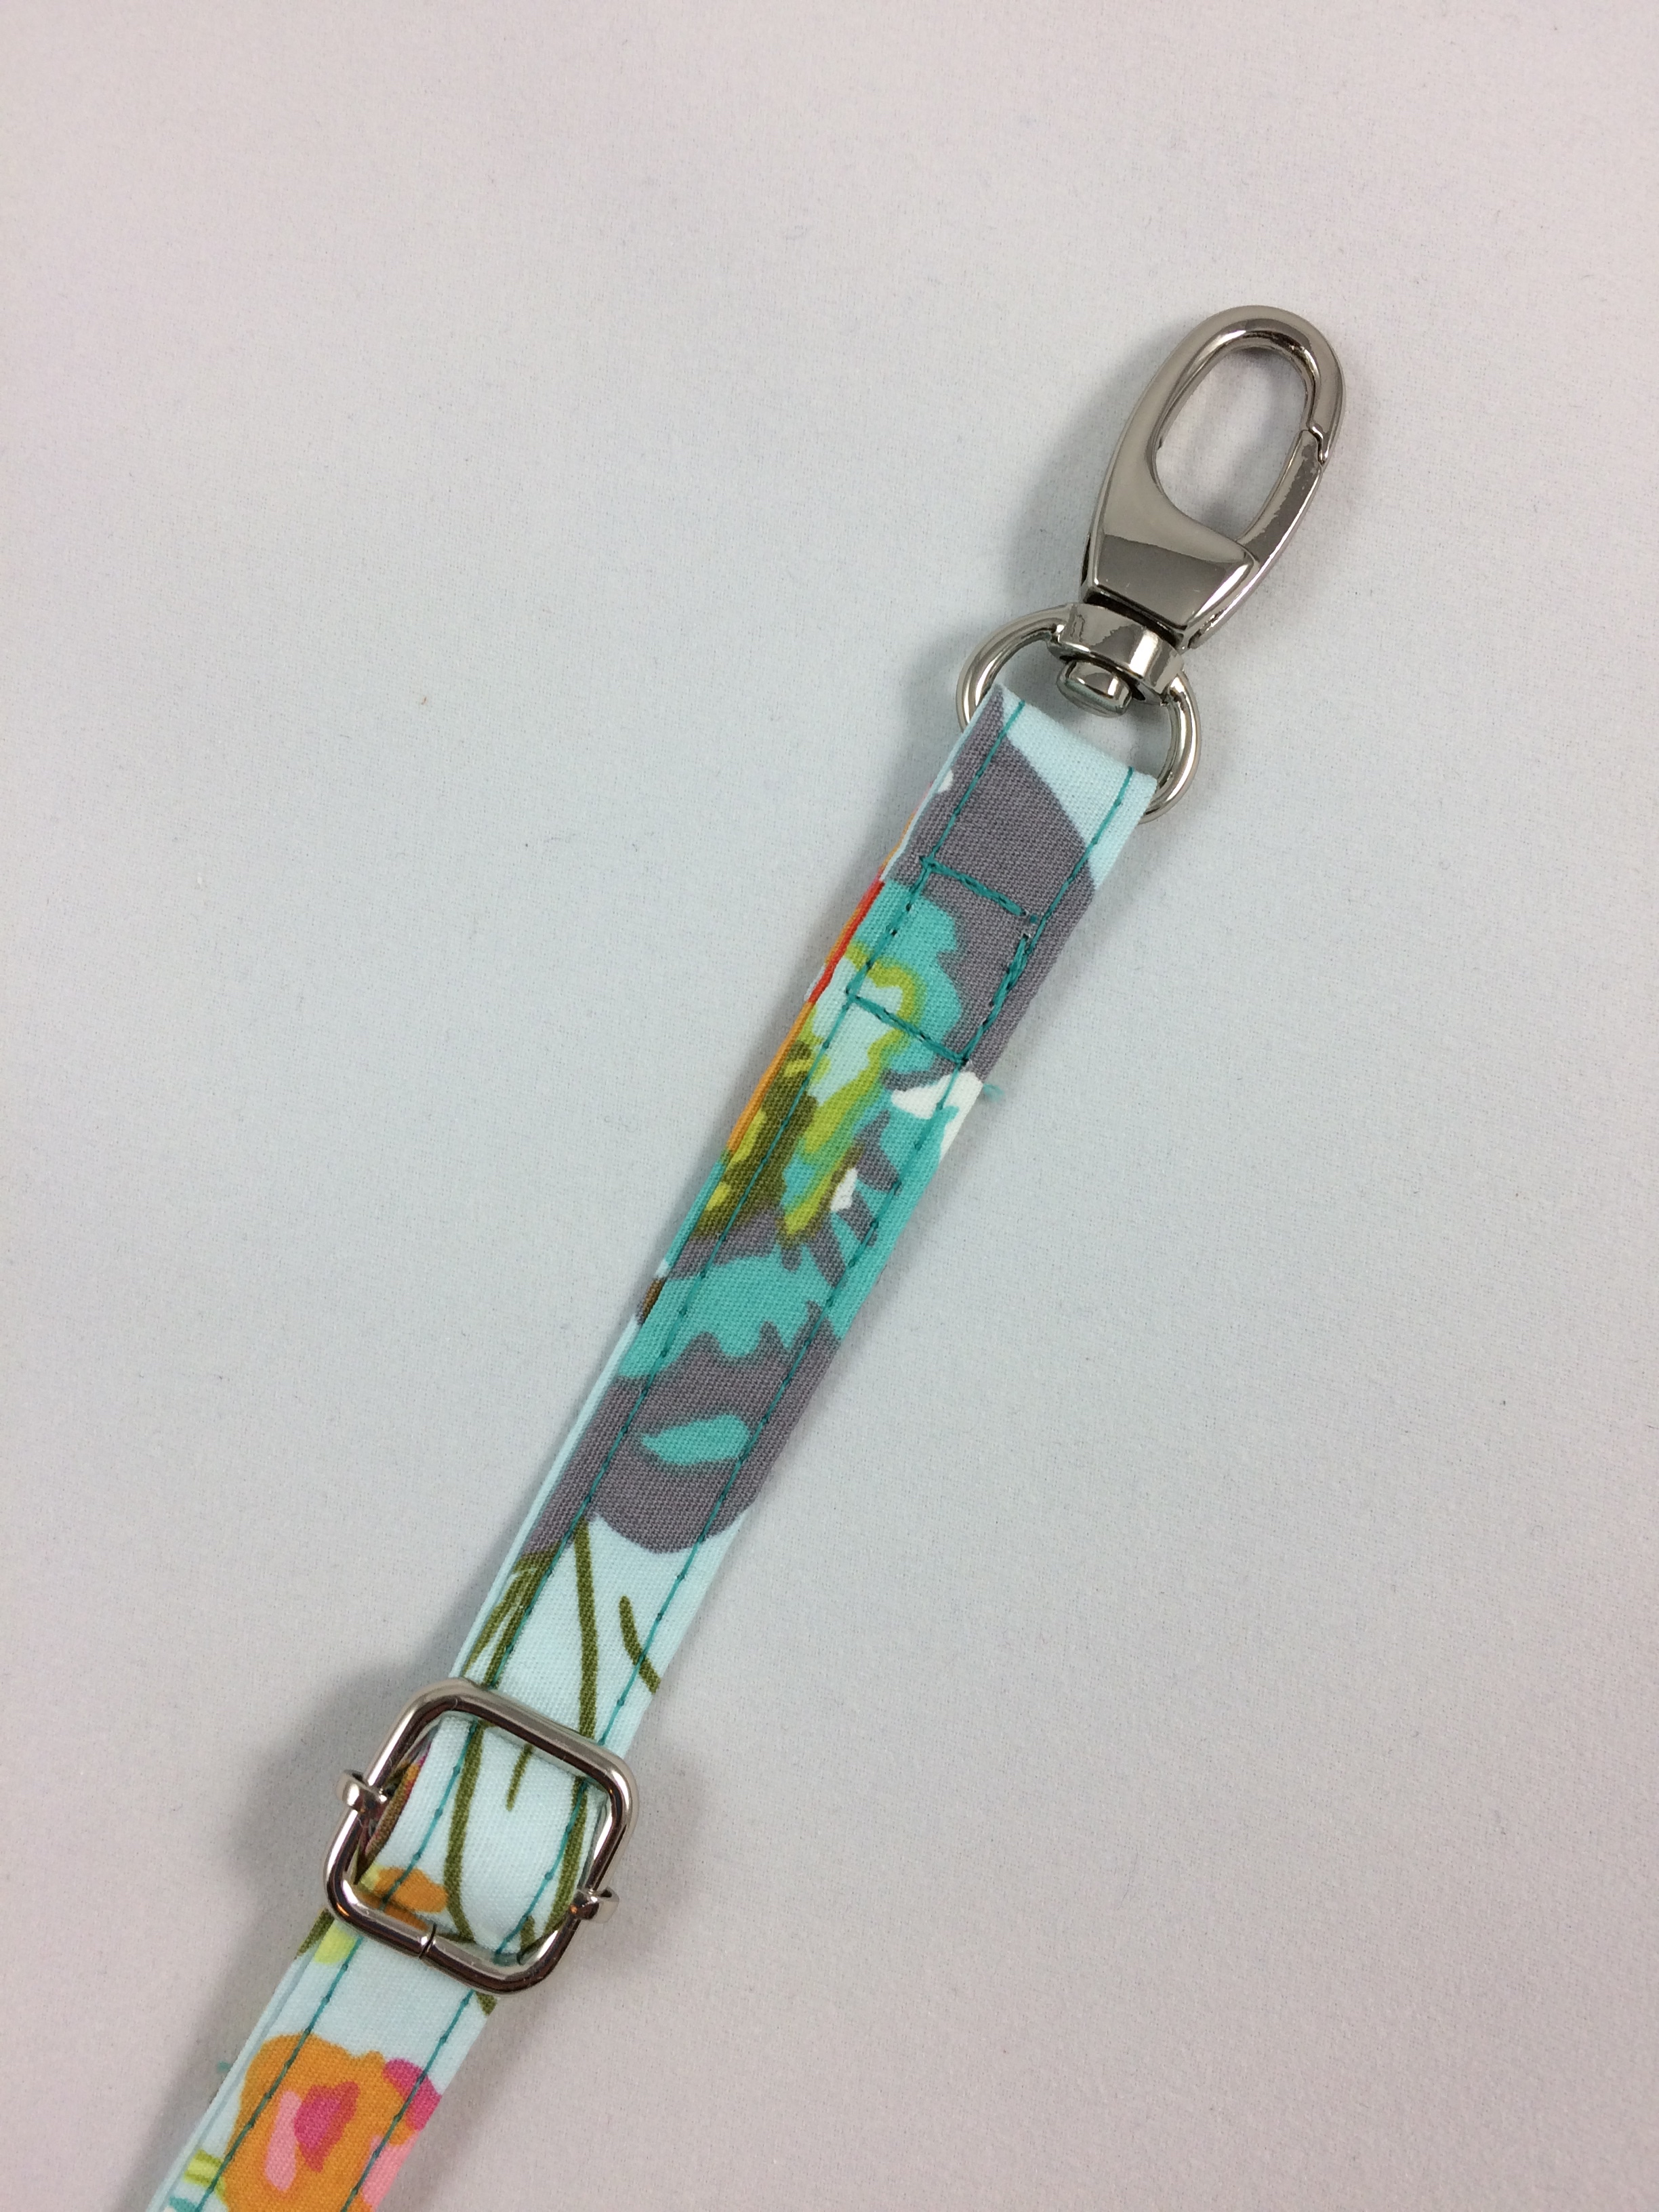
Now you just need to add the other swivel snap hook in the same way you added the adjustable slider to the first end of the strap.
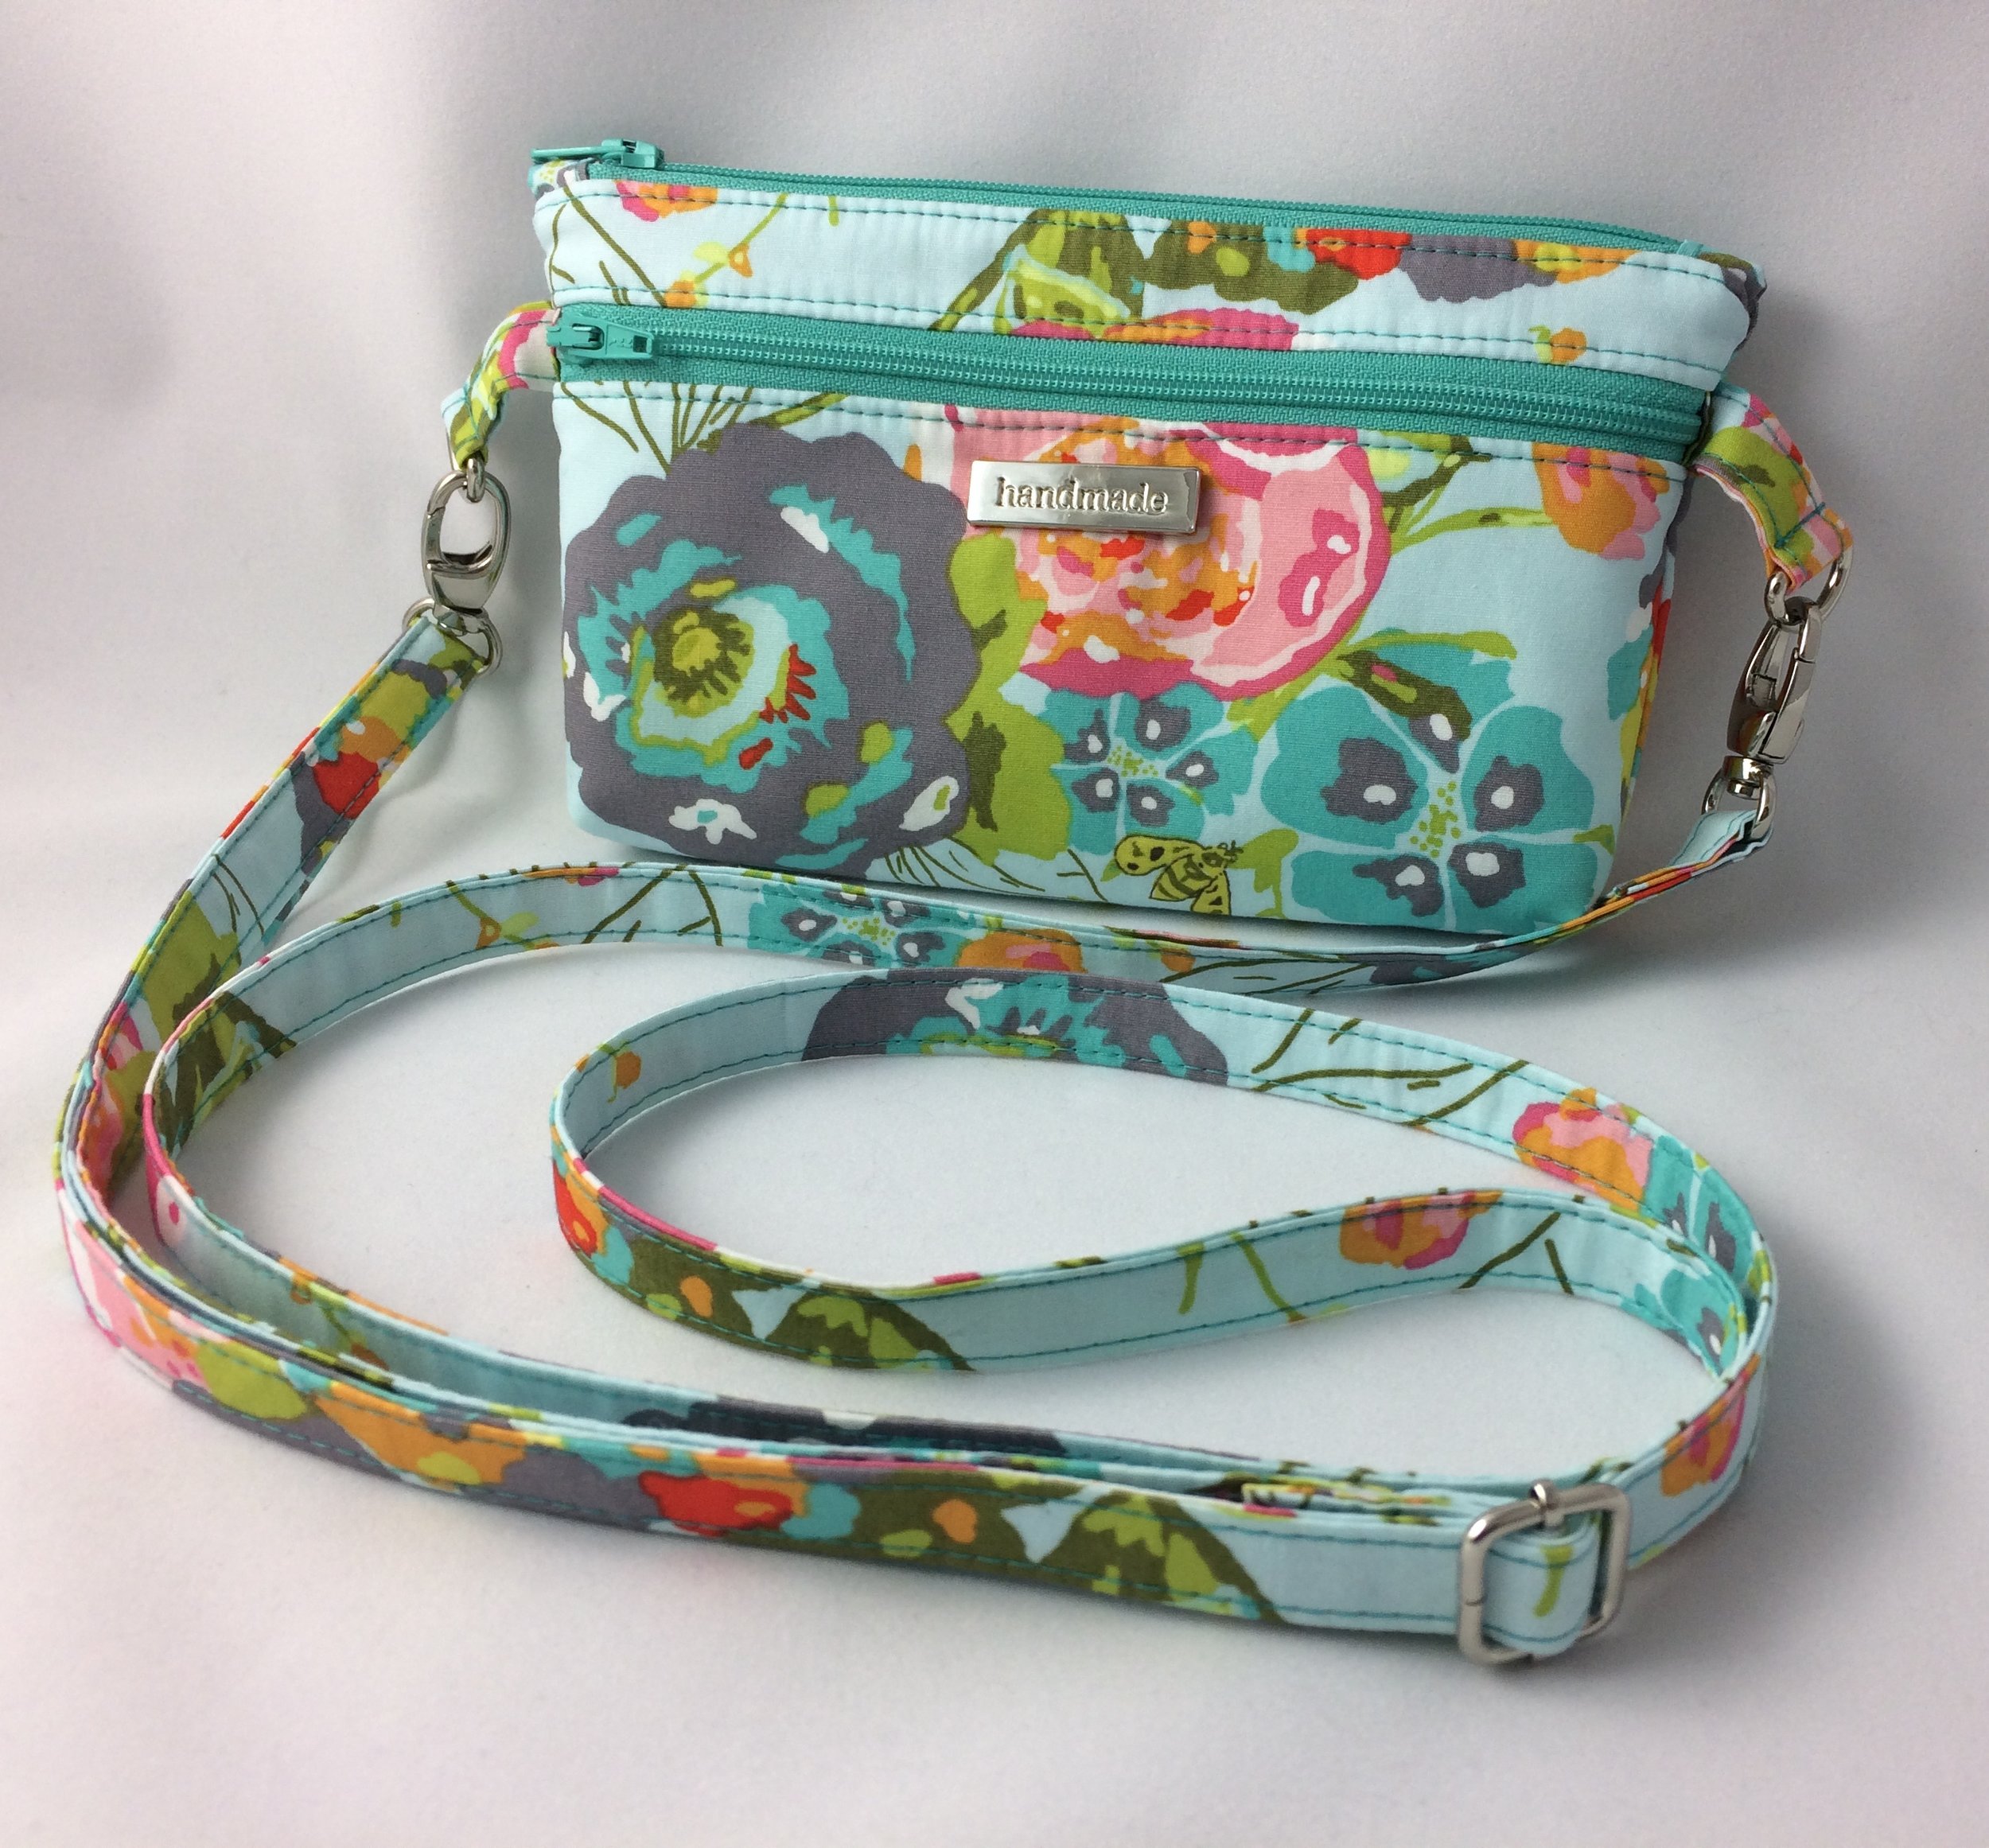
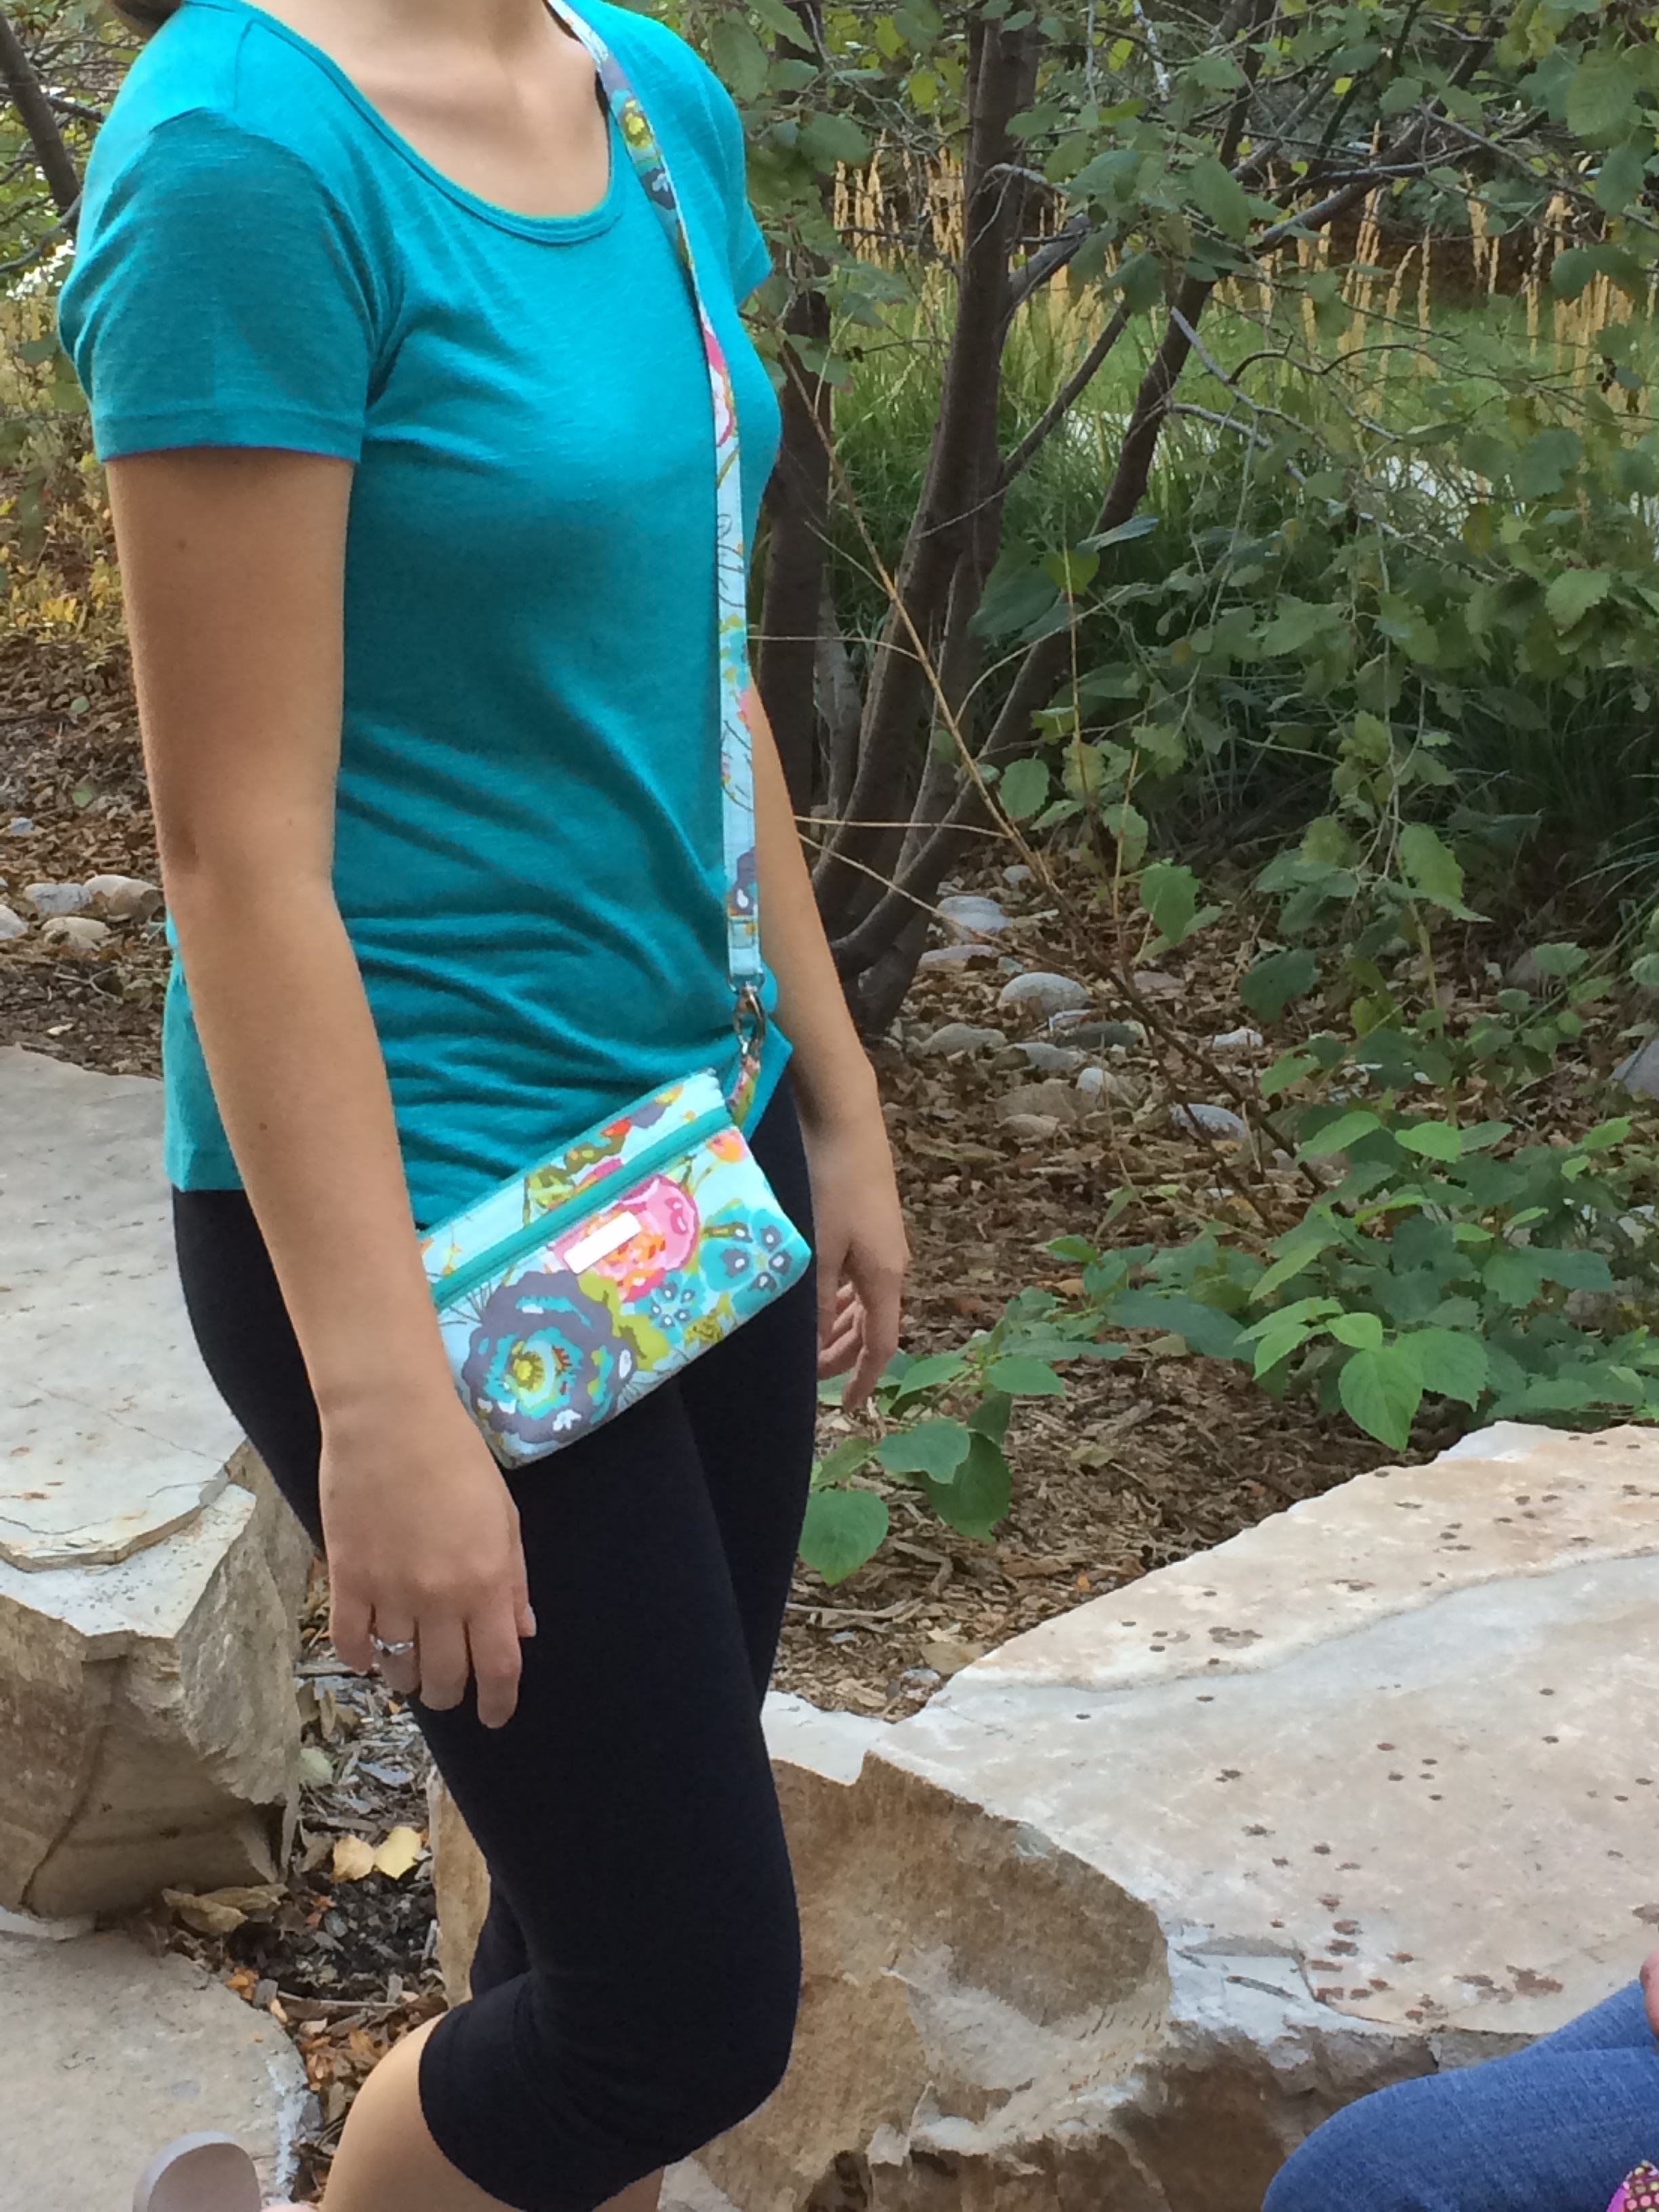
Your cross-body strap is now finished and ready to clip onto your Lindsay Wristlet! I love that the Lindsay Wristlet can still be used as a wristlet, but now can be used as a cross-body bag too!



Don't forget the SALE that is going on all week! You can get 15% off all Uniquely Michelle patterns by entering the coupon code LINDSAYWEEK during checkout in my Website Shop or in the Uniquely Michelle Etsy Shop. You can also purchase patterns from the Uniquely Michelle Craftsy Pattern Shop where I have reduced the prices to reflect the 15% off. The sale runs through this Sunday, October 23rd at 10:00pm (MDT).
Please share pictures of your Lindsay Wristlets and any other Uniquely Michelle creations you make on Instagram (#UniquelyMichelle) and on the Uniquely Michelle Sewing Patterns FB group! I love seeing everyone's creations!


