Snaps - Installing Metal SnapSource Snaps
Michelle Burke
This week we are talking snaps here at Uniquely Michelle! We have already talked about the two different types of snaps, metal snaps on Monday and plastic snaps on Tuesday. On Monday, I explained why I think SnapSource’s SnapSetter Tool is the best tool for installing metal snaps. I love SnapSource snaps too, they come in so many different colors and sizes. Today, I will show you how to use the SnapSetter to install SnapSource metal snaps. This tool along with these snaps changed me from a snap hater to a snap lover! Just a quick reminder, the products I recommend are based on my use and opinion of them, I have not been given anything from the companies that make my favorite products nor do they even know that I wrote this blog series.
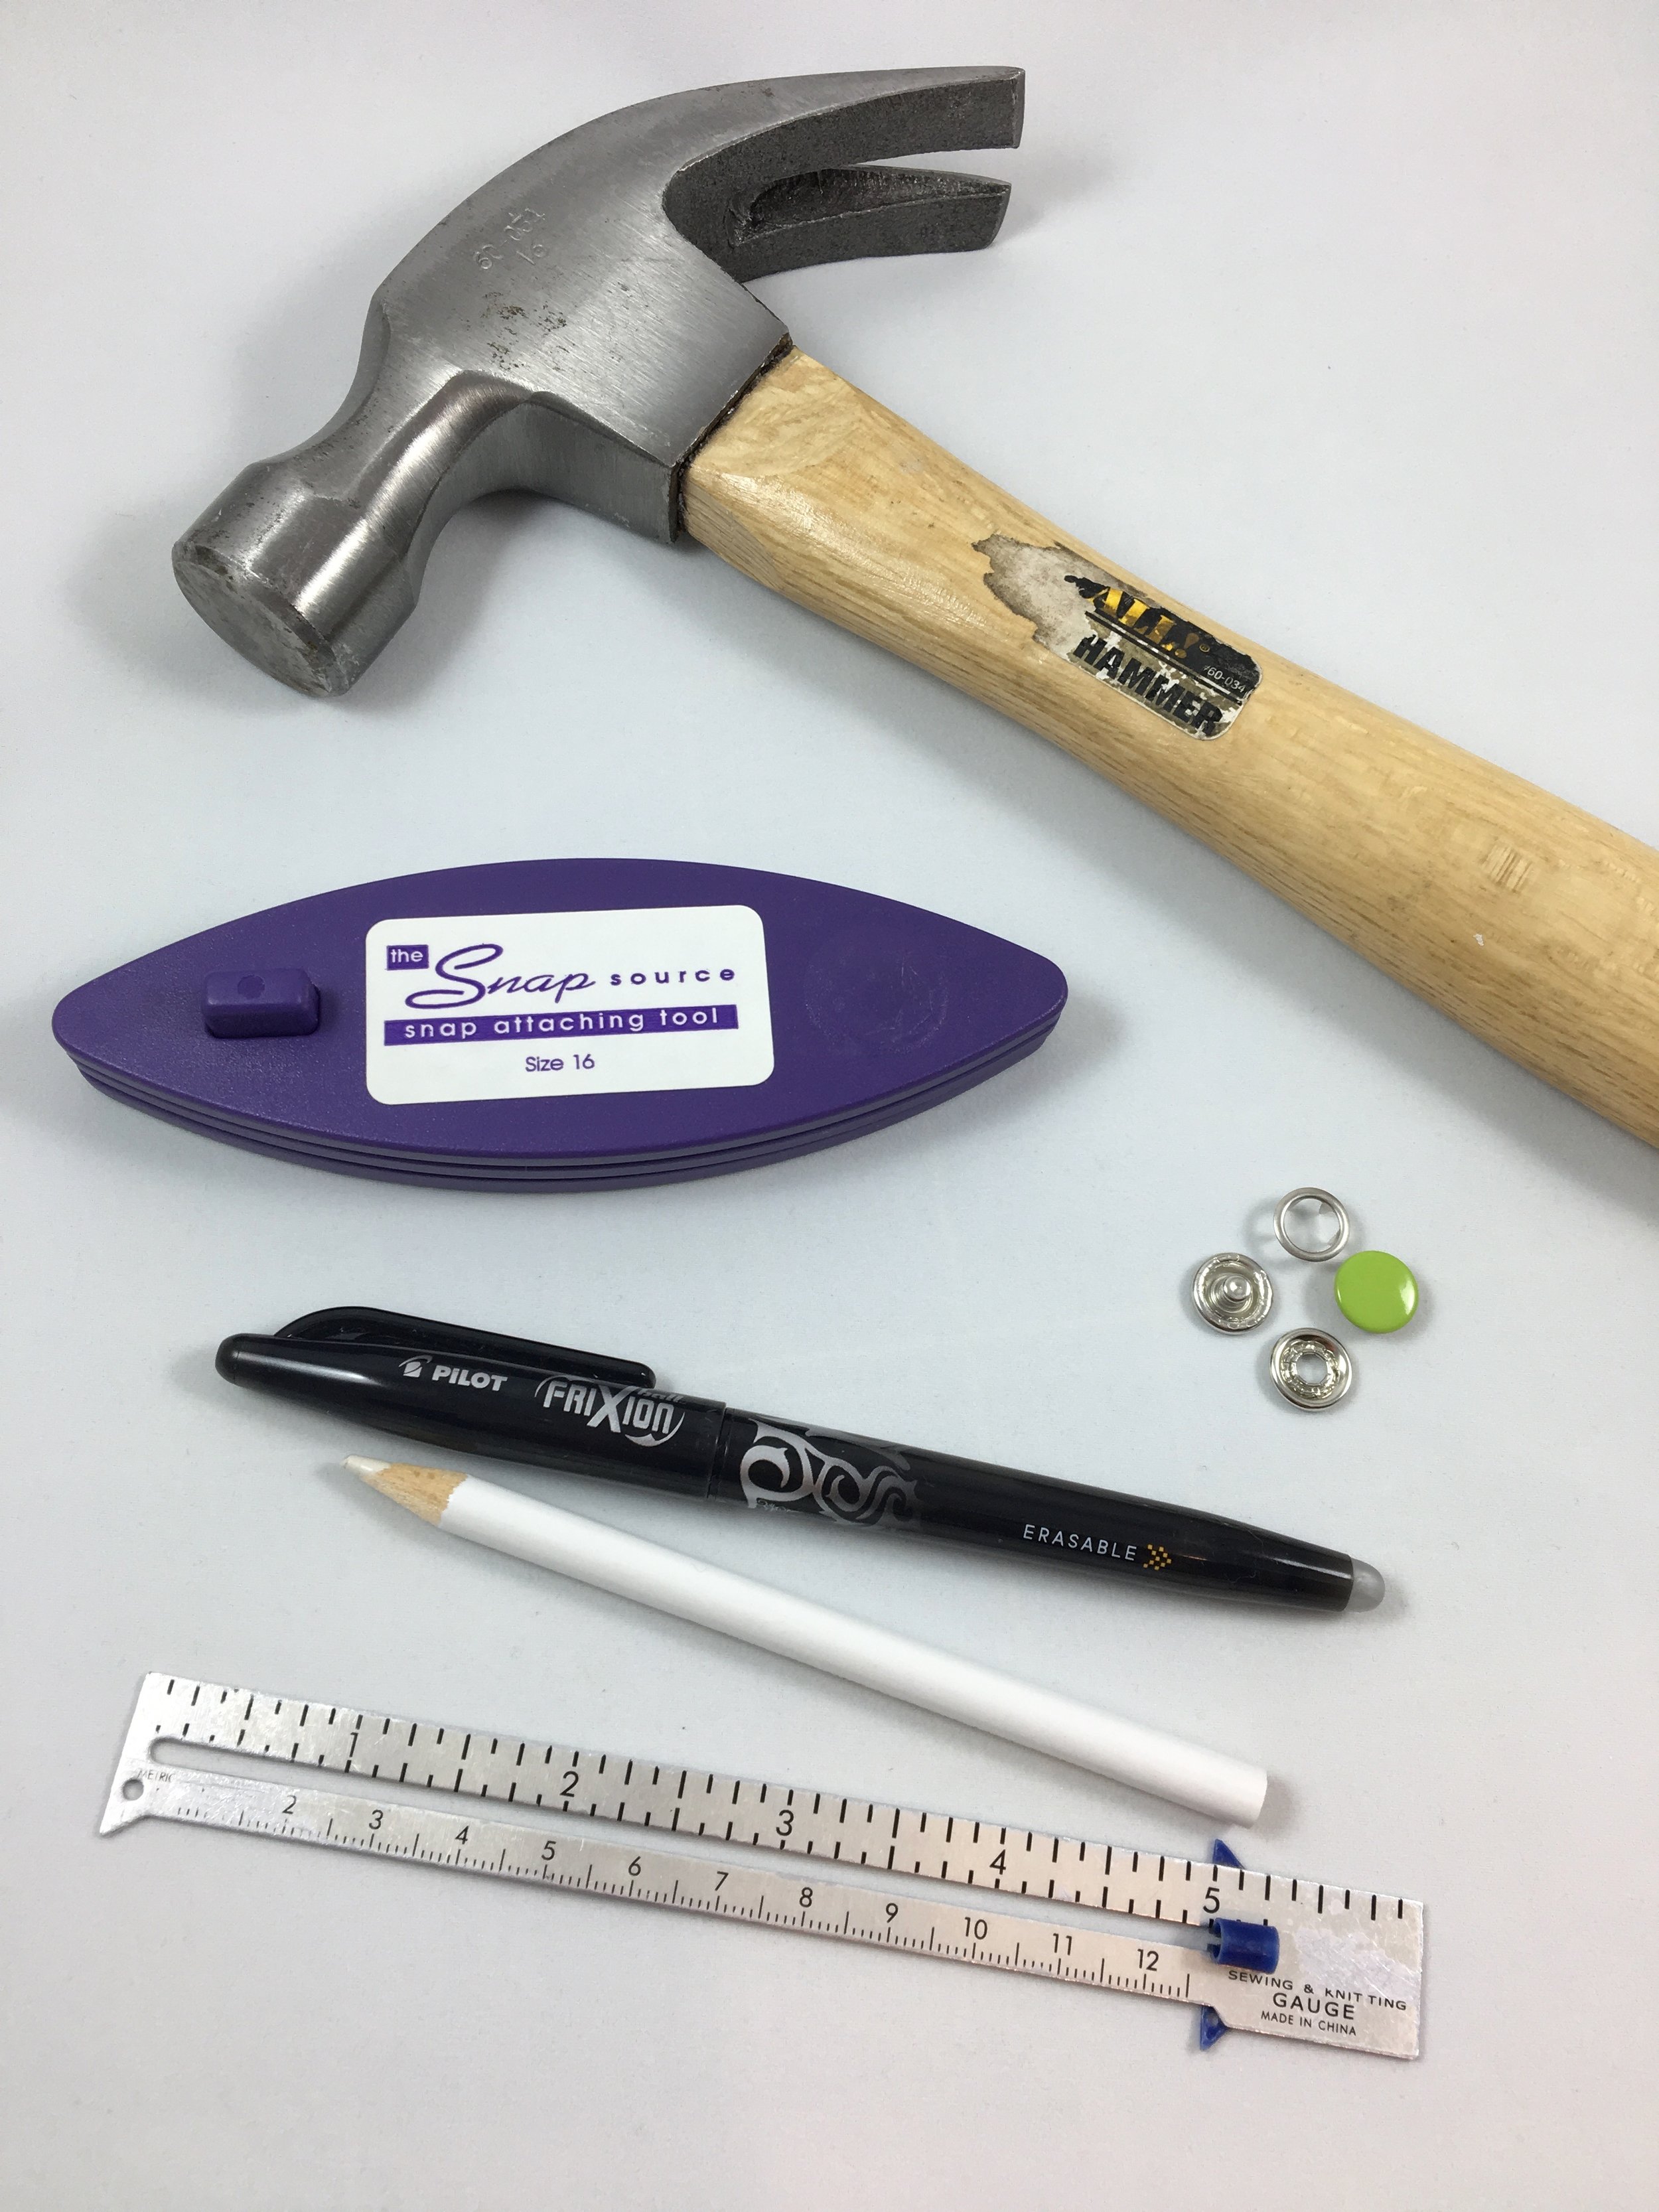
I am going to explain how to install a size 16 snap. The process is the same when using other sizes of snaps, but you will need an adaptor base for the SnapSetter if you plan on installing size 20 or 24 snaps. You will need the size 16 SnapSetter Tool and size 16 snaps (size 18 snaps will work too), both available from SnapSource. You will also need a ruler, a marking pen or pencil and a hammer.
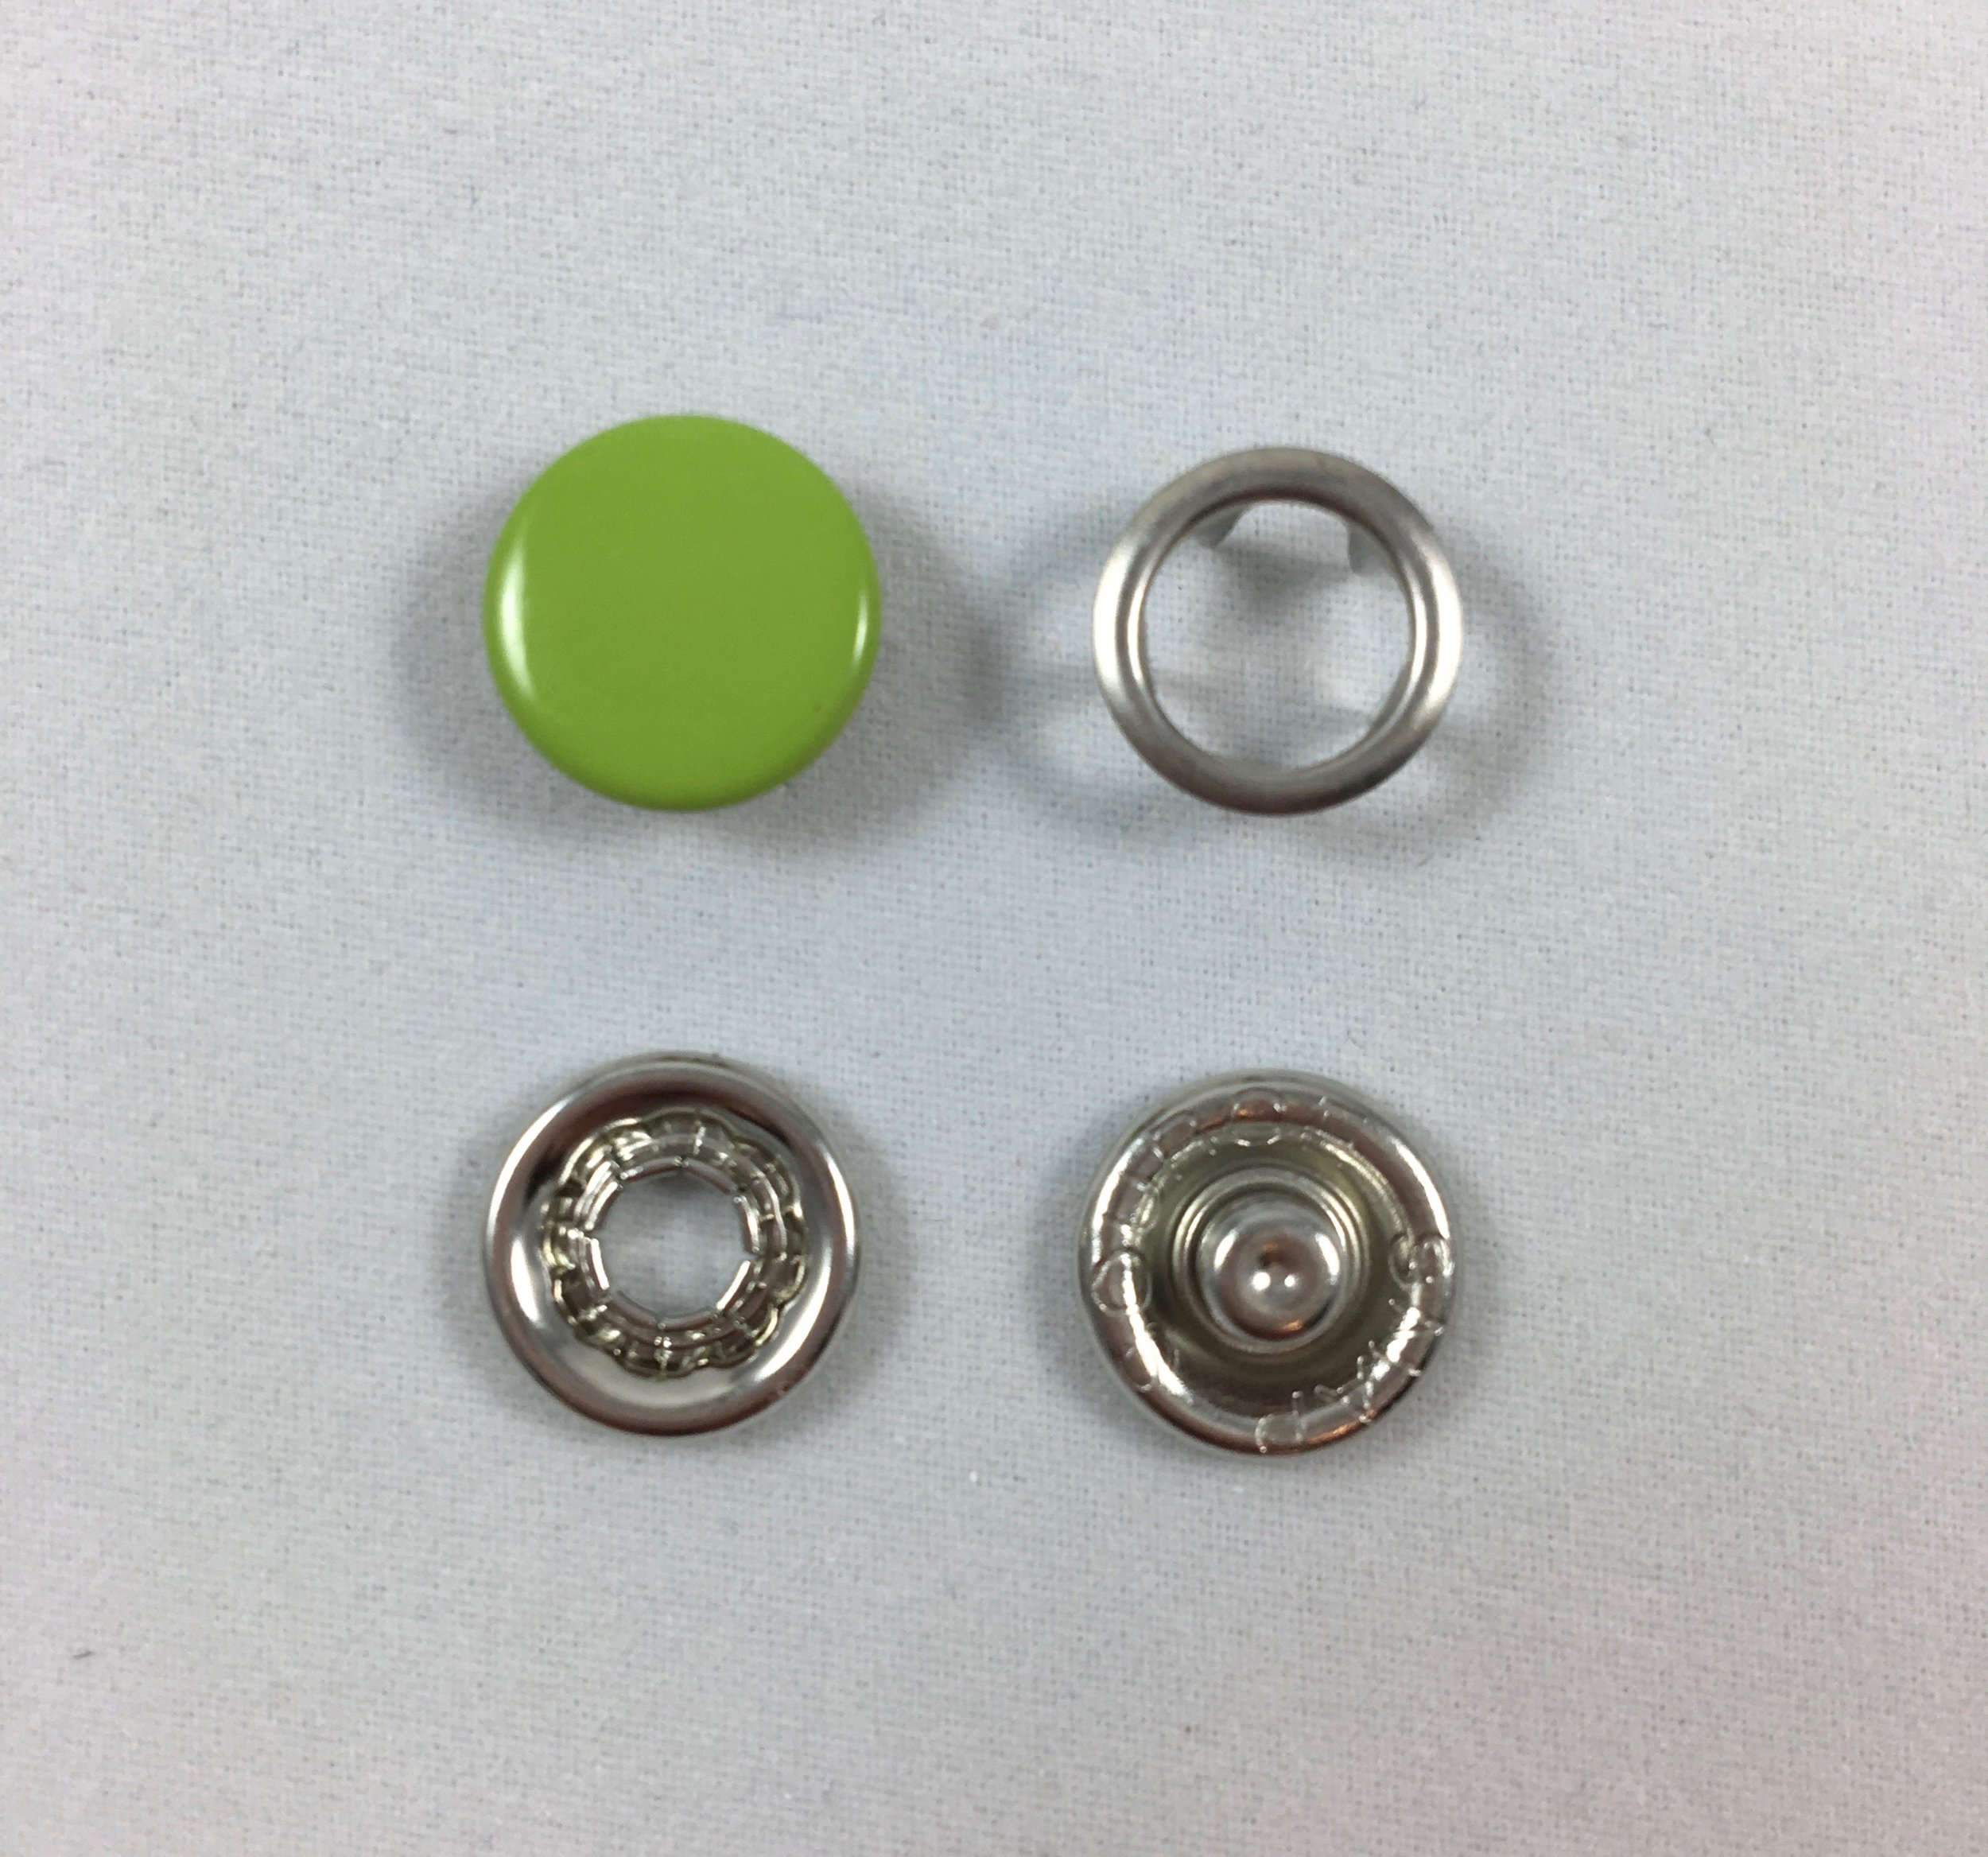
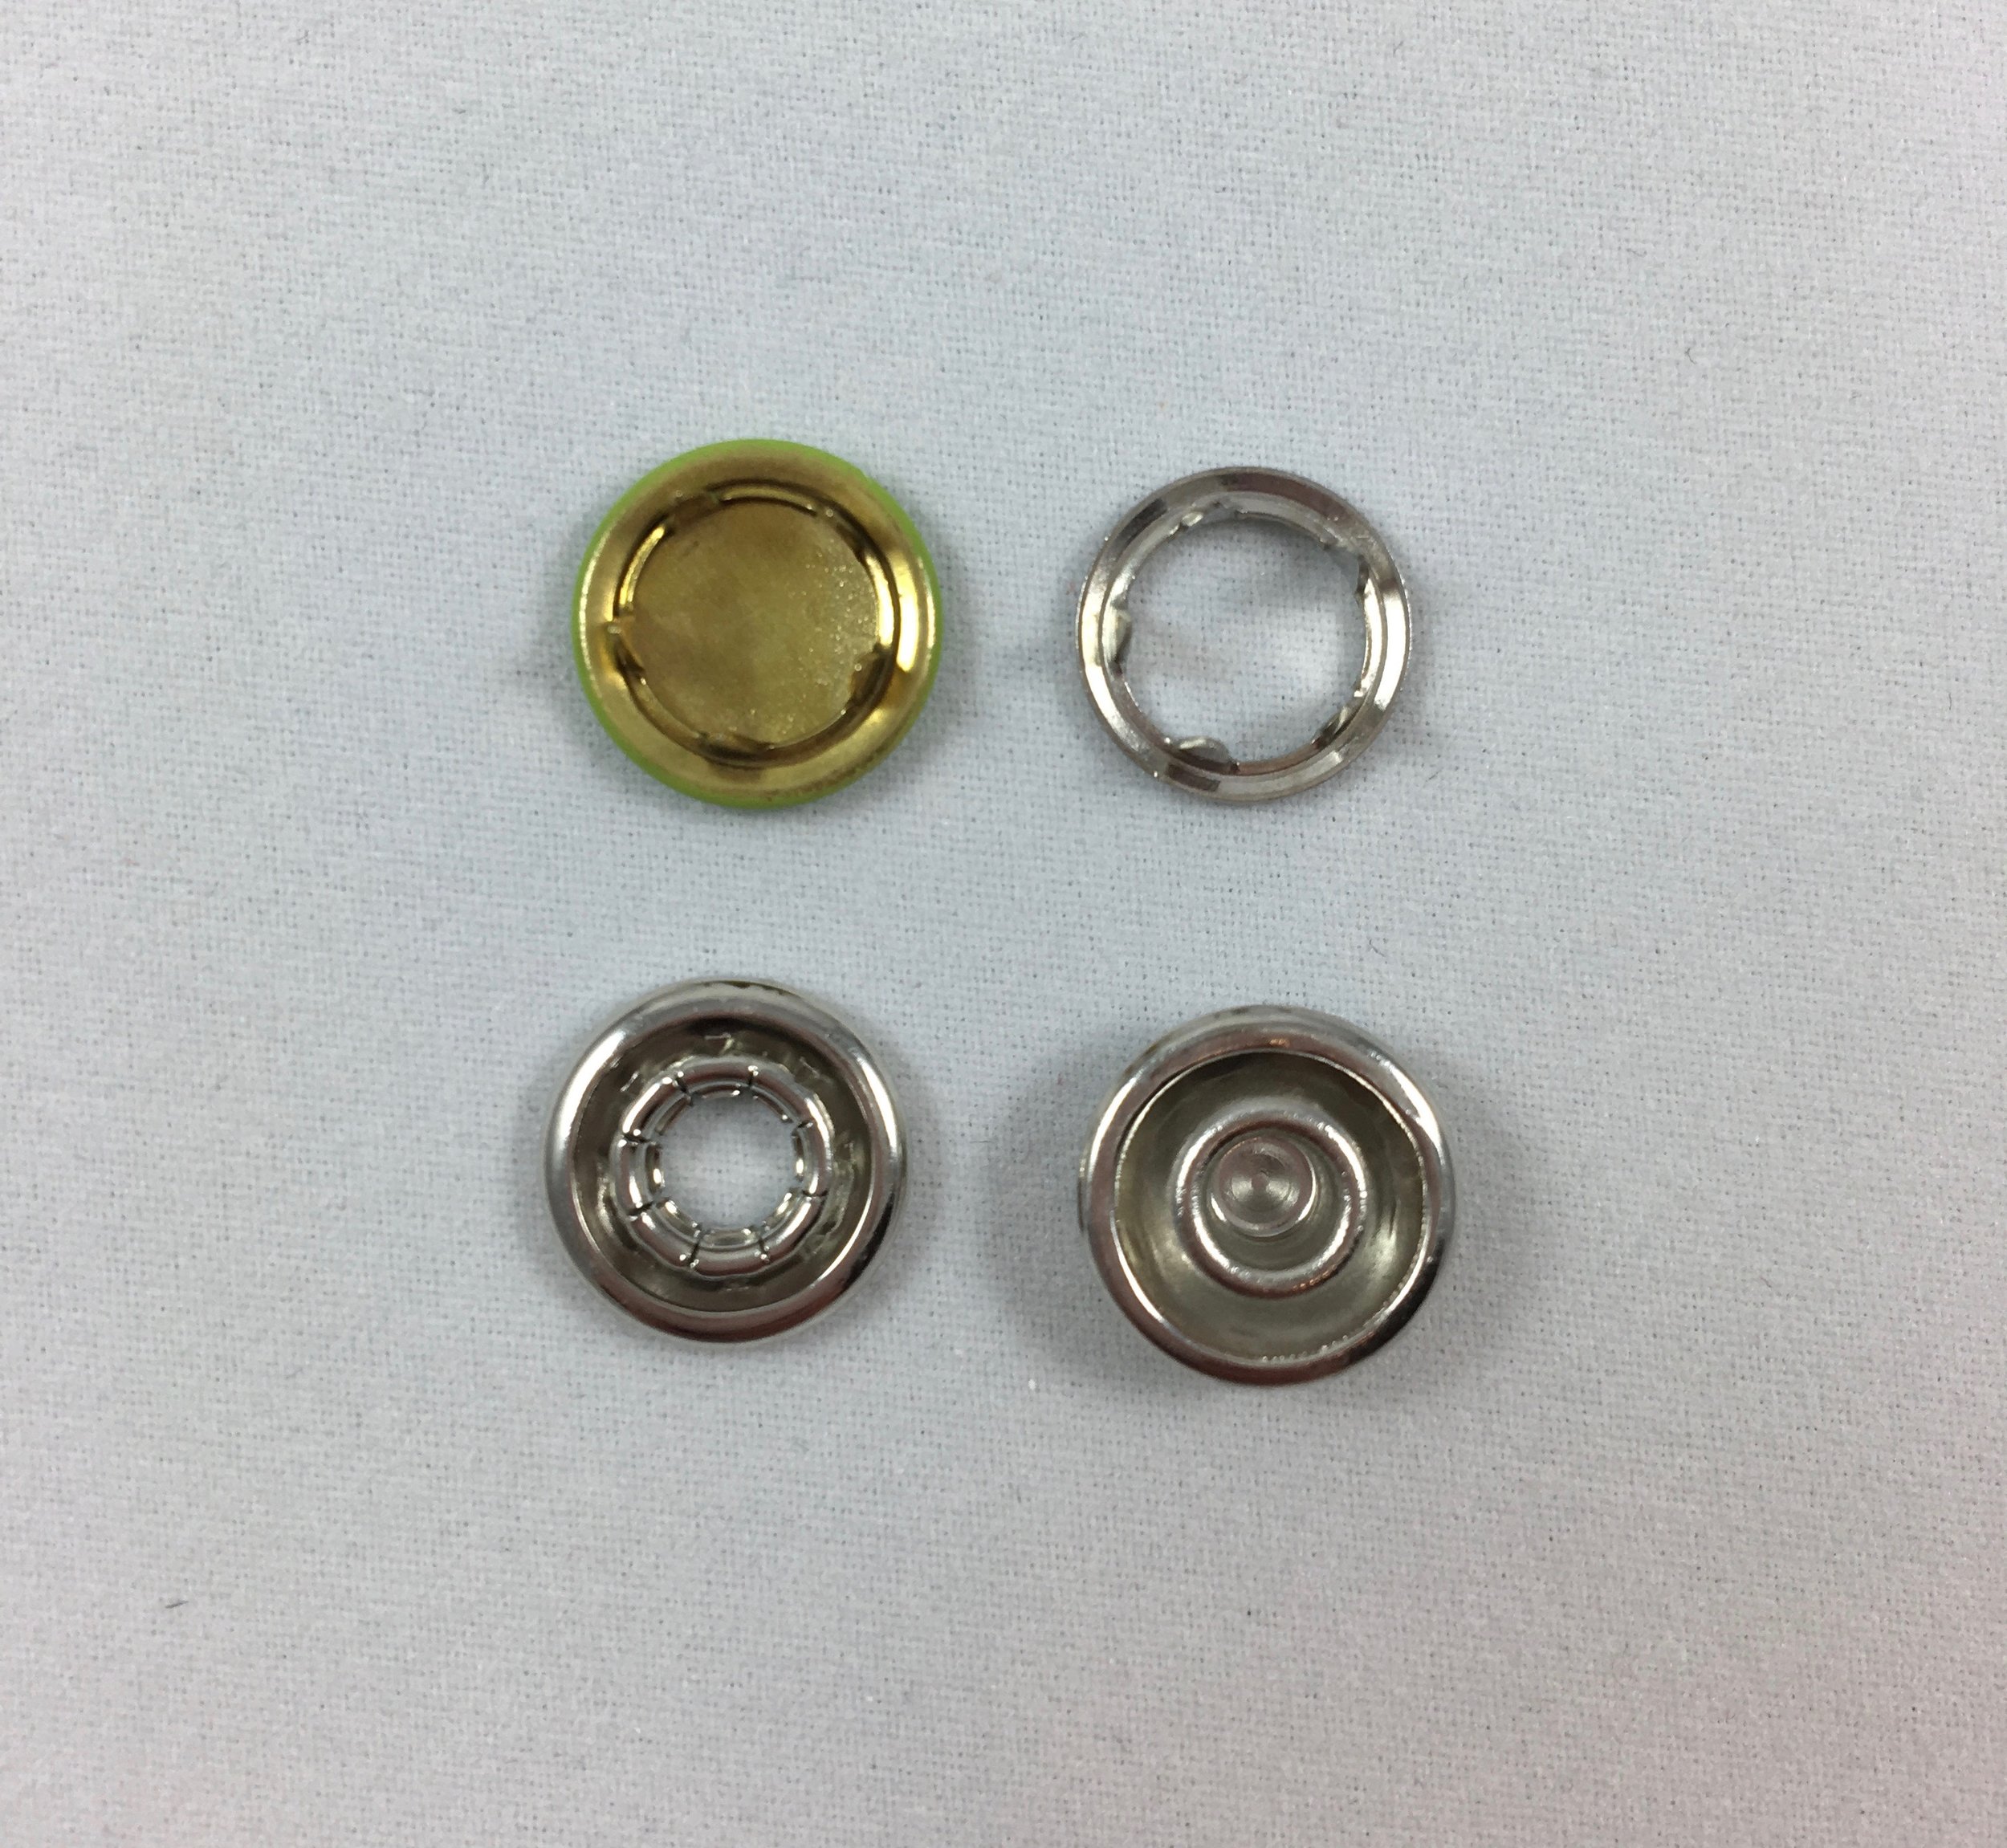
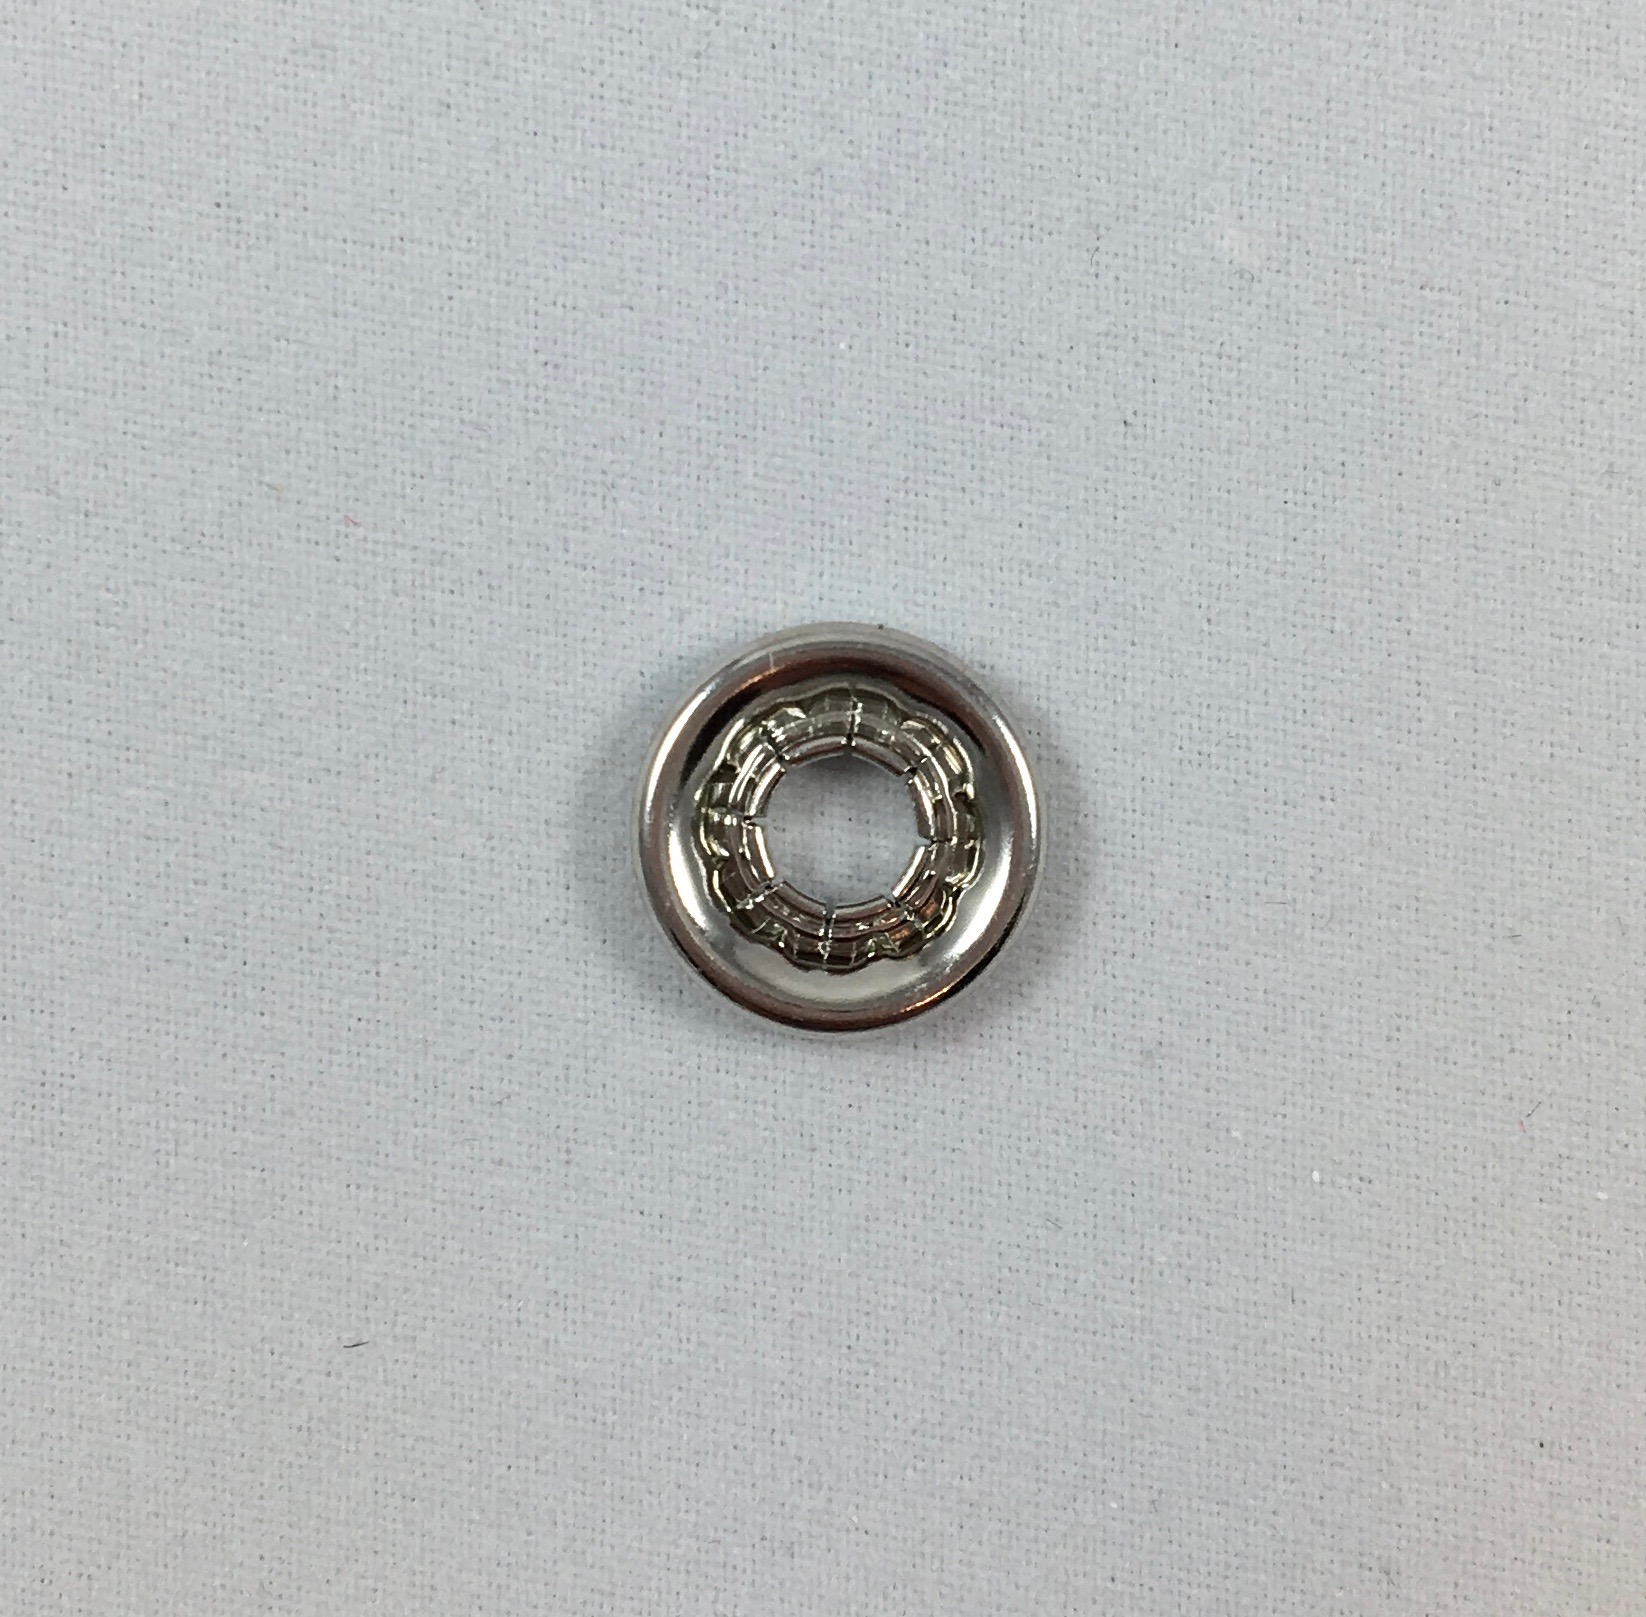
Let’s quickly discuss the parts of a snap so that we are all on the same page. The picture on the left shows the side of each snap piece that you will see once it is installed (the right side). The picture on the right shows the side of each snap piece that is against the fabric once it is installed (the wrong side). The cap is the colorful part of the snap that is a solid circle with prongs on the back (upper left piece). The socket has a hole in the middle and no prongs (lower left piece). The prongs on the cap secure the socket in place on the item you are making. The socket is the part that snaps to the stud. The stud has the raised center area and no prongs (lower right piece). The back ring is a circle with prongs on the back of it (upper right piece). The prongs on the back ring secure the stud in place on the item you are making.
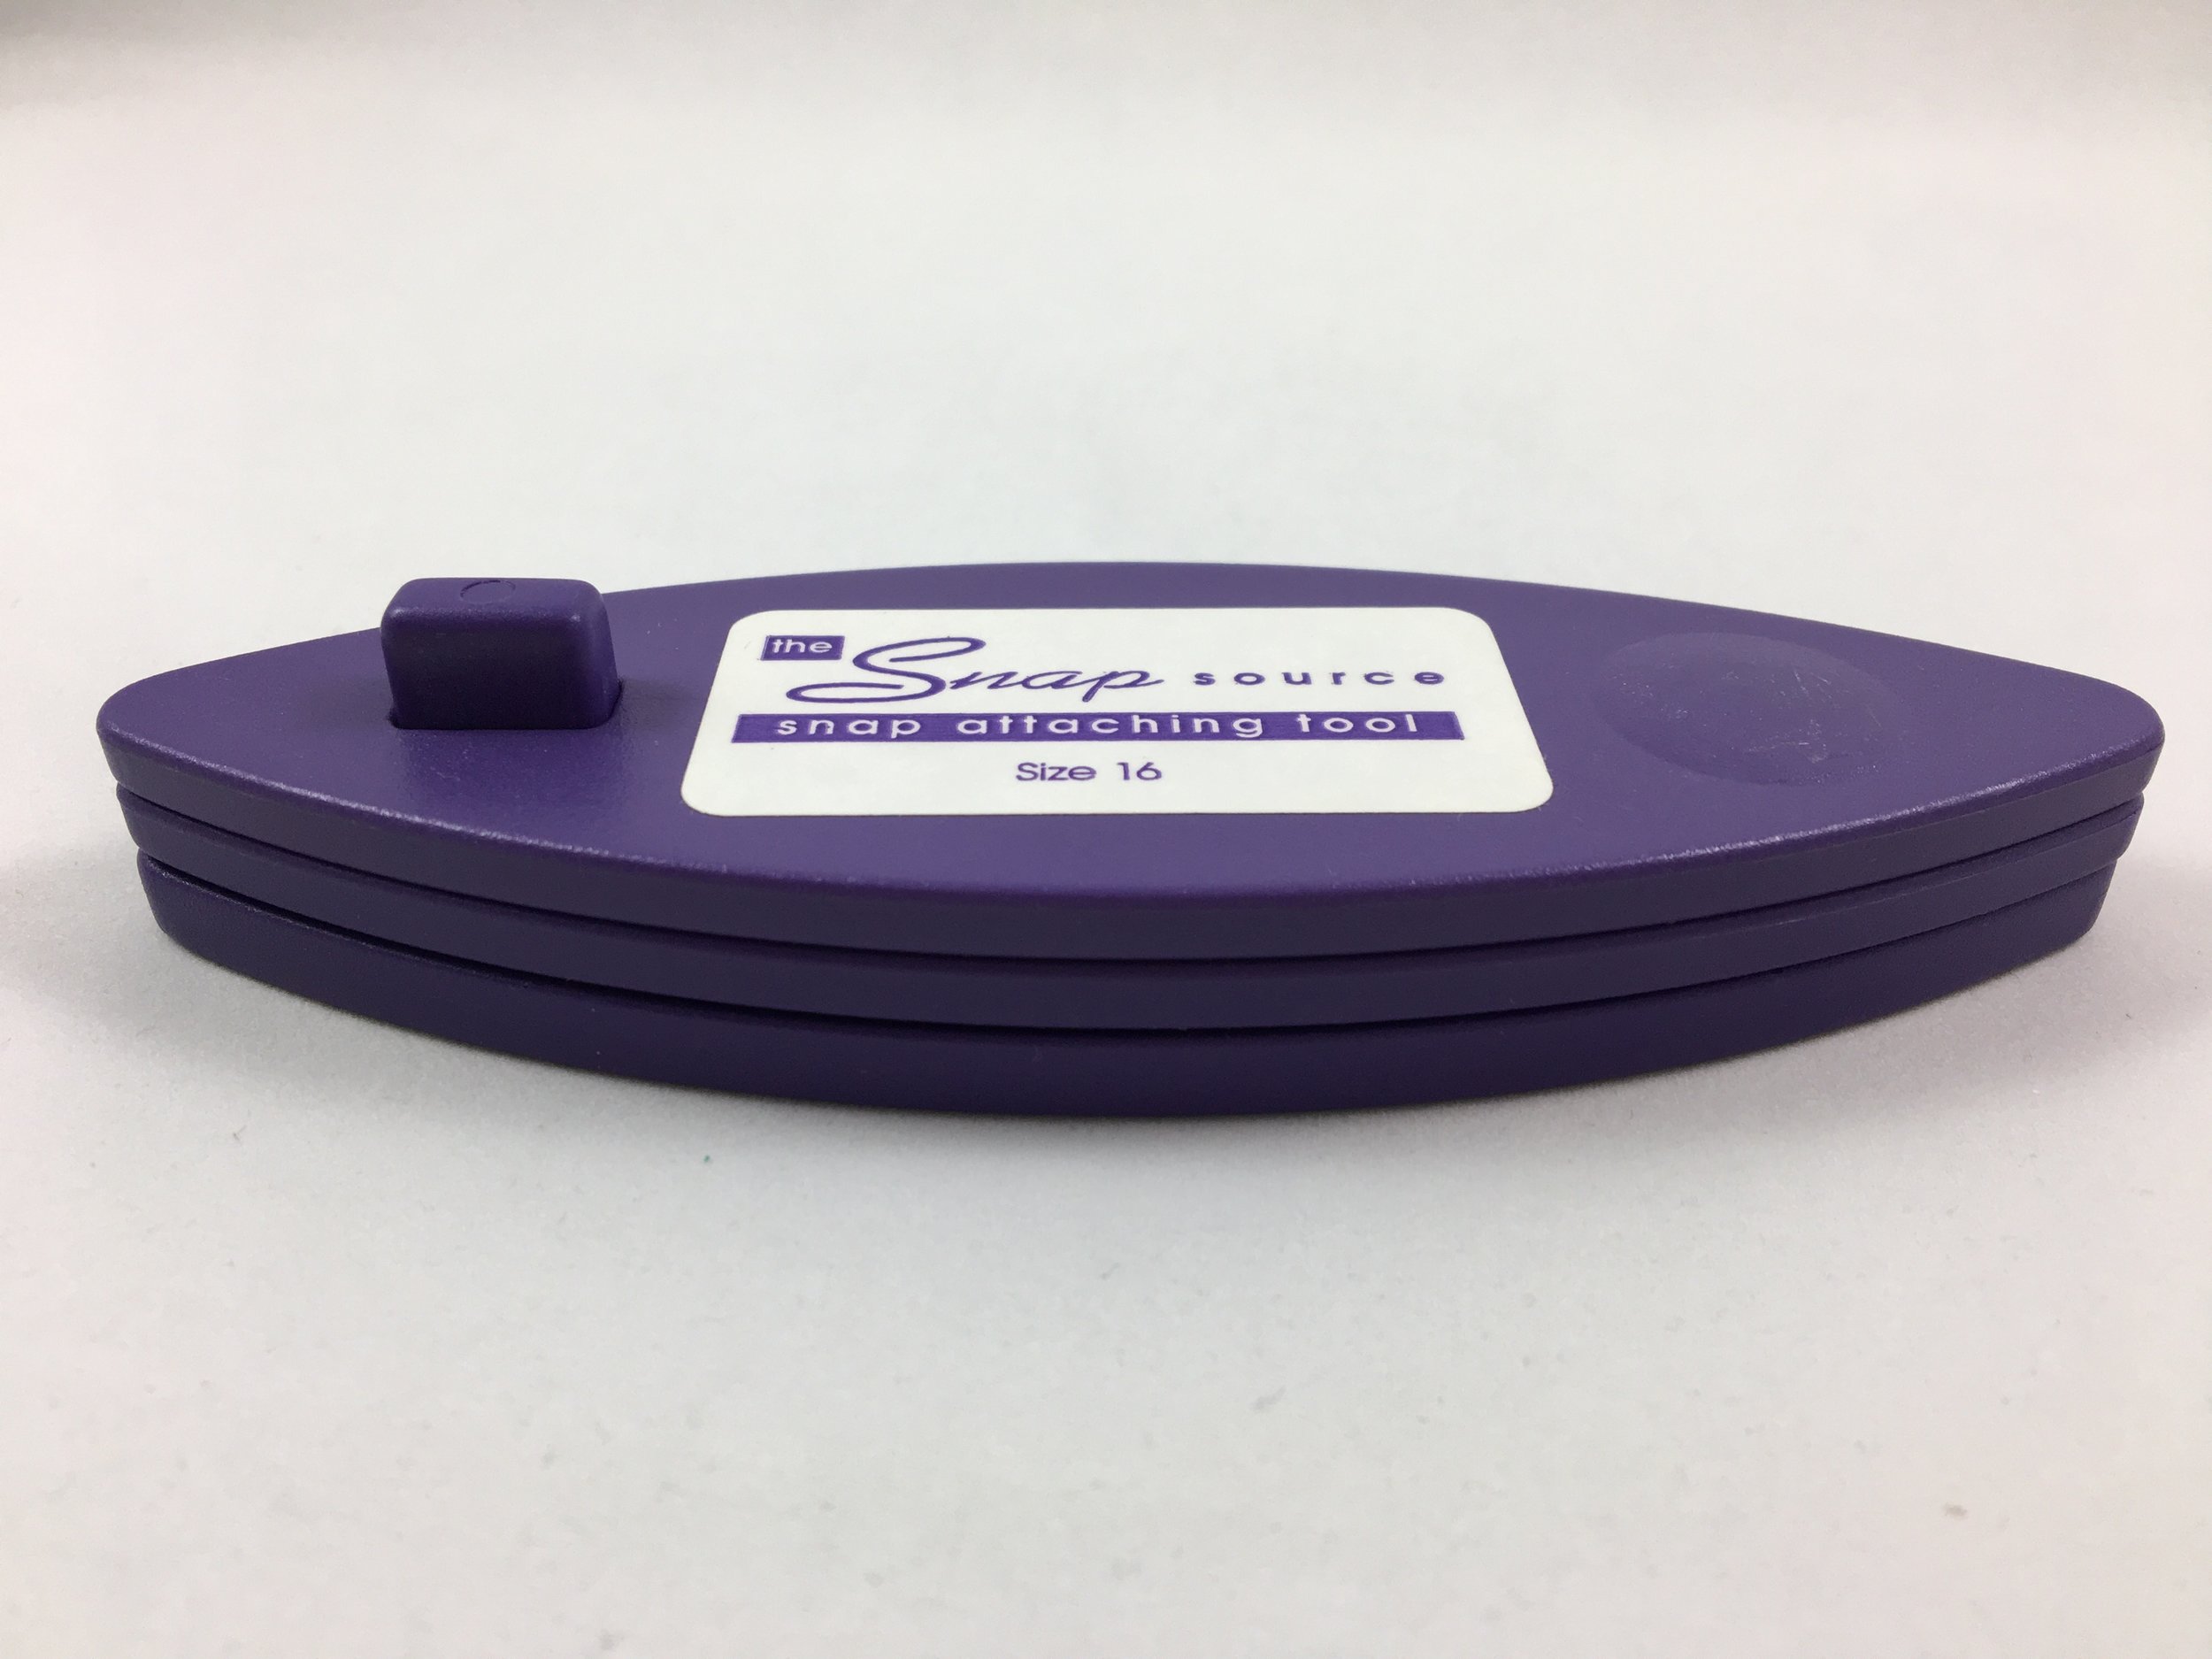
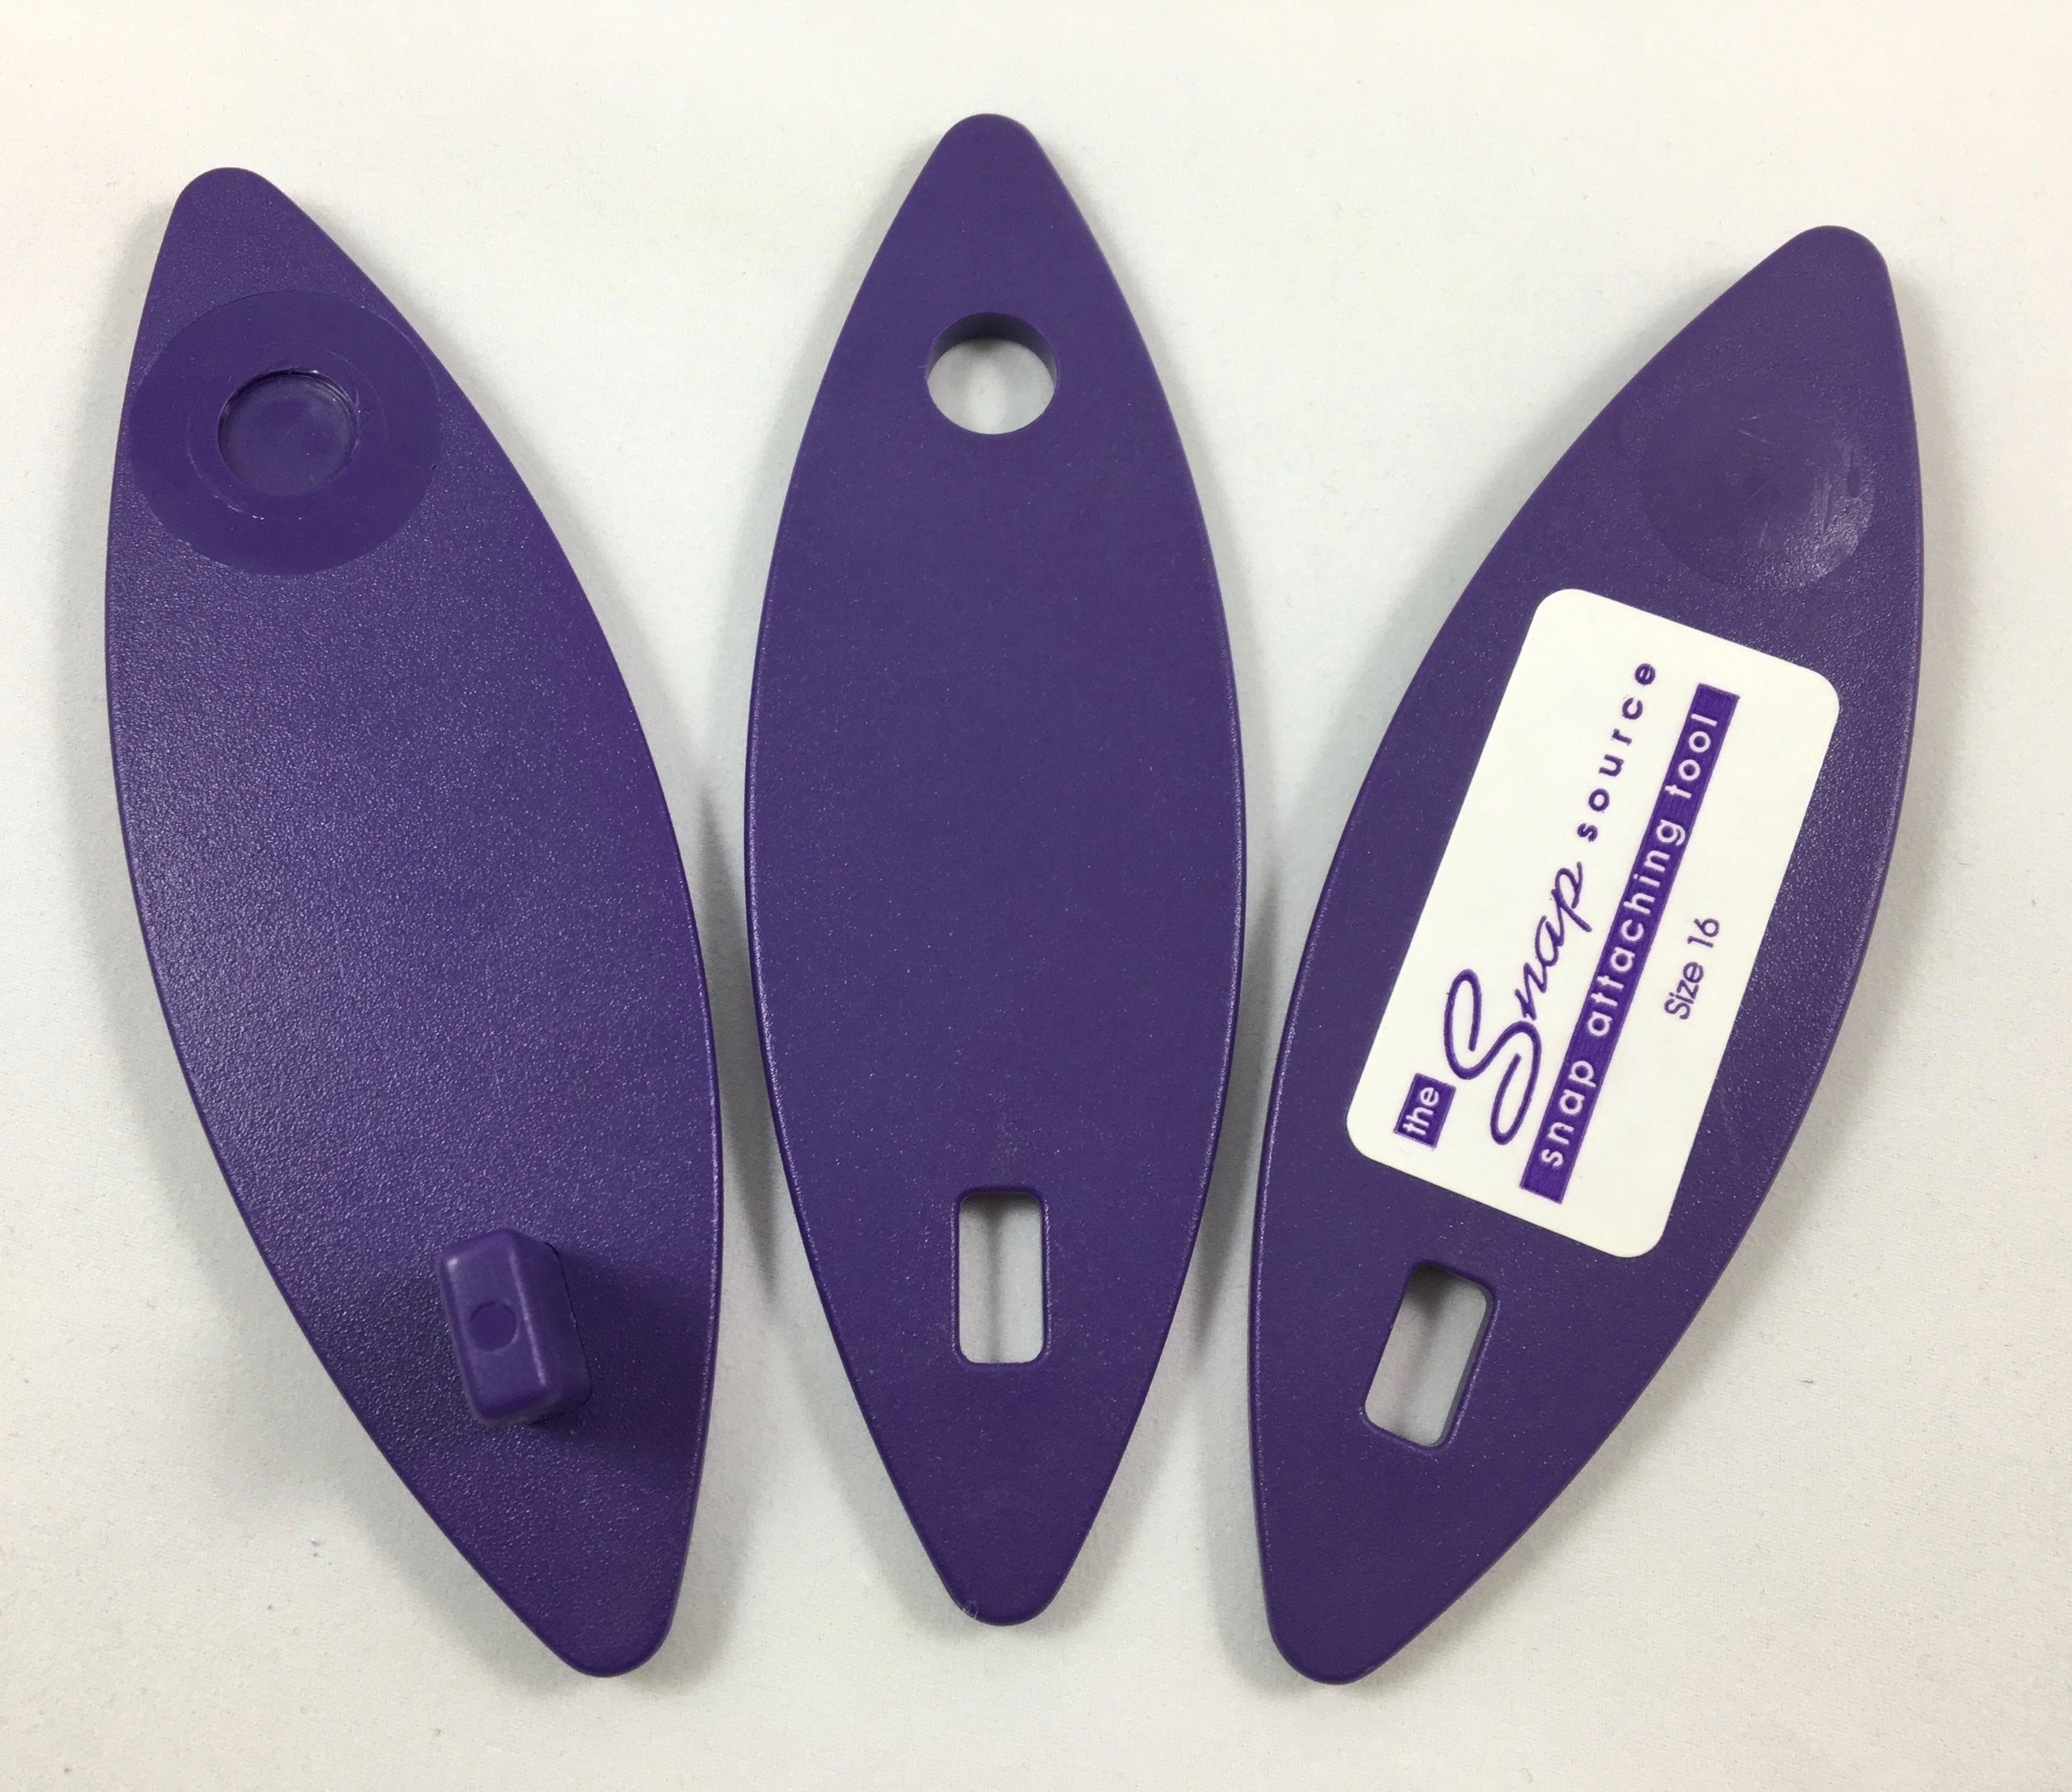
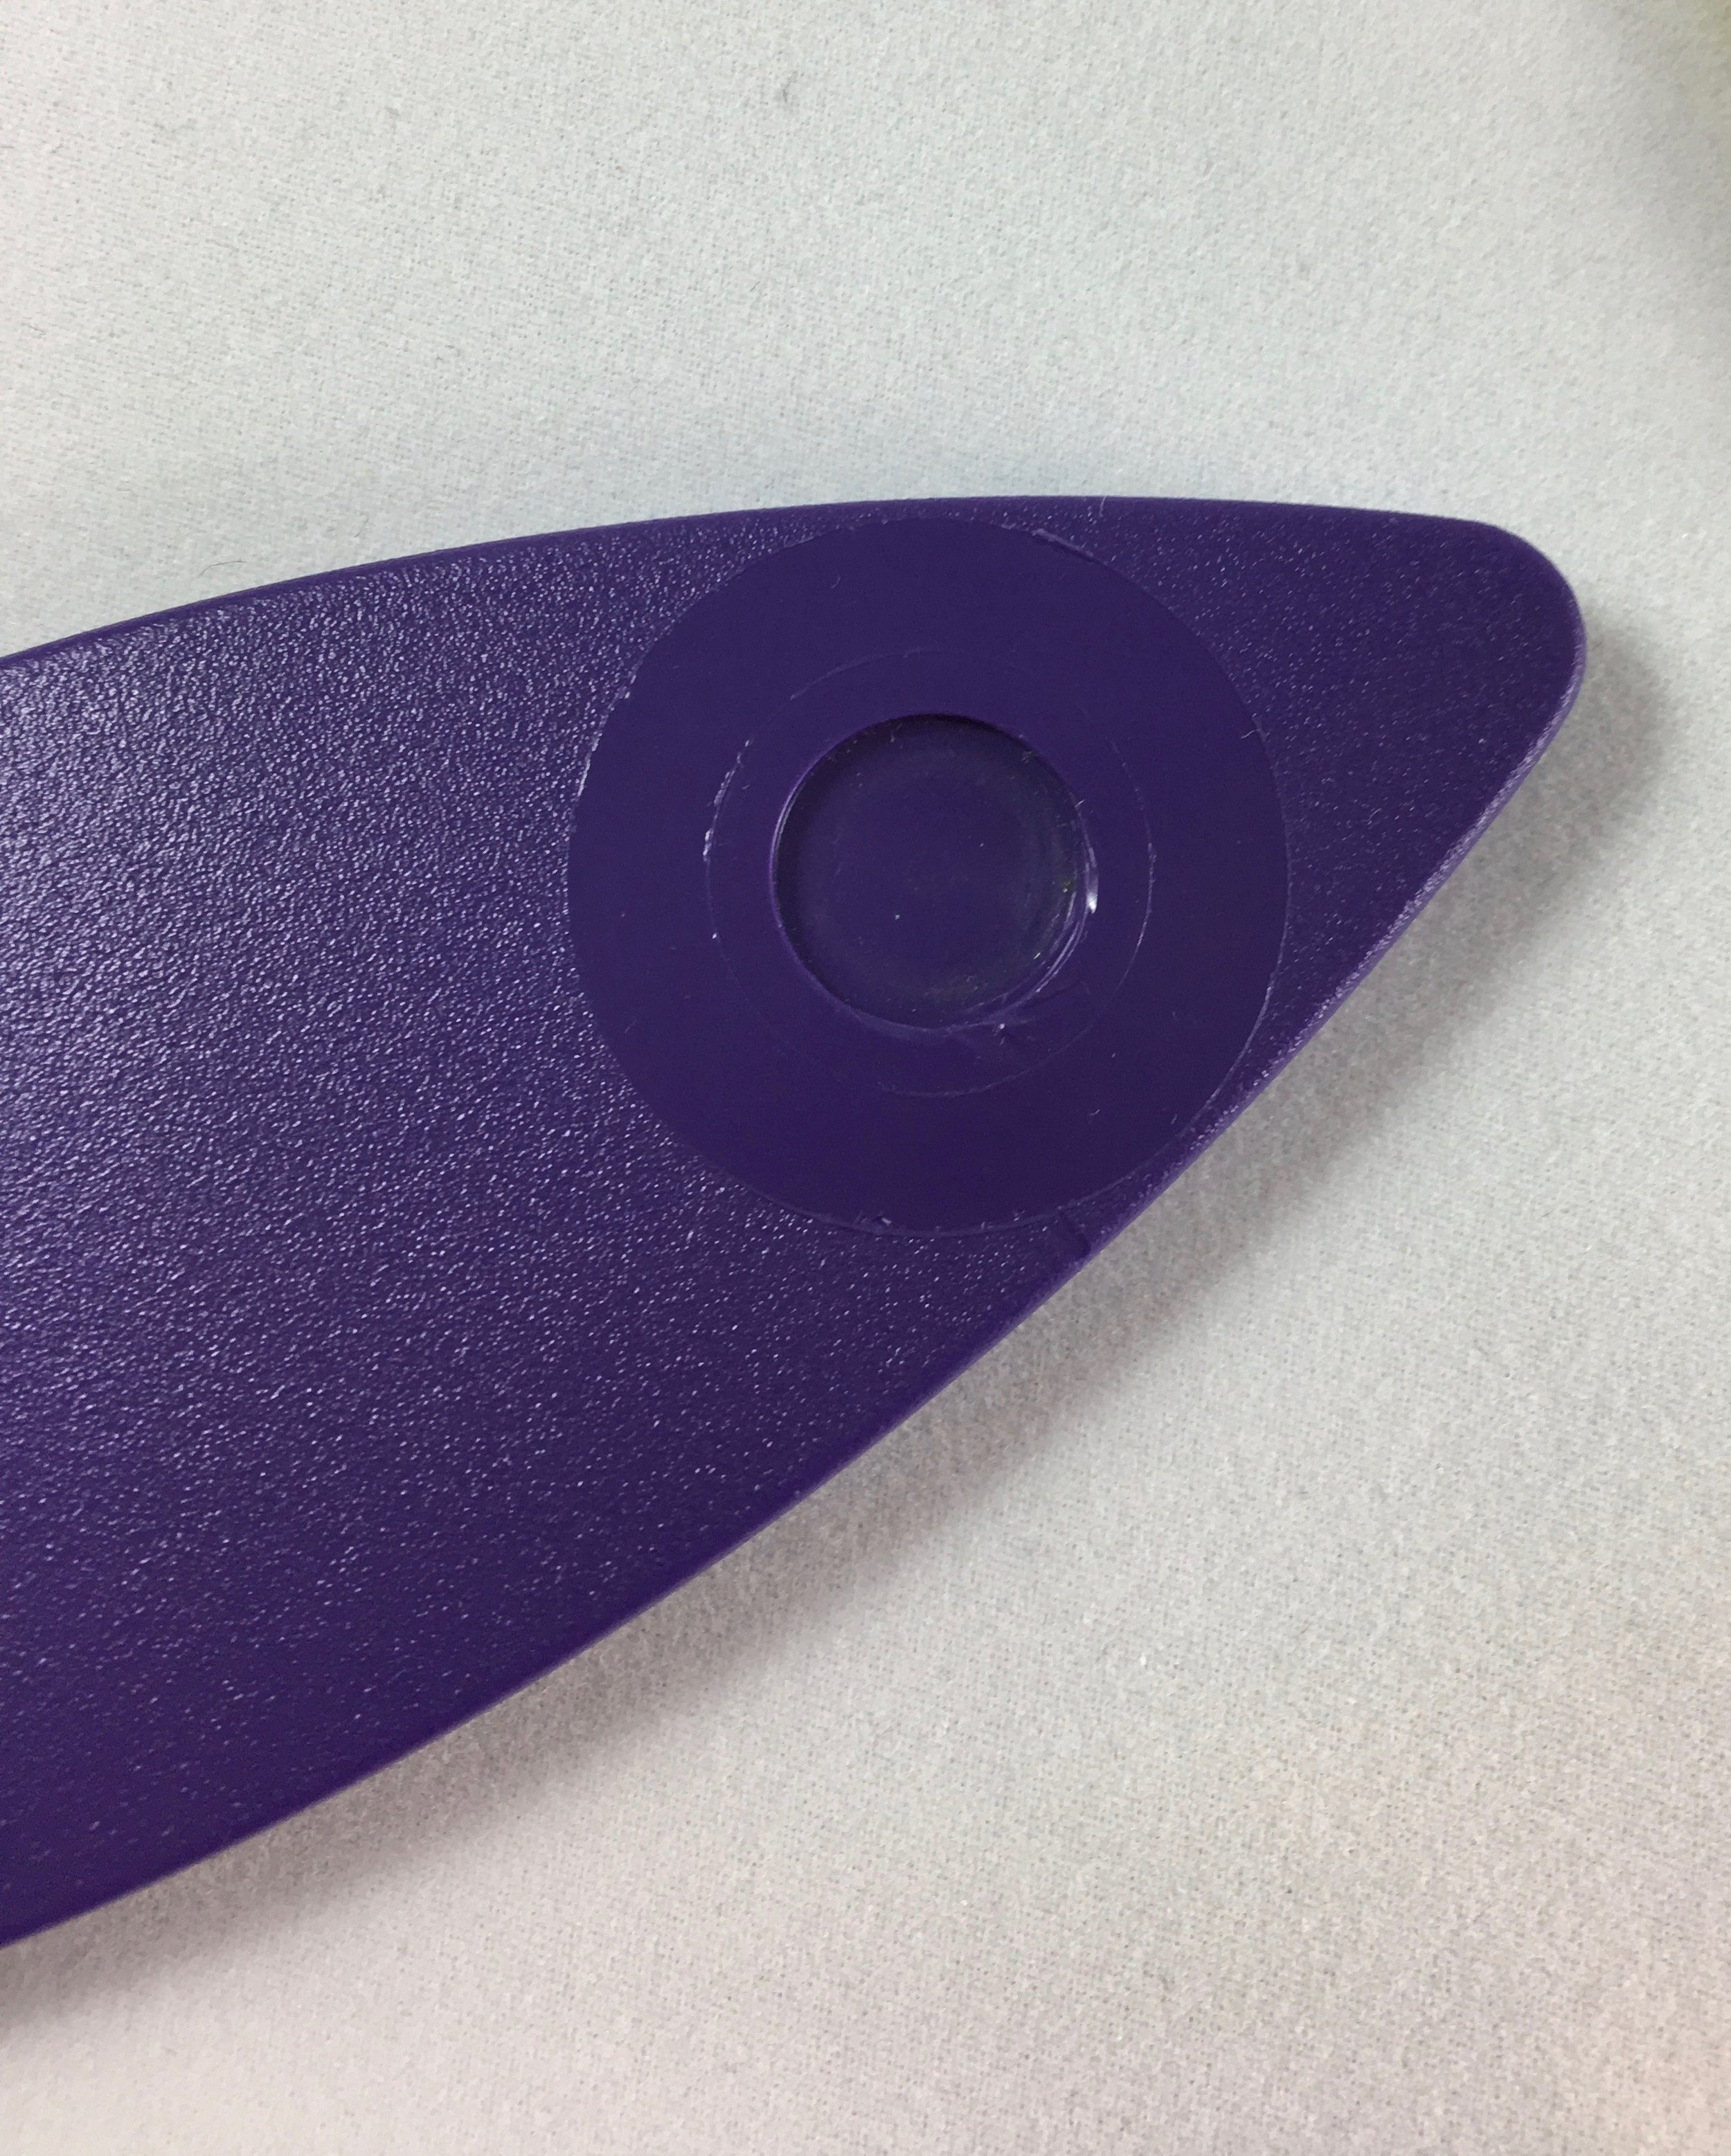
The SnapSetter has three parts that stack together. There is the base with an indentation for the cap or bottom ring to sit. Next there is the middle part with a hole that aligns the socket or the stud perfectly. Finally the top part with a raised area that you will hit with your hammer.

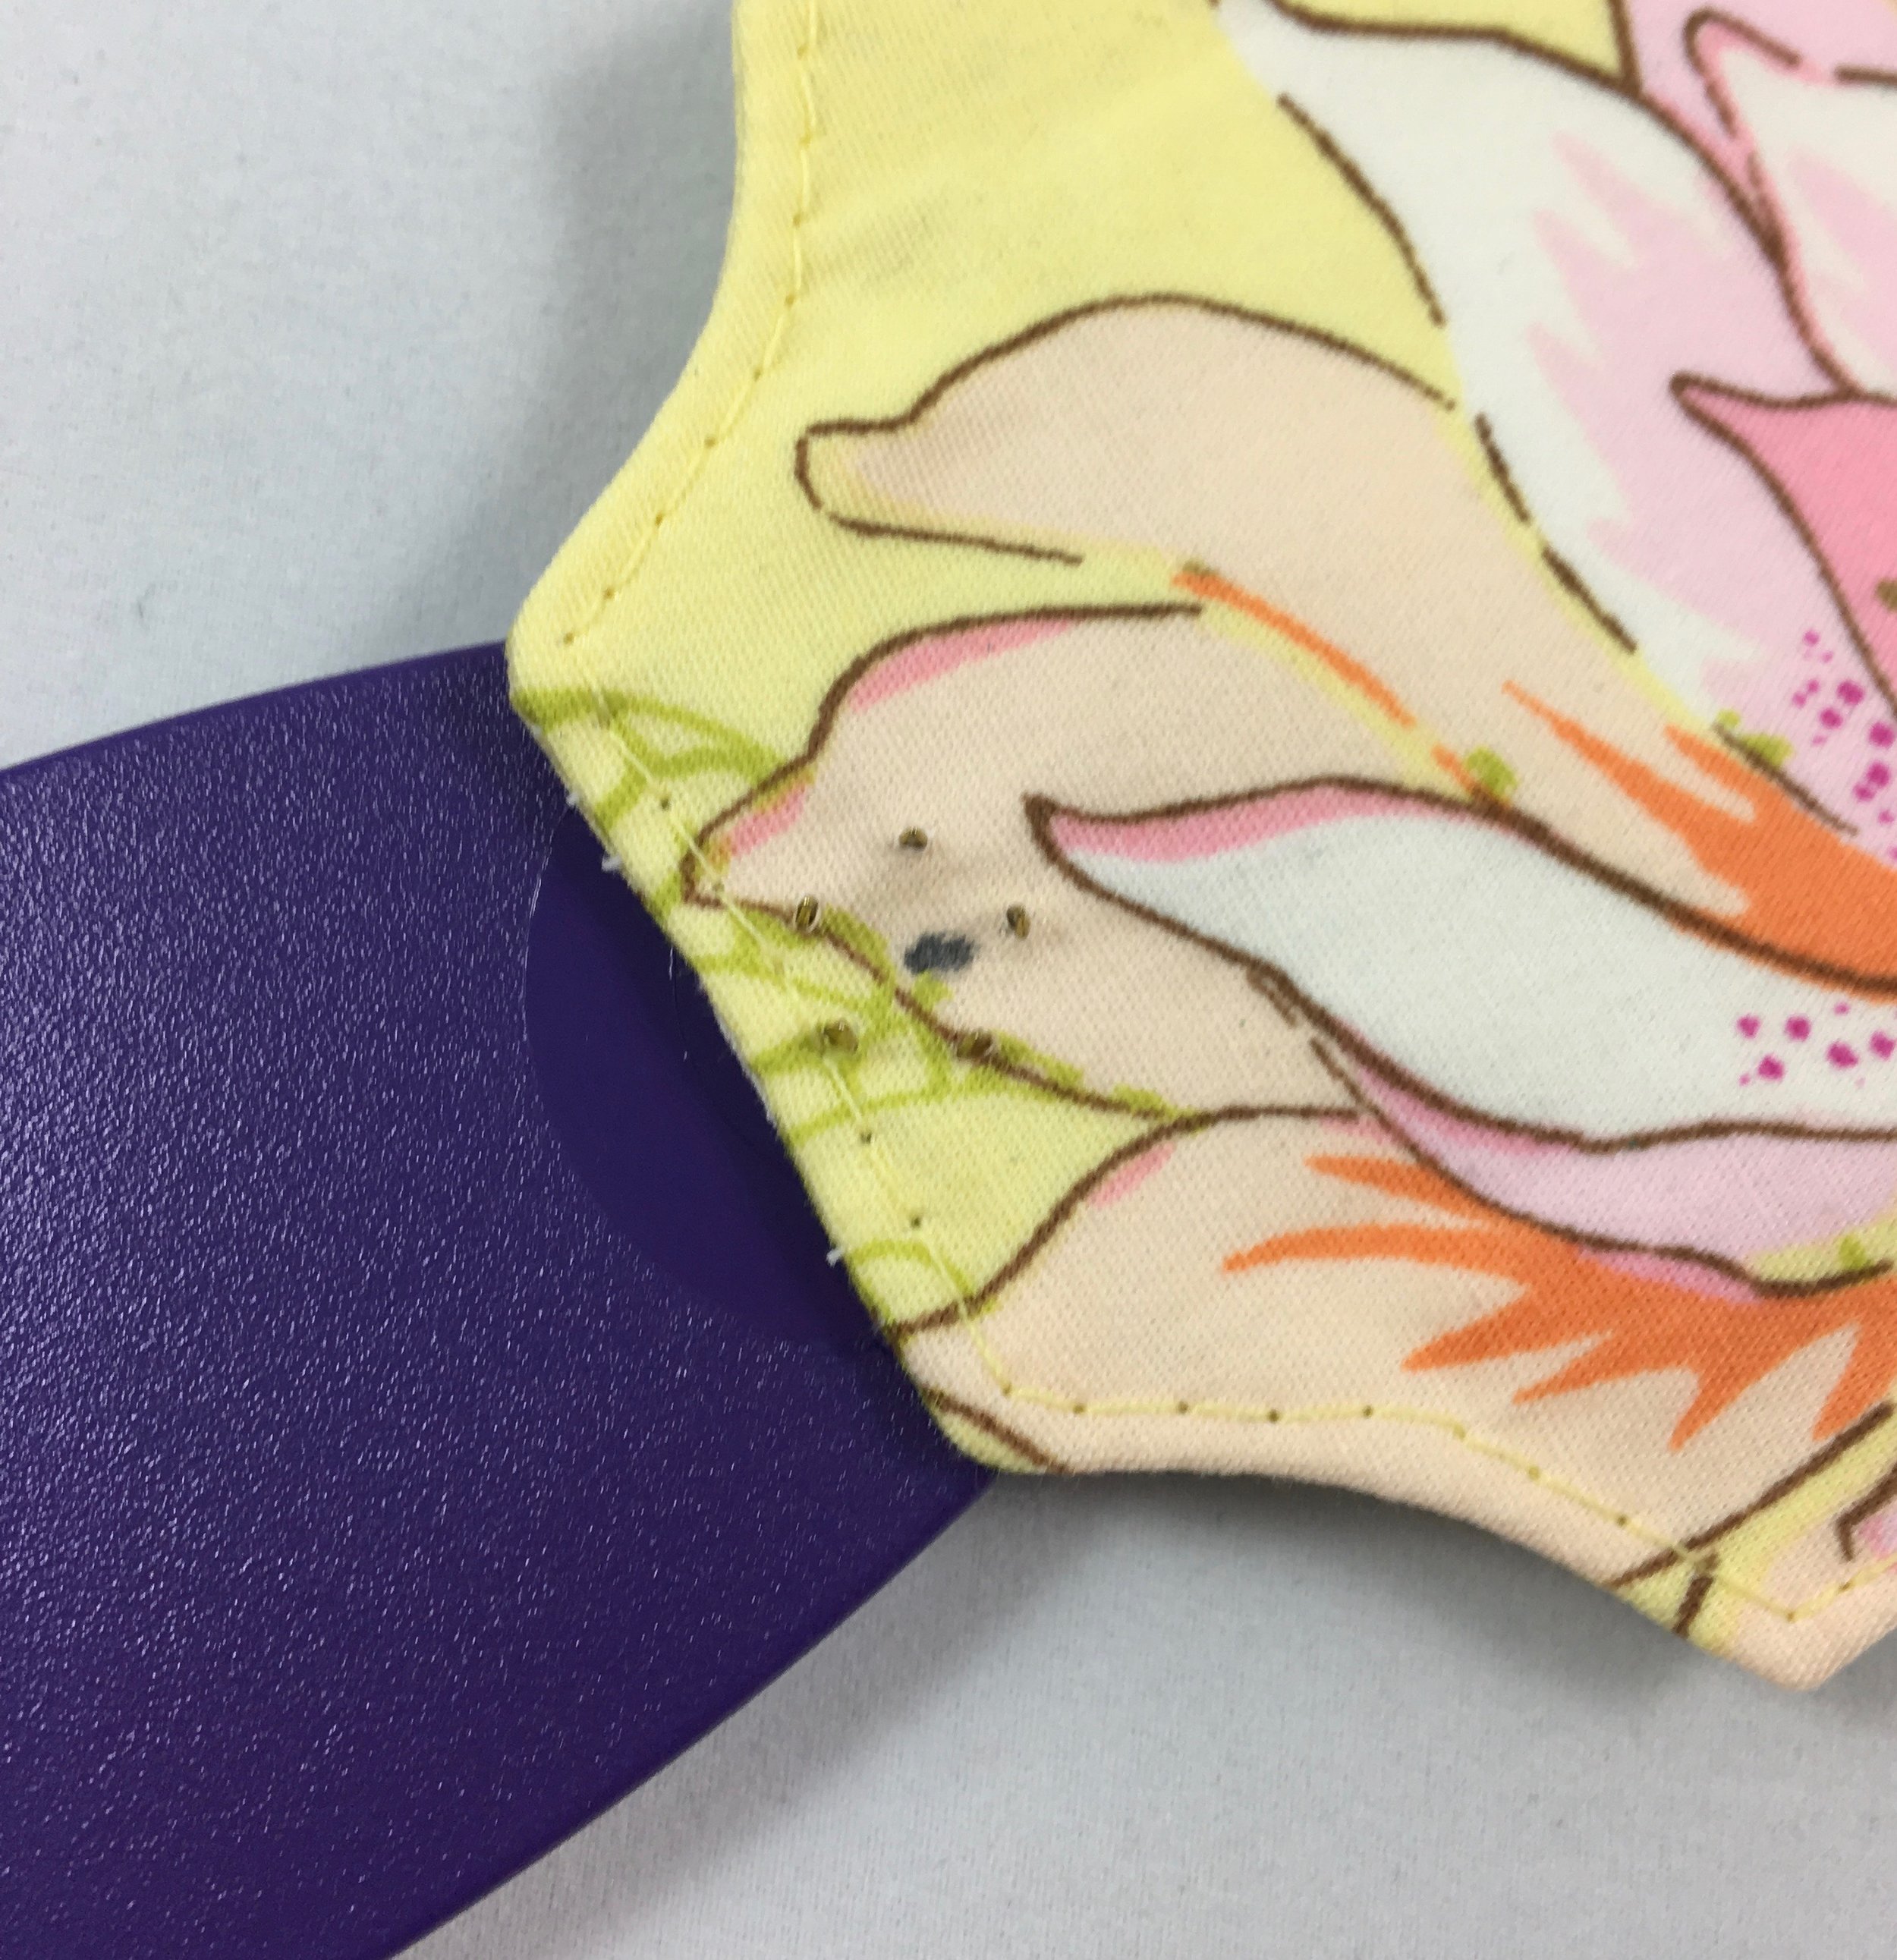
We are going to start by marking the placement of the cap part of your snap. Follow the instructions for the item you are making to measure the location for the cap and mark that spot using a marking pen or pencil. Make sure you are marking the part of the project and the side of that part where the cap will be placed.

This is the most difficult part of installing these metal snaps and it isn't that difficult, it's just worth spending a couple extra minutes making sure you get it right. The reason it is a bit difficult is because the cap covers the mark, making it difficult to see where you are supposed to place the snap. So there is a lot of peeking under the cap while trying to get it centered on the mark.

I usually eyeball it to begin with and then get out my ruler again to check if the center of the cap is where it is supposed to be on my project.
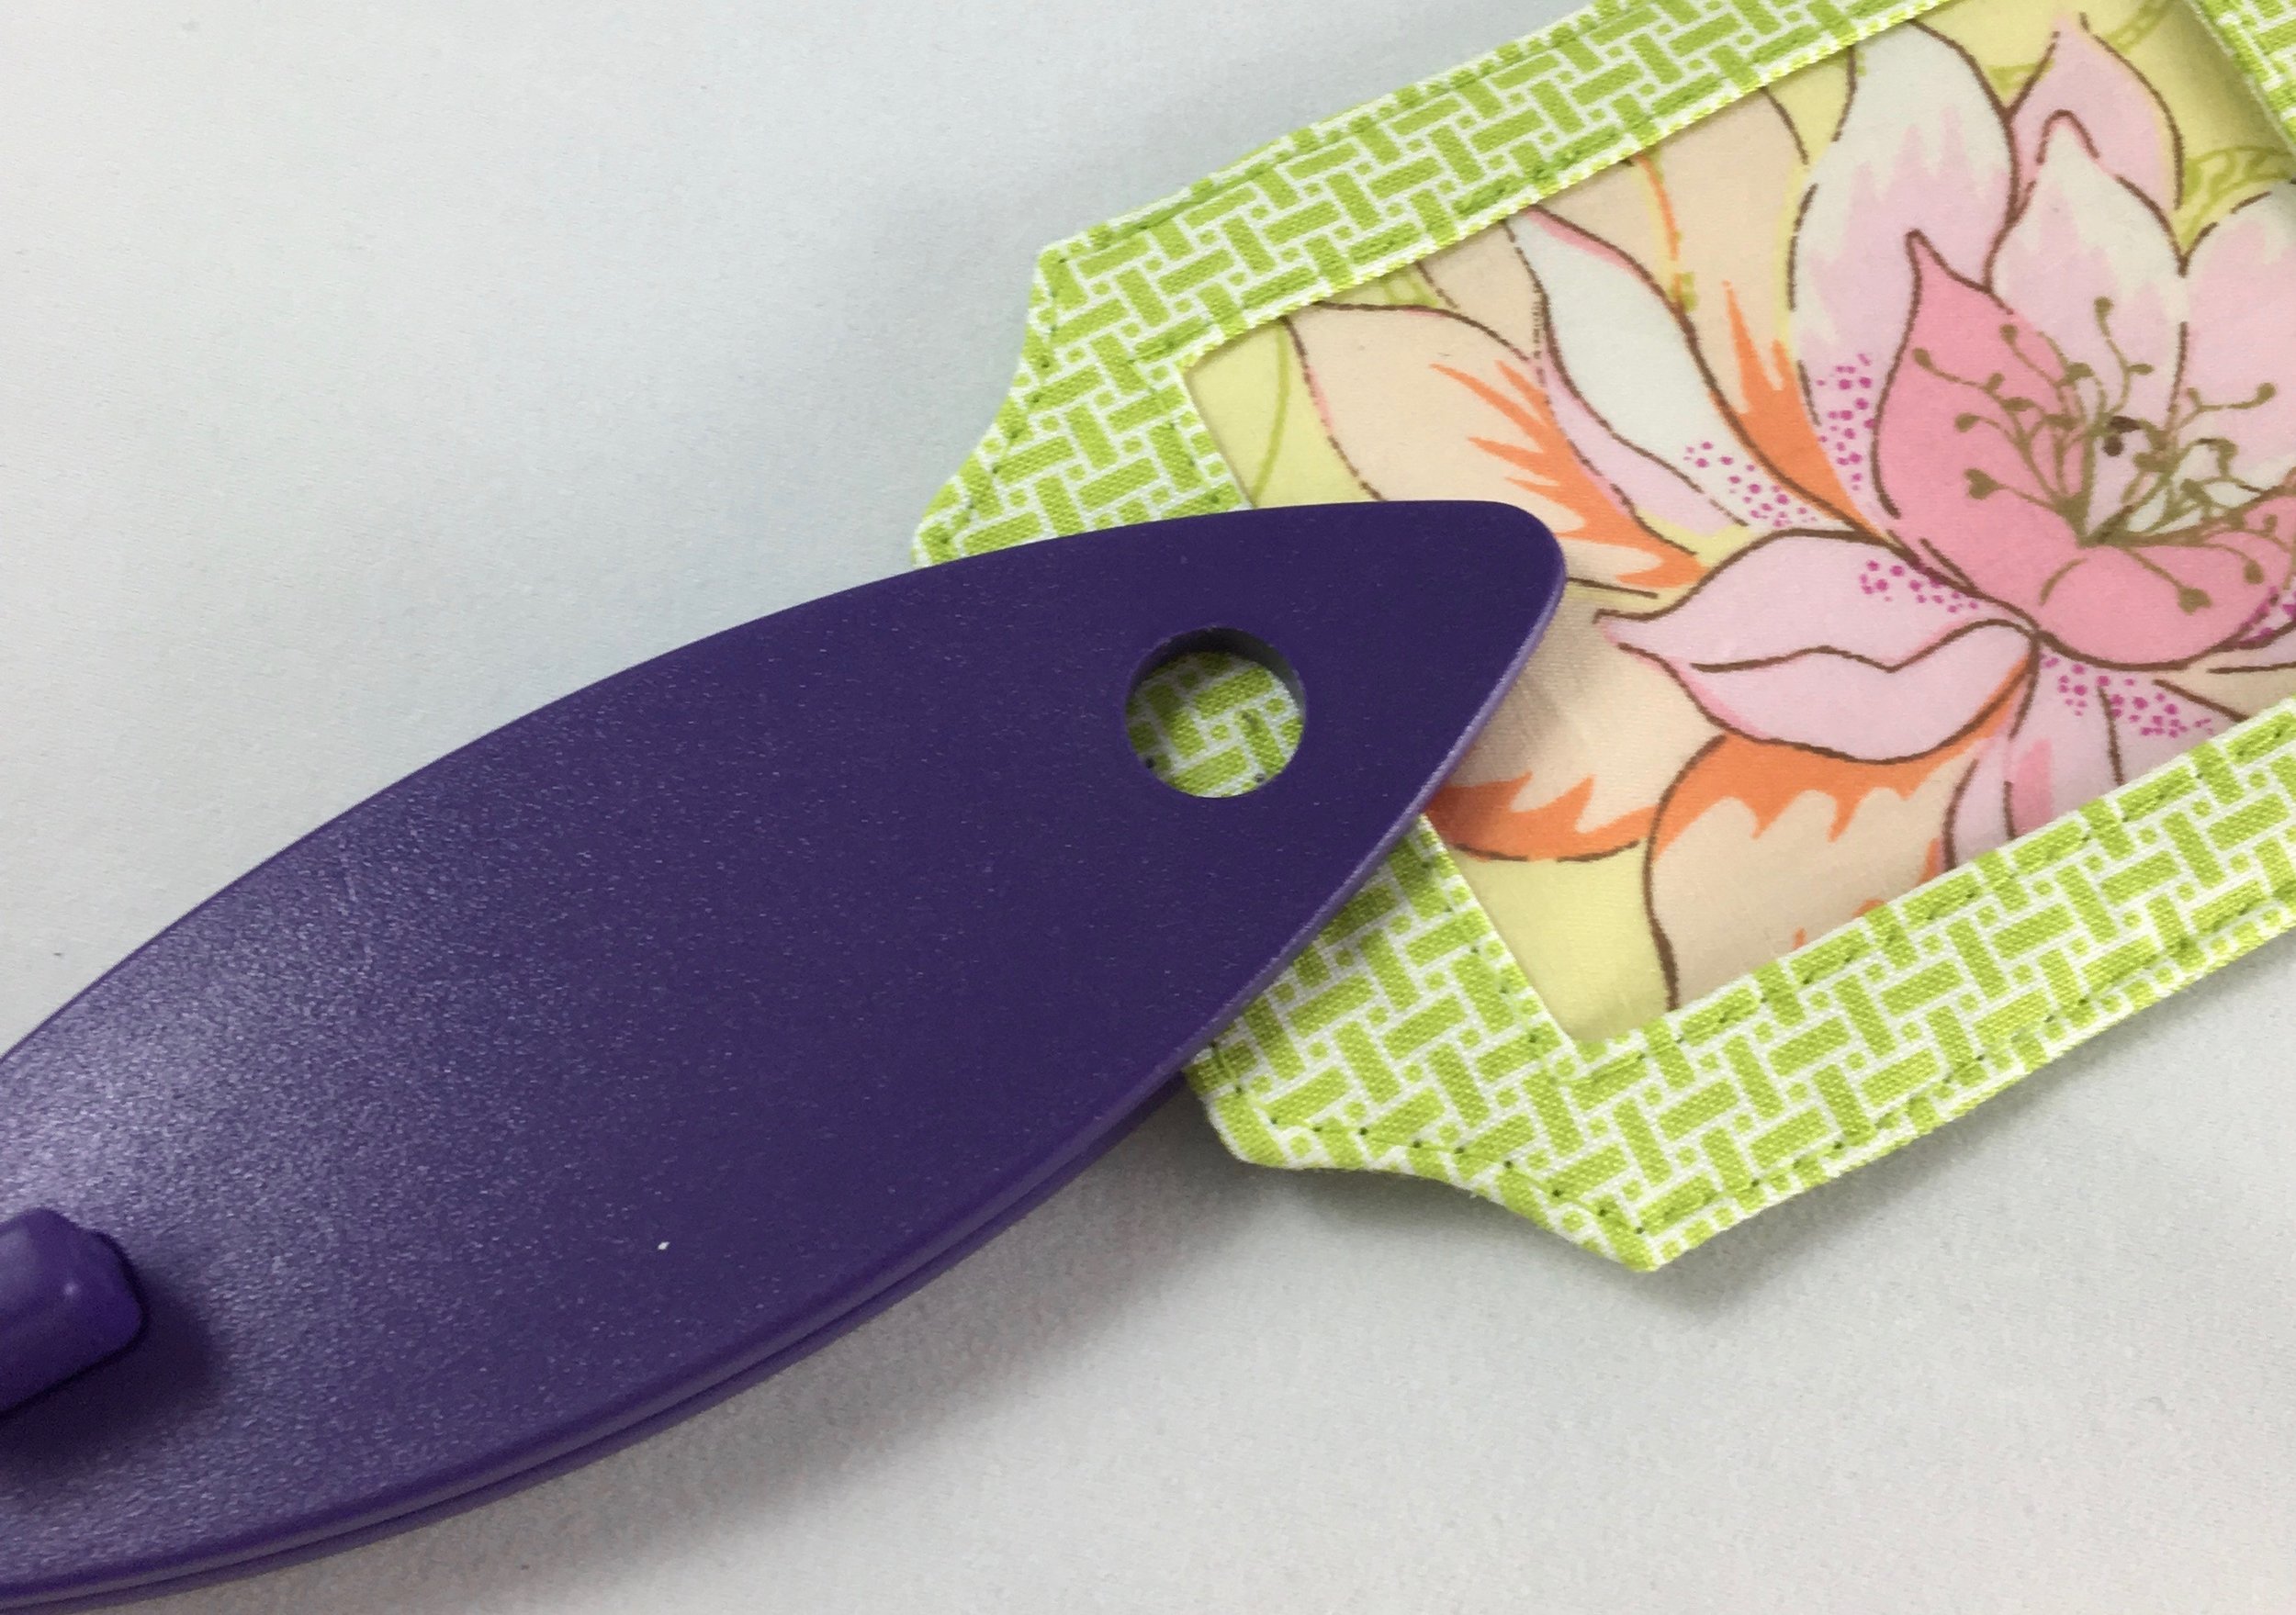
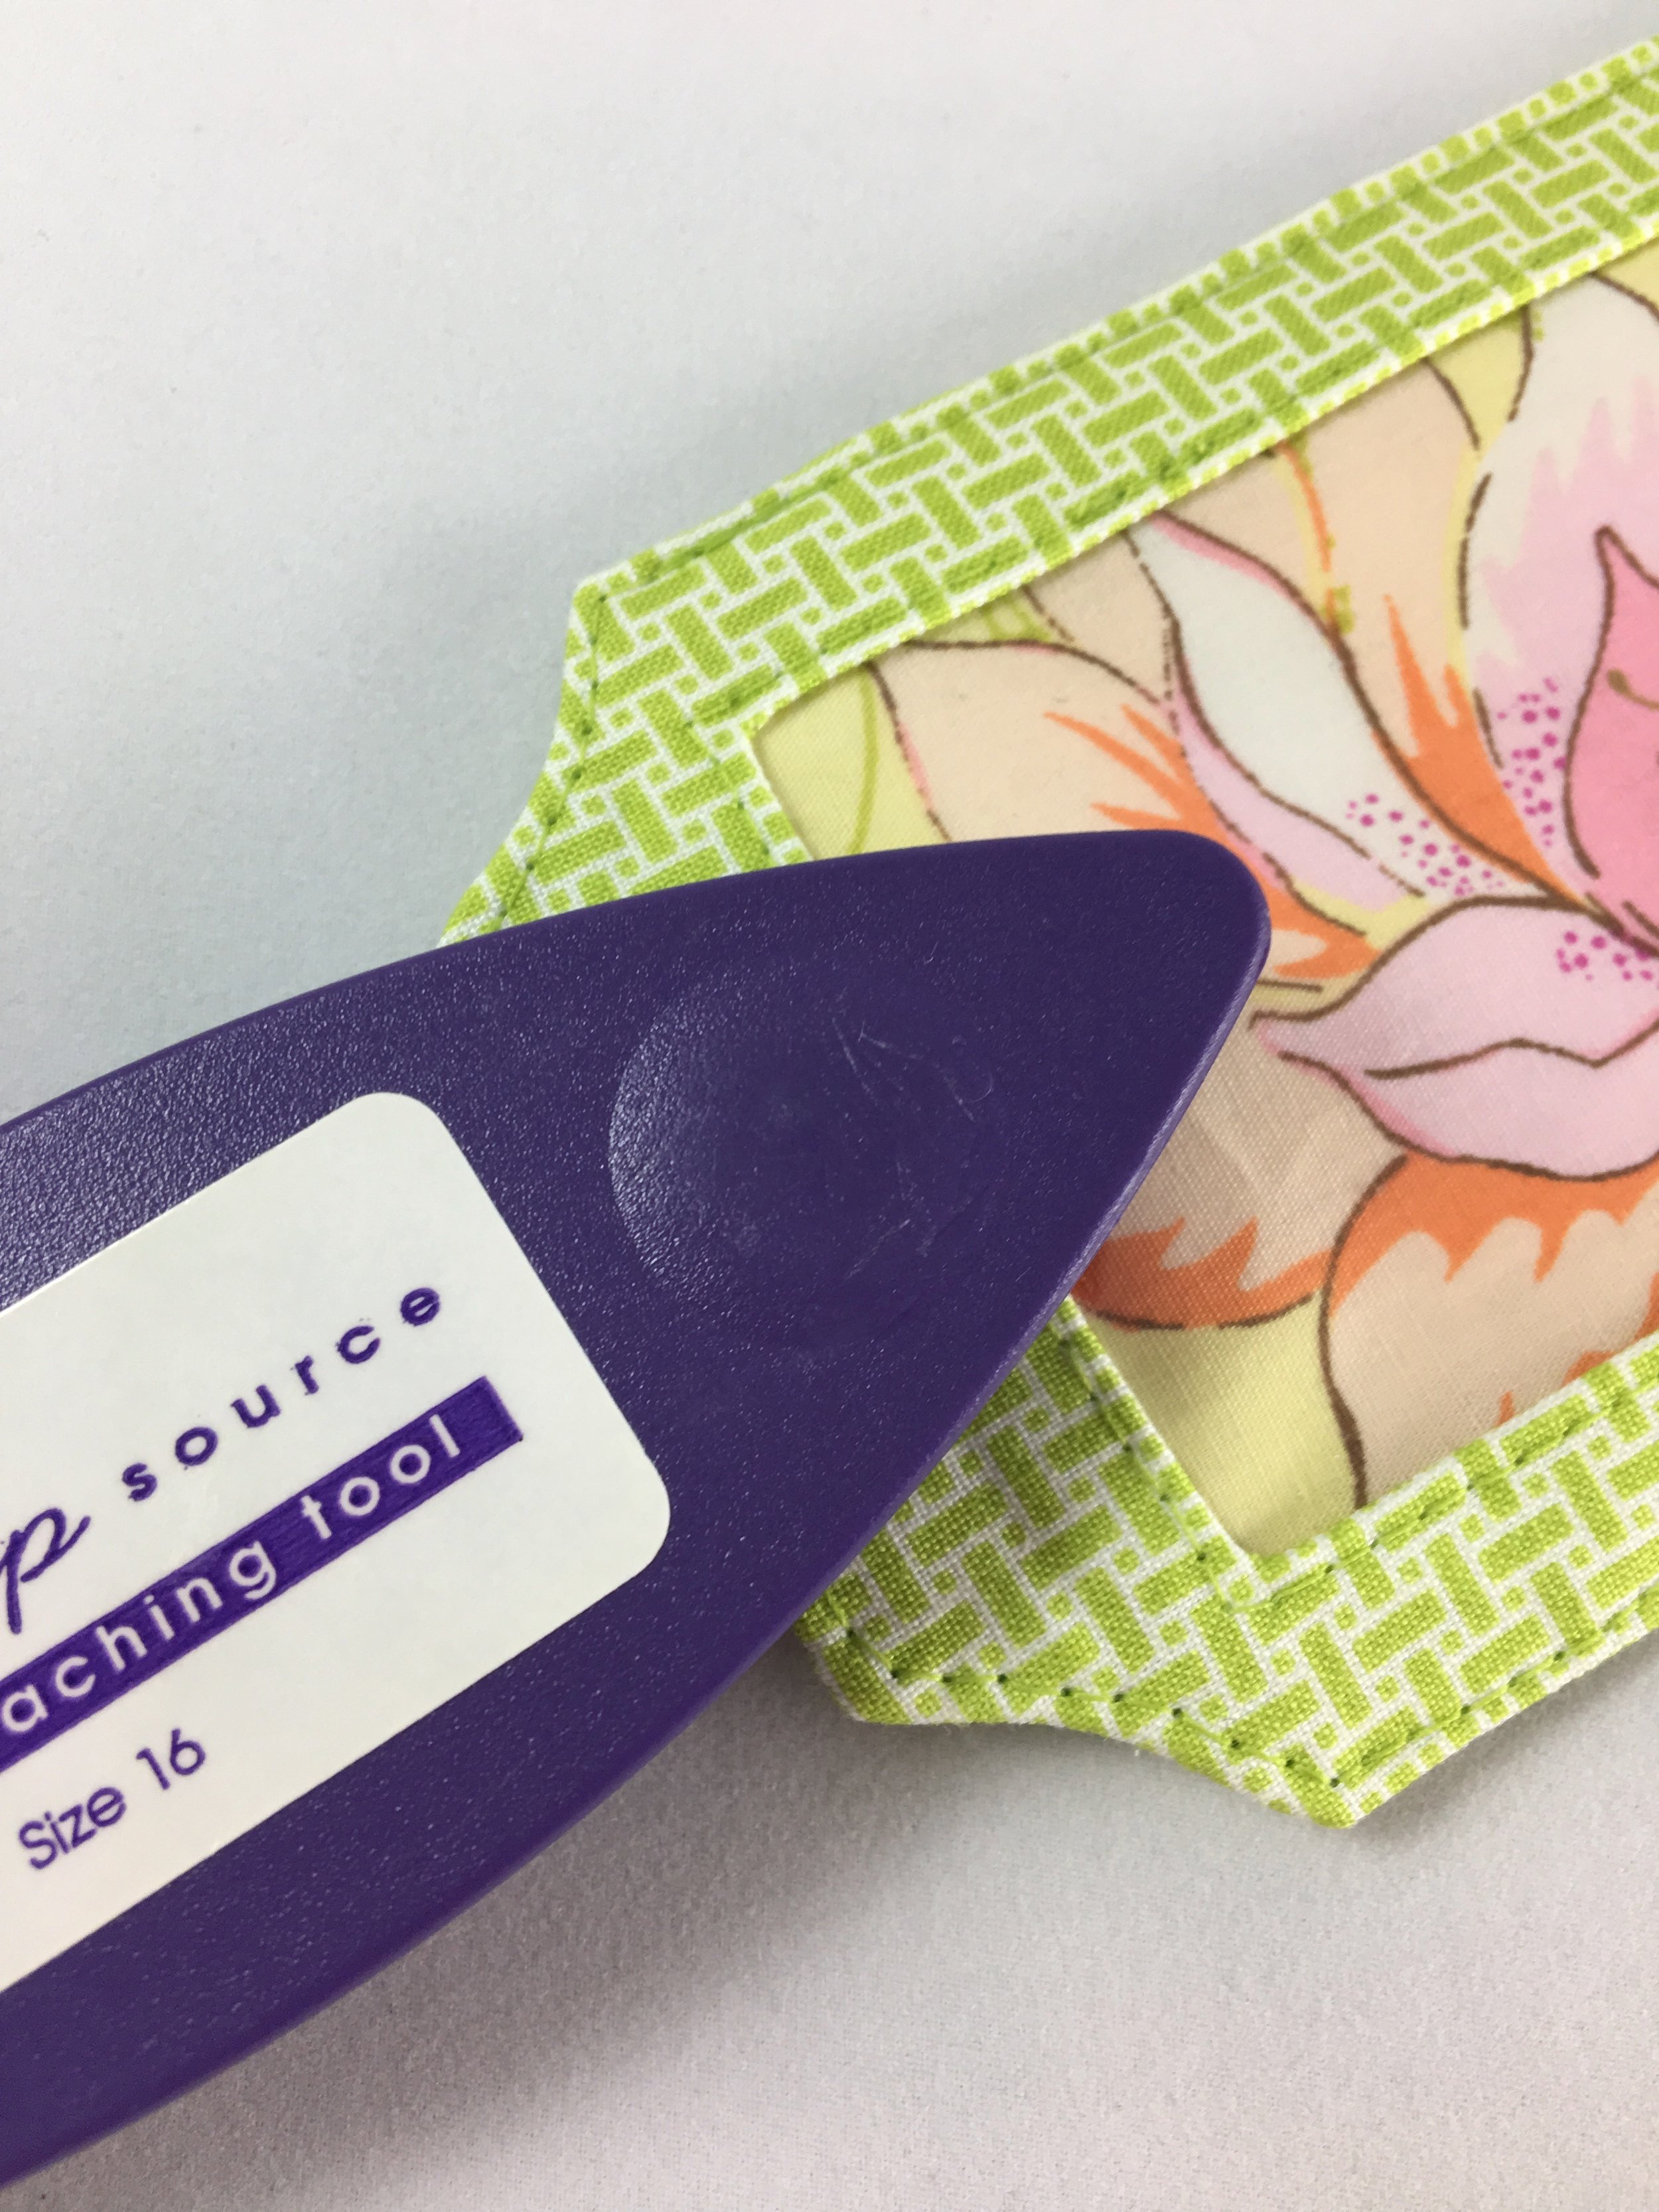
Now push the prongs through all the layers of fabric and interfacing. I like to use a clean pencil eraser to help me with this. Place the base of your SnapSetter on a solid surface, place your creation cap side down and with the cap fitted in the indention of the SnapSetter base.

Next, add the middle part of the SnapSetter, this will help align everything perfectly.
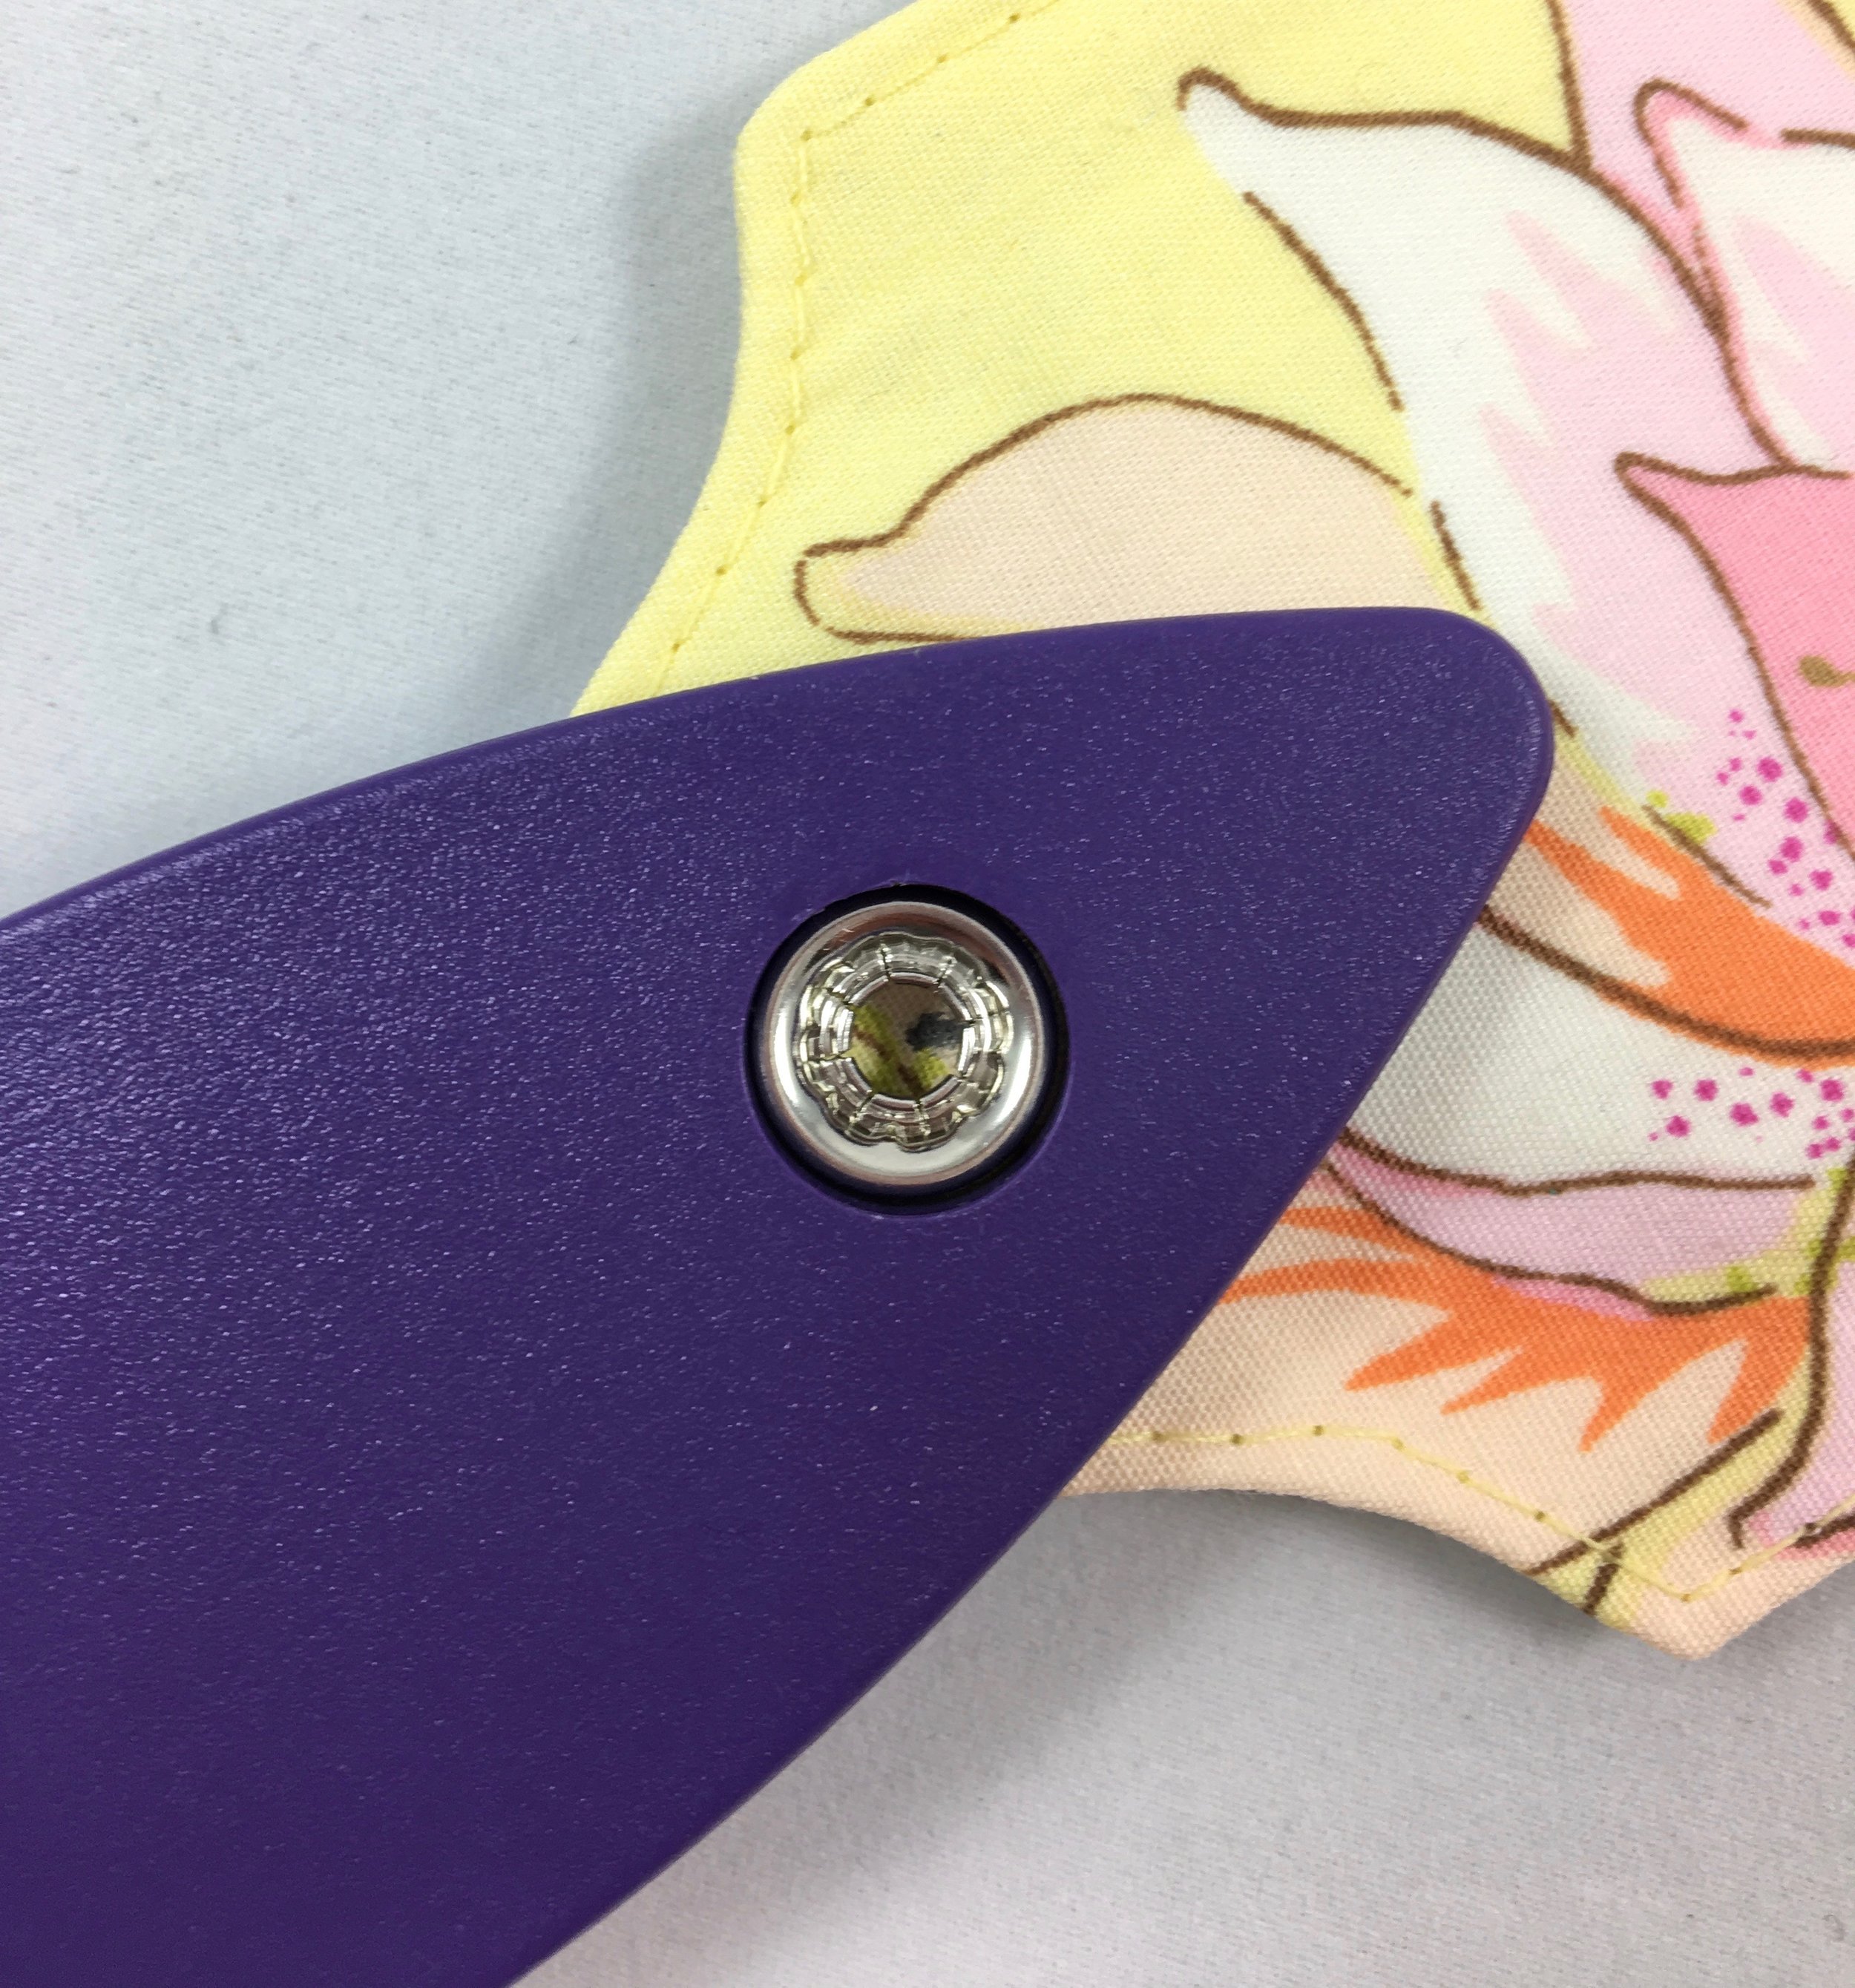
Now place the socket in the hole of the middle part of the SnapSetter with the side that is more raised facing down toward the prongs. This is important so that the prongs can attach correctly. To check that you have placed your socket correctly, you should have the side that has a flower-shape look to it facing up. Place the top part of the SnapSetter over all of this and give it a few good hits with the hammer on the raised part of the SnapSetter Tool. I always think that I probably only need one good whack with the hammer, but usually give it three or four solid hits just to be sure.

Now for the easy half of the snap. Follow the instructions for the item you are making to measure the location for other half of your snap and mark the spot where the back ring will be placed using a marking pen or pencil. I like to check the placement mark for the second part of my snap to make sure it will line up with the first part of the snap I just installed. Place the back ring centered, over the mark that is on the opposite side of the fabric from where the stud will be placed.

Push the prongs through all layers of fabric and interfacing as you did with the prongs on the cap. Again, make sure the base of your SnapSetter is on a solid surface, place your creation back ring side down and with the back ring fitted in the indention of the SnapSetter base.
Add the middle part of the SnapSetter. Now place the stud in the hole of the middle part of the SnapSetter with the raised side facing up toward you. Place the top part of the SnapSetter over all of this and give it a few good whacks with the hammer on the raised part of the SnapSetter Tool.

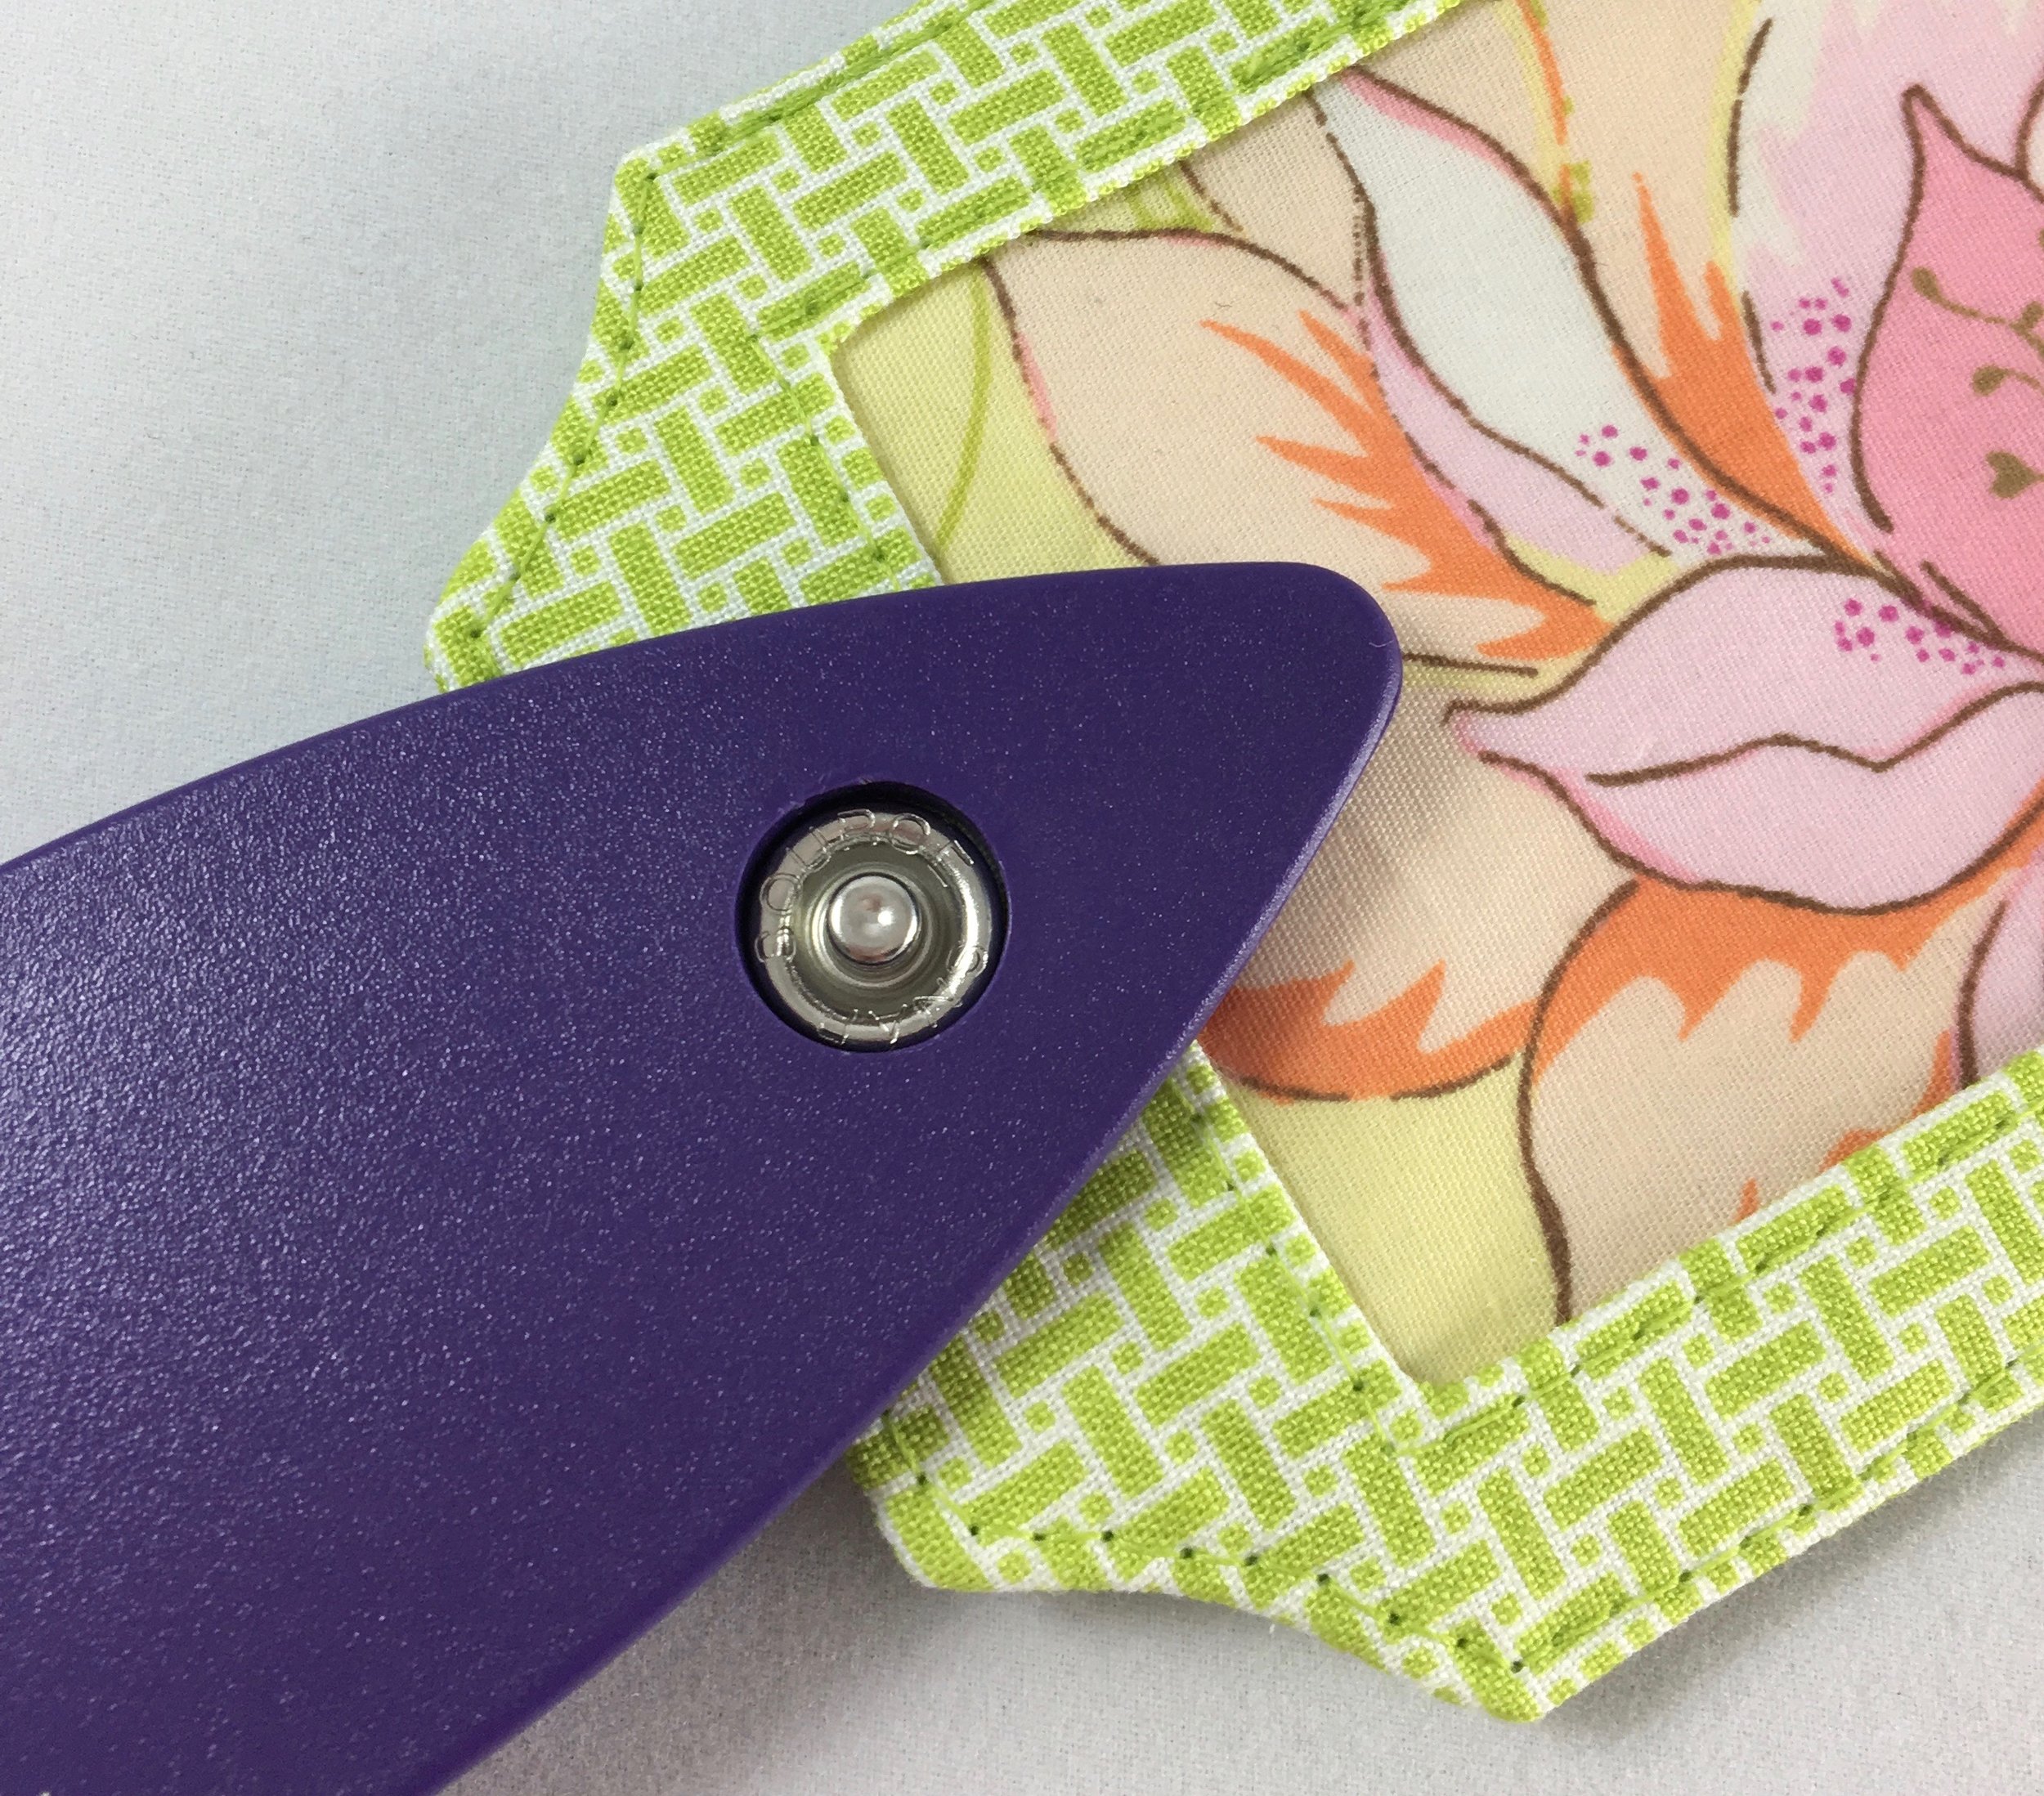
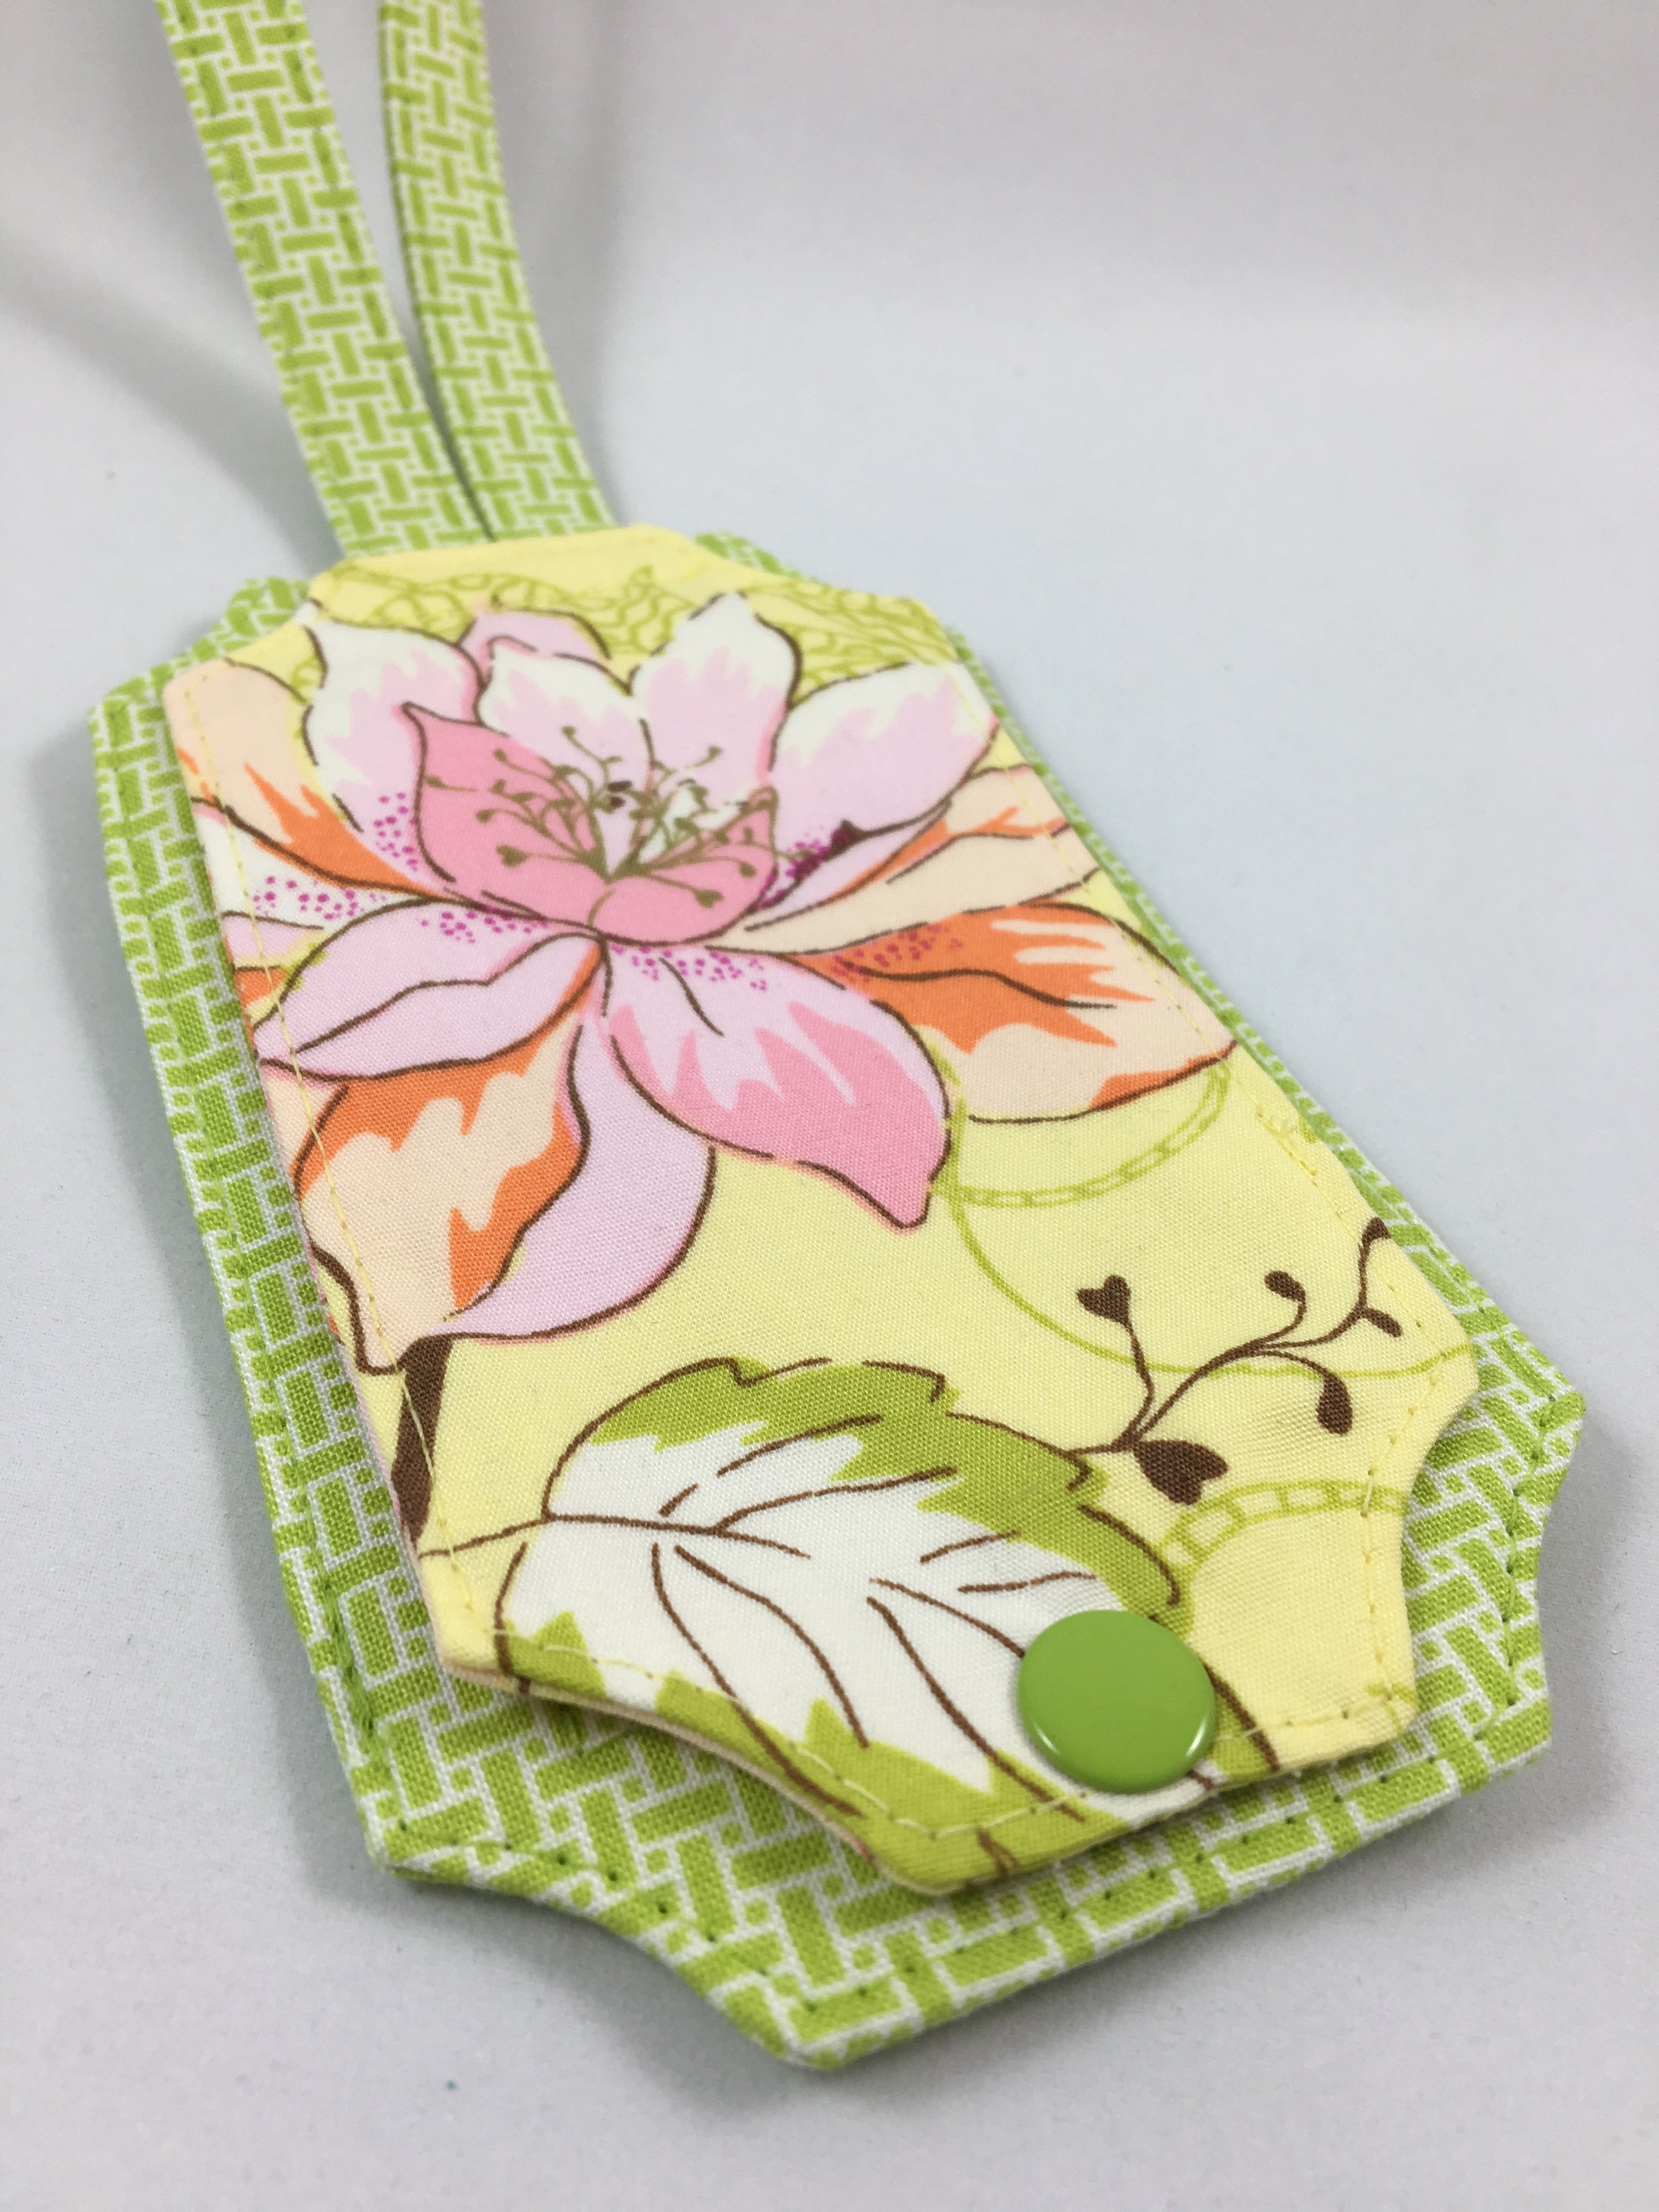
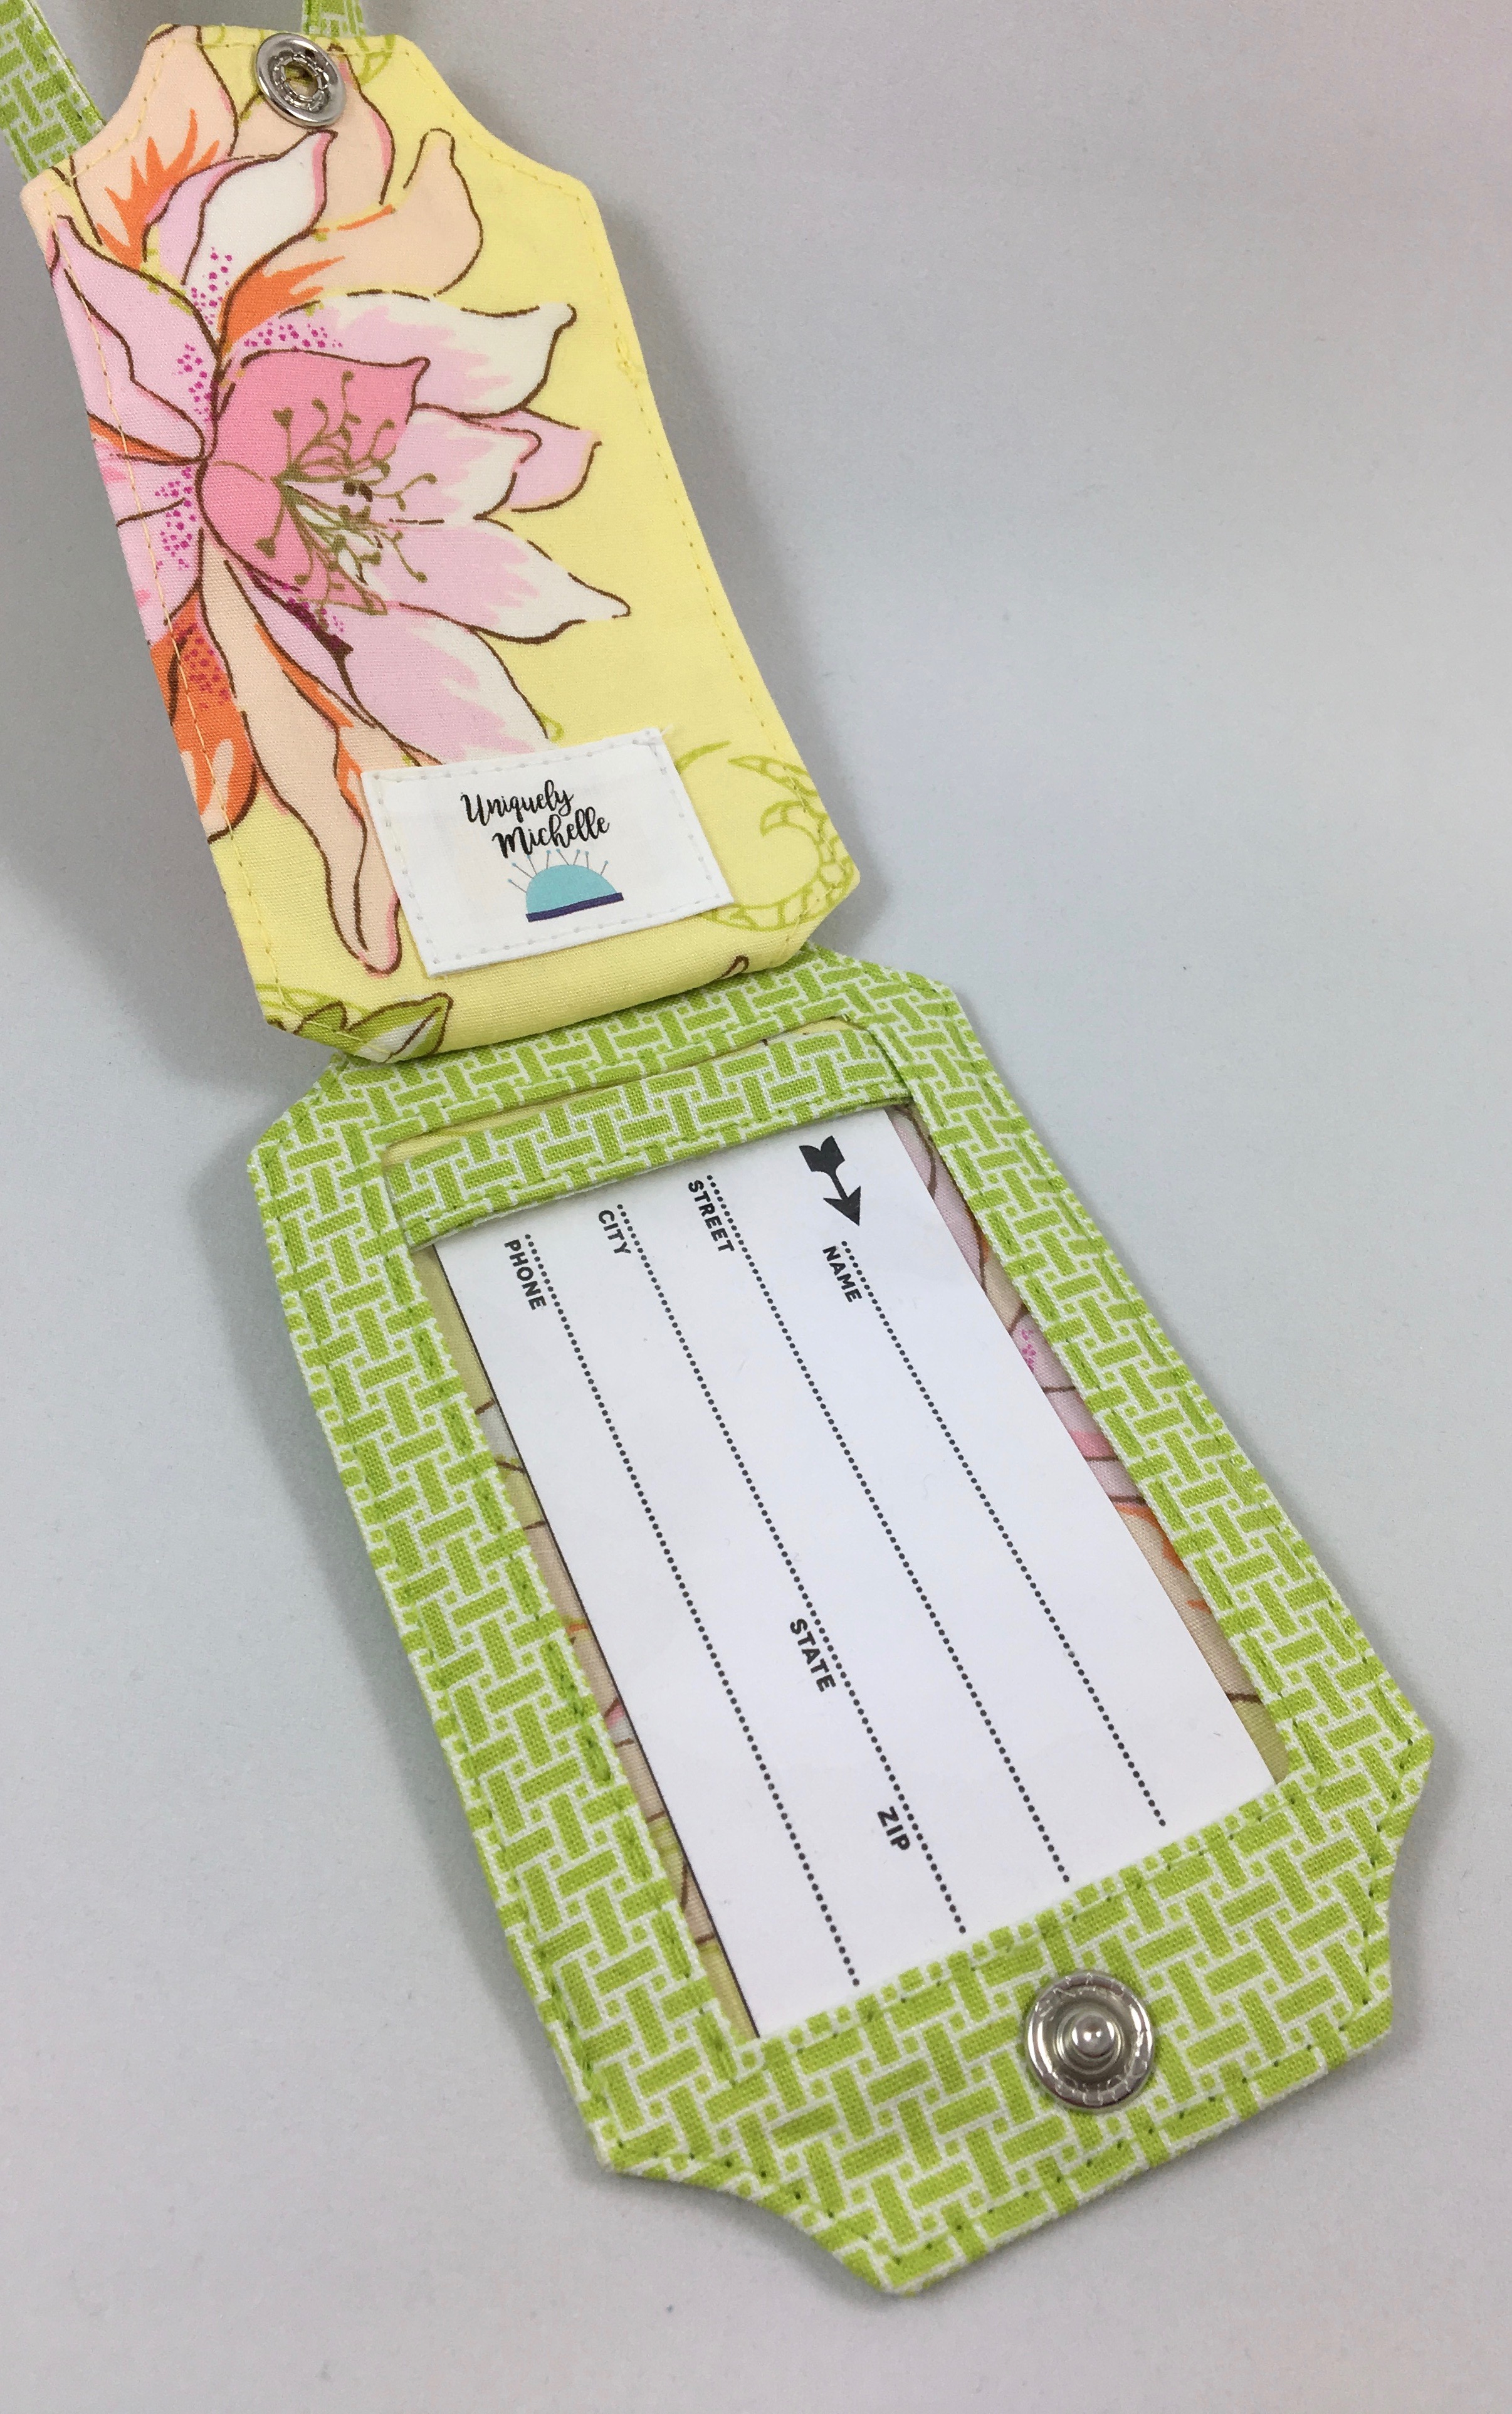
This Just The Ticket Luggage Tag has its snap installed and is ready to be finished up!
I always do a quick test of the snap once it is completely installed by snapping and unsnapping it a few times. I have never had a SnapSource snap that I have installed with a SnapSource SnapSetter not turn out well. The only caution I would give you is that if your fabric and interfacing are so thick that the prongs will not go through all the layers, you will not be able to install the snap securely. I have cut out some of the interfacing before in the place where the snap will be installed to reduce the layers so that the snap will install securely. If you do have a problem with the prongs not lining up well, you can carefully use a small flathead screwdriver to pry the snap parts apart. Then you can reinstall that half of the snap.

As with most things like this, it is a good idea to practice installing a few snaps on a scrap piece. I would recommend using a couple pieces of fabric with some interfacing between them. With the SnapSetter and snaps from SnapSource, it really is easy to install pretty, metal snaps! I love the professional look that adding a metal snap gives to a bag or other creation. And with so many color options, it is easy to find a color that will match your project beautifully.
I hope your excitement is building as you now know how easy it can be to install metal snaps! Tomorrow we will talk about how to install plastic KAM snaps! Once you know how easy it is to install both SnapSource metal snaps and plastic KAM snaps, you will just have to decide which one you will use on the free pattern that I will be sharing with you on Friday! Make sure you don’t miss out on what is happening at Uniquely Michelle and sign up for the Uniquely Michelle newsletter below!